ADJUSTMENT
1 - 40
1.5.2
Adjusting the printer section
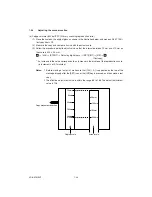
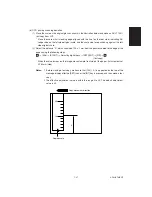
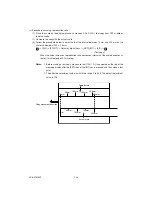
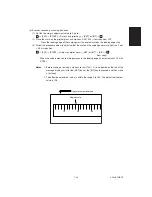
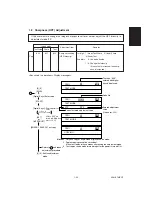
(a) Polygonal motor 600 dpi (Primary scanning reproduction ratio of the printer unit)
Follow the procedure below to make a test print (Paper source: LCF, Paper size: A4/LT).
(1) [0] [5] + [PWR] ON
→
[1]
→
[E/S]
→
1
(Digital keys)
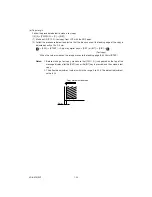
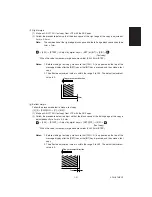
(2) Measure the distance “A” the distance between the 1st line and 21st line.
(3) In order to set the distance “A” to 200 mm ± 0.5 mm, adjust using the following steps:
1
→
[401]
→
[START]
→
Set the value
→
[INT] key or LCD [SET] icon (Carry out the same in
the following.)
→
[1]
→
[E/S]
→
1
* An increase in the value makes the reproduction scale (distance “A”) longer (0.05mm/STEP).
Notes:
1. Before making a test print, make sure that [100% A] is appeared on the top of the
message display after the [SET] icon or the [INT] key is pressed, and then make a test
print.
2. The effective adjustment value is within the range 86 to 168. The default adjustment
value is 128.
Print movement
direction
A
1
2
3
4
5
6
7
8
9
10
11
12
13
14
15
16
17
18
19
20
21
Summary of Contents for AR-650
Page 103: ...MAINTENANCE 2 6 Rear drive system 38 36 37 3 54 54 54 54 54 54 96 12 81 63 63 46 ...
Page 104: ...2 7 MAINTENANCE ADF front sectional view 100 104 109 105 106 102 108 99 101 103 107 98 ...
Page 122: ...SUPPLIES 3 10 13 CONNECT 15 CLOSE 2 1 14 CLOSE 1 2 16 TURN ON 17 PRESS 18 END ...
Page 169: ...Click Finish button then Virtual Modem installation is completed 5 5 ...
Page 179: ...To make the connection ONLINE mode click button before firmware downloading 5 15 ...
Page 194: ......
Page 195: ...MEMO ...
Page 196: ...MEMO ...
Page 197: ...MEMO ...
Page 198: ...MEMO ...
Page 199: ...MEMO ...


