them are ticked) and are set according to floor number and room number of address 1 and
options selected in the drop-down list after it (i.e. "same", "ascending order" and "descending
order"; "same" by default); if ascending order is checked in the drop-down list, the floor number
of equipment at address 1 is 2, the floor number of equipment at address 2 is 3 and the floor
number of equipment at address 3 is 4, and so on, which is also suitable for the room number.
The issue of boundary value shall be noticed. If the floor number in ascending order reaches
200 and it is followed by equipment, then the floor number for subsequent equipment is 200. If
the floor number in descending order reaches -10, then the floor number for subsequent
equipment is -10. This is because the floor number is between -10 and 200. The boundary of
room number can be disposed with the same method; the room number lies between 1 and 254.
Confirm each parameter is correctly configured and then click on "Setup" button to update the
list configuration information of detector/module setup. Click on "OK" button to save batch
setting data, otherwise click on "Cancel" button.
b. Column batch setup
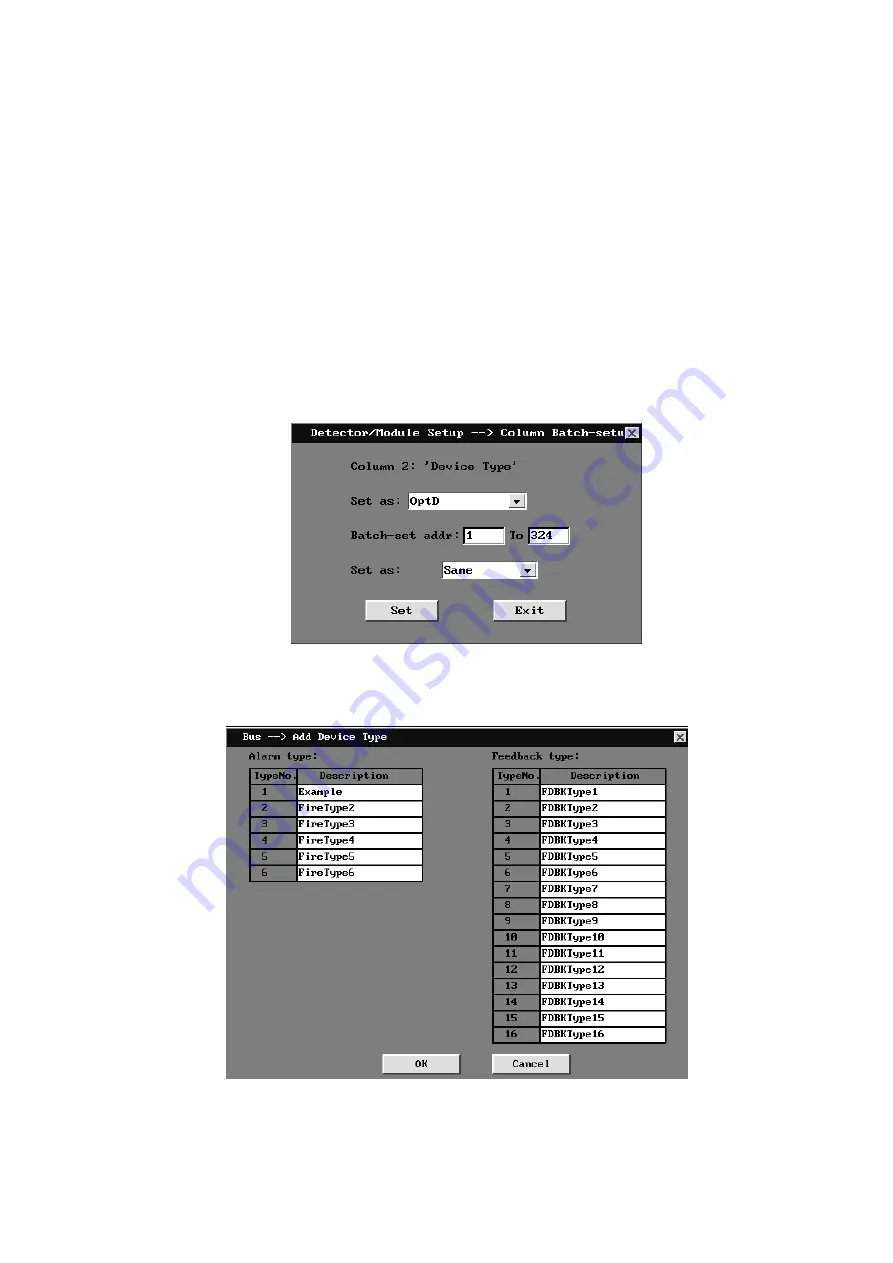
Column batch setup is supplementary to batch setting row, which refers to the batch setting
of a single column; double-click column header requiring batch setting to generate window
interface of batch setting column, as shown below:
Fig 4- 30 Column Batch setup
4.2.3 Add device type
Check Annex 1 for Device types provided by this system. If any type not involved which is
required by the customer, this function is available to add up new customized type.
Fig 4- 31 Device type setup window
6 expandable types for alarm and 16 for feedback signal are available in this system and
the default name is “Fire type **” and “Feedback type **”. Adding method: input type name at the
“Description” filed and press “OK” to confirm and save the setup.


