Troubleshooting
82
7
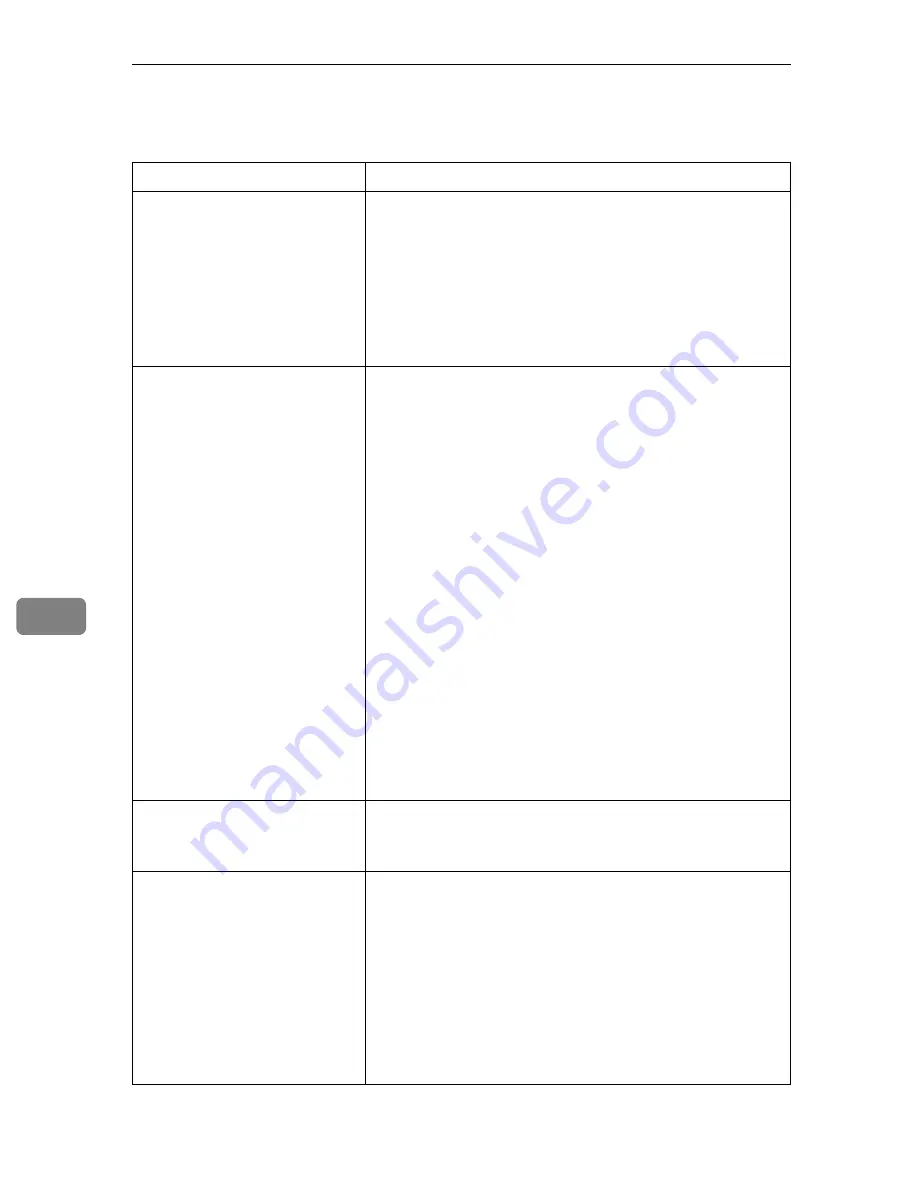
Other Printing Problems
Status
Possible Causes, Descriptions, and Solutions
Toner smears appear on the
print side of the page.
The paper setting may not be correct. For example, although
you are using thick paper, the setting for thick paper may not
be set.
• Check the printer driver's paper settings.
See the printer driver Help.
Confirm that the paper is not curled or bent. Envelopes can
be curled easily. Flatten paper before loading.
See p.23 “Paper and Other Media”.
Paper jams occur frequently.
• Number of paper set in the tray exceeds the limit. Con-
firm that the top of the stack is not higher than the limit
mark inside the tray.
See p.34 “Loading Paper”.
• There may be a gap between the front end paper guide
and the paper, or between the paper guide both side and
the paper in the paper tray. Make sure there are no gaps.
See p.34 “Loading Paper”.
• Paper is either too thick or too thin.
See p.23 “Paper and Other Media”.
• Paper is bent or wrinkled. Use paper that has no bents or
wrinkles.
See p.23 “Paper and Other Media”.
• Paper has already been printed on.
See p.23 “Paper and Other Media”.
• Paper is damp. Use paper that has been stored properly.
See p.23 “Paper and Other Media”.
• The friction pad, or paper feed roller or registration roller
might be dirty. Clean the relevant component.
See p.66 “Cleaning the Friction Pad and the Paper Feed
Roller”, and p.69 “Cleaning the Registration Roller”.
Prints fall behind the machine
when they are output.
Raise the appropriate stop fence (forward fence for A4, rear
fence for legal size prints).
See p.1 “Exterior: Front View”.
Prints do not stack properly.
• Paper is damp. Use paper that has been stored properly.
See p.23 “Paper and Other Media”.
• Pull out the extender.
• Log on to Smart Organizing Monitor as an Administra-
tor, and then select
[
Mode 2
]
or
[
Mode 3
]
in the
[
Anti-humid-
ity:
]
list on the
[
System
]
tab. Note that the first print takes
longer than subsequent prints to complete.
• Raise the appropriate stop fence (forward fence for A4,
rear fence for legal size prints).
See p.1 “Exterior: Front View”.
Summary of Contents for SP C222DN
Page 15: ...11 MEMO...
Page 26: ...10 A B C D E F G ASH204S ASH006S ASH007S ASH008S ASH009S ASH010S ASH205S...
Page 27: ...Print Cartridge SP C220 Series 11 MEMO...
Page 28: ...12 Copyright 2007 Printed in Japan GB GR FR IT SP DU PT SW DA NO FI PL CS HU RU M812 8600...
Page 34: ...6 I J K L ASH015S ASH020S ASH016S ASH017S...
Page 35: ...Waste Toner Bottle SP C220 7 MEMO...
Page 36: ...8 Copyright 2007 Printed in China GB GR FR IT SP DU PT SW DA NO FI PL CS HU RU CH TA M804 8601...
Page 45: ...viii...
Page 95: ...Paper and Other Media 50 4...
Page 107: ...Replacing Consumables 62 5...
Page 154: ...109 U USB port 21 W Waste toner bottle 56 103...
Page 155: ...110 GB GB EN USA G165 8606...
Page 157: ...Operating Instructions Hardware Guide GB GB EN USA G165 8606...
Page 189: ...Preparing for Printing 24 1...
Page 207: ...Other Print Operations 42 3...
Page 213: ...Direct Printing from a Digital Camera PictBridge 48 4...
Page 237: ...Using a Print Server 72 6...
Page 265: ...100 GB GB G167 8612...
Page 266: ...Copyright 2006...
Page 267: ...Operating Instructions Software Guide GB GB G167 8612...


