©
Copyright Qvis Labs. All software and documentation rights reserved.
Manual updated February 2016
19
Video Playback Interface
Incident Records:
Records List Menu
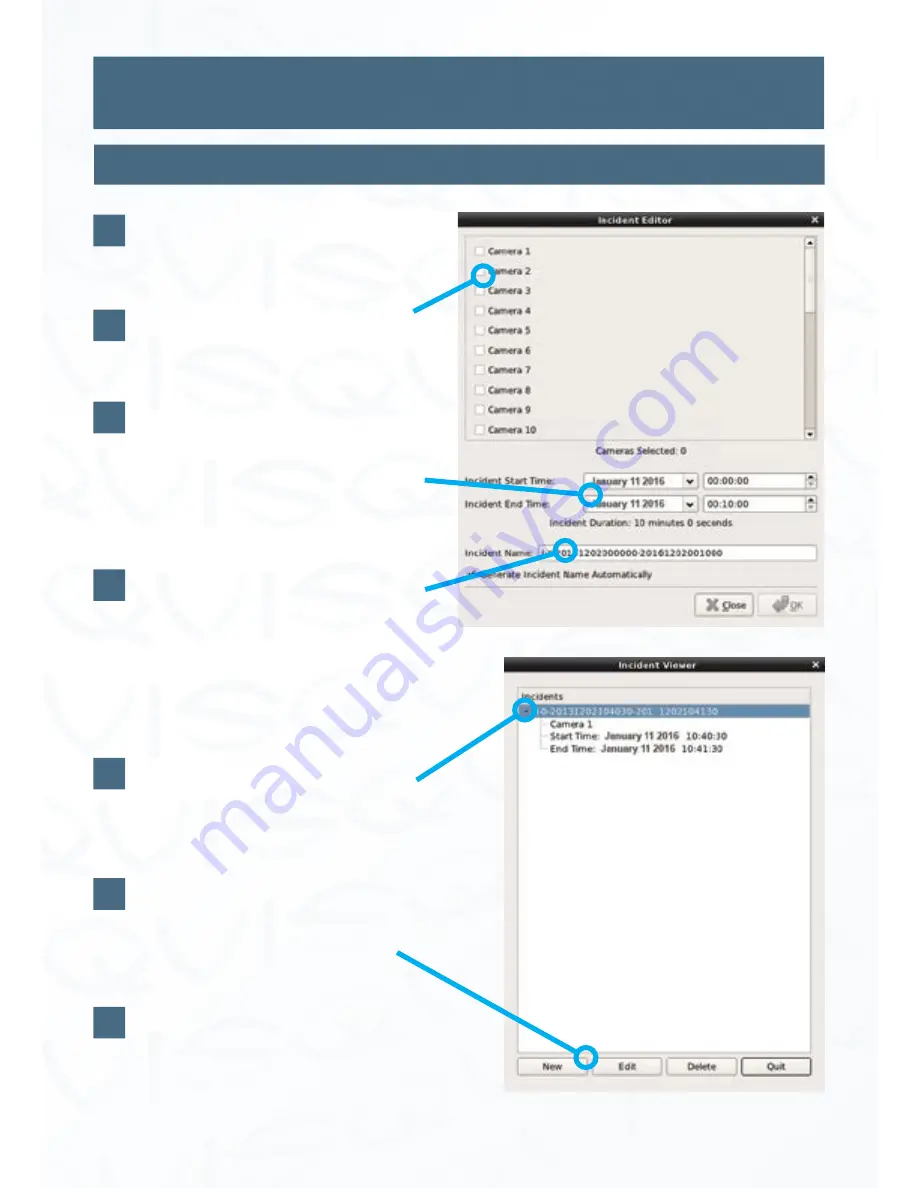
The window, shown on the right, will
appear after clicking on the ‘
New
’
button.
To index or edit an incident record,
select which camera the incident was
caught on.
Then input the precise date and time
of the incident into the ‘
Incident
Start Time
’ and ‘
Incident End Time
’
input tabs. You will need to refer to
the time line bar to find the precise
time and date of incident.
To give the indexed incident a name,
you can either allow the interface to
automatically create a unique one
or you can manually create a desired
name.
Once you have filled in all the fields
click the ‘OK’ button and you will
now be able to see the indexed
incident on the incident viewer.
You will also be able to amend any
details of each indexed incident by
selecting the particular incident
name and then clicking the ‘
Edit
’
button at the bottom of the window.
The NVR will save the incident details
to the system and then you can click
'Quit' if you have finished using the
incident viewer.
3
4
5
6
7
8
5
9


