background image

 **<


$

."=* =&"=0 <

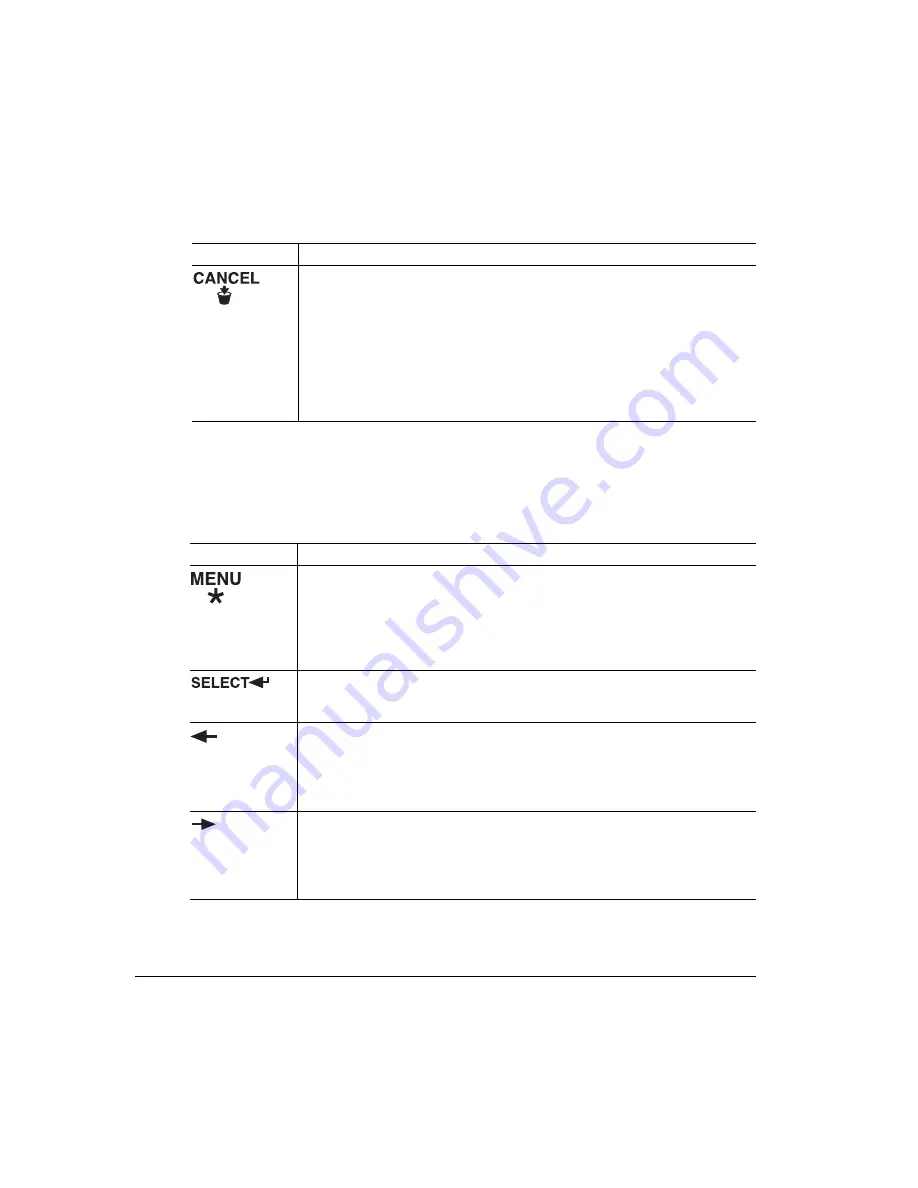
The Menu, Select, Previous, and Next keys are used in printer configuration 
(explained in detail in chapter 2, “Printer Configuration,”  of the 

Reference

 manual). 

Before using any of these keys, press the Online key to take the printer off line.

The Cancel key allows you to cancel one or all print jobs. (See chapter 3,  
“Advanced Printer Features,” i
n the this manual for complete information.) It 
also allows the user to end a job.

If the printer is on line, press the Cancel key to cancel the page currently 
printing. To cancel the entire print job, use the printer driver.

If you press the Cancel key by mistake, or if you decide not to cancel a print 
job after pressing this key, press the Menu key to “cancel” the Cancel key’s 
function.

Key

Function

The Menu key provides access to the configuration menu. First press the 
Online key to take the printer off line, and then press the Menu key to access 
the configuration menu. When you’re changing the printer configuration, 
press this key to cancel a change (before pressing the Select keys), to return 
to a previous menu, or to return to a previous character when entering 
character information.

Press Select to access a menu or to choose a displayed menu option.

Press the Previous key to return to the previous selection or option for the 
current menu. When changing character information, use this key to return to 
the previous choice for the current input character.

Press the Next key to advance to the next selection or option in the current 
menu. When changing character information, use this key to advance to the 
next choice for the current input character.

Key

Function

Summary of Contents for Magicolor 6100

Page 1: ......

Page 2: ...lk EtherTalk LaserWriter LocalTalk Macintosh TrueType Apple Computer Inc VINES Banyan Centronics Centronics Color Solutions ColorBlind Color Solutions DEC DECnet LN03 LN03 Plus VMS Digital Equipment C...

Page 3: ...graphic Conventions 1 6 Getting Acquainted with Your Printer 1 7 Printer Components 1 7 The Control Panel 1 9 Message Window 1 9 Setting the Message Window Language 1 10 Control Panel Indicators 1 10...

Page 4: ...fe 2 14 Refilled Toner Cartridges 2 15 Ordering Toner Cartridges 2 15 Toner Cartridge Storage 2 15 Replacing a Toner Cartridge 2 16 Replacing the OPC Belt Cartridge 2 18 Replacing the Fuser Oil Bottle...

Page 5: ...assette Chaining 3 7 Enabling Disabling Cassette Chaining 3 7 Collating Output 3 8 Enabling Disabling Collation 3 8 Working with Chunk Collation 3 9 Improving Collation Performance 3 9 Duplex 2 Sided...

Page 6: ...logy 4 2 QMS QCOLOR Automatic Color Correction 4 3 Color Matching with QMS Advanced Level 2 4 5 Host Based Color Matching 4 6 PANTONE Color Matching Tables 4 8 Color Calibration 4 8 Colorific 4 9 QMS...

Page 7: ...5 15 Service Messages 5 26 HP GL Error Codes and PCL Error Codes 5 28 Testing PC Printer Communication 5 29 Creating the Test File 5 29 Sending the Test File 5 29 Testing Macintosh Printer Communicati...

Page 8: ...red Bands Horizontal Banding 5 50 Insufficient Gloss or Fusing 5 51 Irregular Print Mottled Image 5 51 Missing Image at Edge 5 52 Mixed Color Image Color Variation Color Misregistration 5 52 Spotting...

Page 9: ...Remove the Lower Feeder Unit 6 11 Repack the Printer 6 13 Sources of Support A 2 Your Vendor A 2 Your Application Vendor A 2 Internet A 2 Support A 3 QMS World wide Offices A 4 QMS United States and...

Page 10: ......

Page 11: ...1 1 1 Getting Acquainted with Your Printer on page 1 7 The Control Panel on page 1 9 Message Window on page 1 9 Control Panel Indicators on page 1 10 Control Panel Keys on page 1 11...

Page 12: ...dling cleaning and maintaining your printer improving print quality and troubleshooting printer problems Connecting Your QMS Print System This manual guides you through connecting your printer to a co...

Page 13: ...ptions Commands This manual lists and explains all QMS Document Option Commands DOCs software codes you insert in documents to enable printer features that can t be accessed by your application or pag...

Page 14: ...n in your man uals They ll never become dog eared and yellowed or collect dust on some forgotten shelf with quick online access Your PDF formatted manuals will empower you to take full advantage of al...

Page 15: ...ay a QuickTime video clip of the procedure described in the text Use the Acrobat Reader Online Help for a more complete explanation of these features 5 Don t forget that your application documentation...

Page 16: ...riebene Vorgehensweise da sonst Verletzungsgefahr bestehen k nnte Mixed Case Courier Text you type and messages and information displayed on the screen Mixed Case Italic Courier Variable text you type...

Page 17: ...n on the following pages Note If you re using the Acrobat PDF version of this manual the parts of the printer identified on the next 2 pages are hotlinked by clicking on that portion of the illustrati...

Page 18: ...6 7 8...

Page 19: ...current status of the printer including any condi tion that needs your attention 8 The control panel message window provides status and configuration information Status messages are listed in chapter...

Page 20: ...save the change and exit from the configuration menu or you can wait for the change to take effect the next time you manually turn on the printer Indicator Off On The printer is not ready to print Not...

Page 21: ...the printer off line pressing the Online key on the control panel will not take effect until the remote console puts the printer back on line Note You must take the printer off line before using all...

Page 22: ...cel key s function Key Function The Menu key provides access to the configuration menu First press the Online key to take the printer off line and then press the Menu key to access the configuration m...

Page 23: ...0 Now that you ve become acquainted with your printer refer to chapter 2 Everyday Operations and Printer Care for general use and care instructions...

Page 24: ......

Page 25: ...per on page 2 6 Using Toner Cartridges on page 2 14 Replacing the OPC Belt Cartridge on page 2 18 Replacing the Fuser Oil Bottle on page 2 22 Replacing the Cleaning Roller on page 2 23 Replacing the W...

Page 26: ...Handling the Printer on page 2 26 Handling the Printer on page 2 26 Cleaning the Printer on page 2 27 Maintenance Schedule on page 2 36...

Page 27: ...onal Letter A4 Capacity 250 sheets of 20 lb bond 75 g m paper capacity for other weights varies accordingly Type Any standard or recycled office paper suitable for plain paper laser printers such as H...

Page 28: ...tic buildup 3 Take off the top and bottom sheets Residual glue buildup on these sheets may cause media jams 1 Remove the media cassette from the printer 2 Adjust the media guides to fit the size paper...

Page 29: ...er driver Paper tab Paper Type option select Automatic 2 Remove the media cassette from the printer and remove any media in the cassette Formatting Format letterhead or memo data within your applicati...

Page 30: ...printing side up with the top of the media the letterhead or memo information toward the back of the cassette If you want to print duplex both sides per sheet from the Letter A4 cassette load the medi...

Page 31: ...ation Print on the front side only Some parts of the envelope consist of three layers of paper the front back and flap Anything printed in these layered regions may be lost or faded See your applicati...

Page 32: ...ugh to keep the envelopes straight but not so tight that they buckle the envelopes 9 Place the envelope stack into the cassette with the printing side up Note Check your application documentation to d...

Page 33: ...application Try printing your data on a plain sheet of paper first to check placement Input Cassette Standard upper media cassette only Capacity Up to 50 sheets depending on the thickness of the media...

Page 34: ...r A4 A label consists of a face sheet the printing surface adhesive and a carrier sheet The face sheet must follow to the plain paper specification listed on Paper Specifications on page 2 3 The face...

Page 35: ...k within your application Try printing your data on a plain sheet of paper first to check placement Input Cassette Standard upper media cassette only Capacity Up to 50 sheets depending on the thicknes...

Page 36: ...edia key to select printing on thick stock 3 Remove the upper media cassette from the printer and remove any media in the cassette 4 Load the new media 5 Reinsert the upper media cassette in the print...

Page 37: ...any transparencies also known as OHP film that meet normal photocopier standards and that can withstand the fusing temperature 392 F 200 C We recommend Xerox 3R5765 3M CG3710 Weight 24 41 75 lb 90 157...

Page 38: ...de of carbon particles to the photosensitive belt which functions like photographic film 5 A toner cartridge contains enough toner to print the following number of letter A4 size pages Note Starter to...

Page 39: ...ter caused by refilled toner cartridge use will not be covered by warranty Choosing the right consumables for your magicolor 6100 printer will not only increase its reliability and performance but als...

Page 40: ...Press the front cover latch on the upper right side of the printer 2 Remove and discard the empty toner car tridge Caution Dispose the used toner cartridge according to your local regulations Do not d...

Page 41: ...toner cartridge in the slot with a label of the same color If a toner cartridge doesn t slide in easily don t force it 7 Align the toner cartridge with the cartridge guides and gently push the cartrid...

Page 42: ...rk place to recover Depending on the amount of exposure recovery may take up to two hours Recovery time is dependent on the amount of exposure sustained and recovery is not guaranteed Also handle the...

Page 43: ...rs one on each side of the OPC belt cartridge opening to prepare the opening for the cartridge 3 Remove the protective sheet from the cartridge and then pull out the two orange ten sion release pins o...

Page 44: ...green surface of the car tridge faces you Caution When lowering the cartridge into the guide slots the metal contact on the lower left side of the cartridge should be aligned outside of the left guide...

Page 45: ...n sumables Item Replaced OPC Cartridge menu choose Yes to reset the consum ables usage monitoring sys tem Note You must manually reset the consumables usage monitoring system to ensure accurate consum...

Page 46: ...ter 3 Open the two bottle lock levers 4 Remove the empty oil bottle 5 Install the new oil bottle 6 Close the two bottle lock levers 7 Close the top cover and turn on the printer 8 In the Operator Cont...

Page 47: ...s Print Statistics menu or the CrownView printer web page WARNING The fuser unit can become extremely hot and cause severe burns Make sure the unit is cool before handling it ACHTUNG Die Fixiereinheit...

Page 48: ...mables Item Replaced Cleaning Roller menu choose Yes to reset the con sumables usage monitoring system Note You must manually reset the consumables usage monitoring system to ensure accurate consumabl...

Page 49: ...l Consumables Item Replaced Waste Toner Pack menu choose Yes to reset the consumables monitoring system Note When you replace the waste toner pack after a CHECK WASTE TONER message displays in the mes...

Page 50: ...installed always open the duplexer s rear cover before opening the printer s top cover Avoid spraying cleaning solution directly on the printer s surface the spray could penetrate through the air vent...

Page 51: ...ter when moving it When moving the printer keep the printer level to avoid spillage of fuser oil See chapter 6 Repacking the Printer for printer shipping instructions Keep the following in mind when s...

Page 52: ...caution and warning labels carefully making sure to follow any instruc tions contained in them These labels are located on the inside of the printer s covers and the interior of the printer body Use...

Page 53: ...9 2 Open the printer s rear cover If your printer has a duplexer installed you can access the printer s rear cover by opening the duplexer s rear cover and paper guide 3 4 3 4...

Page 54: ...nsfer roller unit by lifting the lock lever at the right end of the transfer roller unit until the unit is freed and then lifting the unit out Note Because you cannot see when the unit is released it...

Page 55: ...ng a dry cotton swab clean any paper dust and toner buildup from the interior of the paper discharger d Using a dry cotton swab clean the paper discharger wire e Reinstall the paper discharger in the...

Page 56: ...l you are ready to install it Any exposure to light should be limited to two minutes If you suspect the belt is damaged due to exposure to light put the belt in a dark place to recover Depending on th...

Page 57: ...tion marked by an arrow on the corona case may degrade print quality 5 Reinstall the OPC belt cartridge and secure its lock levers 6 Close the printer s front and top covers It s necessary to clean th...

Page 58: ...cover toward the rear of the printer This will allow enough access room to clean the lens without the need of parts removal 4 Using a dry cotton cloth wipe the lens 5 Reinstall the laser lens cover Th...

Page 59: ...s besteht To protect your printer and maintain its appearance clean the exterior regularly Use the following guidelines Use only a dry or slightly damp lint free soft cloth moistened only with water o...

Page 60: ...he duplexer If you have the duplex model the duplex unit roller Every 30 000 single sided pages or 12 months whichever comes earlier User See information about cleaning the duplexer Laser lens Only wh...

Page 61: ...Cleaning the Transfer Unit Transfer roller Every 30 000 single sided pages or 12 months whichever comes earlier User See Cleaning the Transfer Unit This item needs preventive maintenance After By Pri...

Page 62: ...fter approximately 12 000 single sided pages however fuser oil bottle life is media dependent coarser paper requires more oil User See Replacing the Fuser Oil Bottle and Cleaning Roller OPC belt cartr...

Page 63: ...ages maximum at an equal mix of black and 4 color pages all with 5 coverage of each color however fuser unit life is media dependent Service or a QMS authorized service provider Paper discharger 240 0...

Page 64: ...plane and a two color print job makes two passes two planes A single sided color page also called a face consists of four passes or planes of the OPC belt since most color print jobs use all four tone...

Page 65: ...rinting on page 3 5 Cassette Chaining on page 3 7 Collating Output on page 3 8 Duplex 2 Sided Printing on page 3 10 Printing on Standard and Custom Media Sizes on page 3 12 Working with Status Pages o...

Page 66: ...Proof Then Print on page 3 16 CrownView on page 3 18 Setting up the Printer Web Page on page 3 19 Printer Home Page on page 3 23...

Page 67: ...the next lower resolution that can handle the job For example if you attempt to print a 4 color image at 1200x1200 dpi resolution on legal media but the printer has only 96 MB of RAM instead of the re...

Page 68: ...Basic Full Speed B5 ISO B5 JIS Executive 64 MB 64 MB 64 96 MB 64 MB 96 MB 160 288 MB Letter A4 64 MB 64 MB 64 96 MB 64 MB 96 MB 160 384 MB Legal 64 MB 64 MB 64 64 MB 64 MB 128 MB 192 192 MB B4 64 MB...

Page 69: ...n the printer see Minimum System Memory Requirements on page 3 4 for more information Notes Whenever possible set the print resolution through your application If the print resolution can t be set thr...

Page 70: ...the browser Users will be presented with a Browse button that when selected will enable a file chooser on the host Users then select the file that they want to send to the printer and the file is tra...

Page 71: ...cedure for using a dual cassette printer Select an alternate cassette for chaining in the QMS Advanced Level 2 Windows printer driver On a network use CrownAdmin to select the media cassettes and or t...

Page 72: ...separate and sort individual copies of a document Each copy of the docu ment exists as a whole unless chunk collation has occurred E2 There are several ways to enable disable collation Use your appli...

Page 73: ...aller more manageable sets is known as chunk collation For example in the following illustration copies a and b of each set must be manually combined to create one collated document The order of print...

Page 74: ...ional hard disk set the Administration Memory Enable Disk Swap menu to On This distributes any extra memory to all clients Collate through your application Note Collating through your application is m...

Page 75: ...xing is recommended In the printer driver Paper tab Duplex option select Short Edge flipped vertically as on a clipboard or Long Edge flipped horizontally as in a loose leaf notebook Note 12 x 18 304...

Page 76: ...2x10 1 182 0x257 0 U or A Com 10 4 1x9 5 105 0x241 3 U or A DL Envelope 4 3x8 7 110 0x220 0 U or A Executive 7 3x10 5 184 0x267 0 U or A Legal 8 5x14 0 215 9x355 6 U or L Letter 8 5x11 0 215 9x279 4 U...

Page 77: ...nt consumables tracking period Administration Consumables Start Period menu Printer settings printer setup options for paper handling Current memory configuration printer memory settings Timeouts prin...

Page 78: ...with a printing interpreting terminating or spooled status It allows you to send an end of job indicator to a currently compiling print job wait ing on incoming data You don t have to press the Online...

Page 79: ...ation Communications Serial menu Refer to chapter 3 Technical Press this key to The message window reads Cancel Access the Job Cancel menu JOB CANCEL CANCEL JOB Cancel or Select Cancel the oldest job...

Page 80: ...ves you the ability to set up multi copy print jobs that will print one copy for proofing and hold the remaining print job order until you approve or cancel the job at the printer s control panel 4 5...

Page 81: ...PostScript printer driver window closes 5 Click OK The printer setup window will close 6 Select Print from your application s print dialog window The printer will produce one copy of the print job fo...

Page 82: ...accessed printer configurations and gives you instant access to printer status Anyone on your company intranet can access the QMS printer through their web browser software Note The sample windows and...

Page 83: ...from the IP host table on the computer system and is usu ally assigned by the system administrator for example magicolor 6100 Print System 4 8 5 8 Since your printer will reside on your intranet and...

Page 84: ...tion radio button and press the View button 5 In the No Proxy For text box type a comma after the last entry and then type the printer name or the IP address of your magicolor 6100 6 Choose OK 7 Enter...

Page 85: ...3 Select the Connection tab on the dialog box 4 Click the Settings button to display the Proxy Settings dialog box...

Page 86: ...text box type a comma after the last entry and then type the IP address 6 Click OK 7 Now you should be able to enter the IP address in the URL address box to access the printer home page xxx xxx xxx...

Page 87: ...web pages for your printer Note The illustration below shows the printer without the duplexer The printer home page provides the following information Product Name Identifies the particular printer t...

Page 88: ...ray the media size and the percent filled with media Configuration Menu Operator Control Inputbin Sheets Printed Lists the number of sheets of media printed to date during the current consumables trac...

Page 89: ...contains the following options For complete information on any options see chapter 2 Printer Configuration of the Reference manual Copies Allows you to enter the number of copies to print Configurati...

Page 90: ...to select Low Med or High link quality Configuration Menu Operator Control Color Matching Link Quality Sim in RGB Links Allows you to select No or Yes to Sim in RGB LInks Configuration Menu Operator...

Page 91: ...fer Sizes on page 3 29 Upper Bin Media Allows you to specify the type of media in the upper standard cassette so the printer can optimize output for that media type The choices are Automatic or Thick...

Page 92: ...Configuration Menu Administration Startup Options Do Start Page Do Error Handler Identifies whether the PostScript Error Handler is loaded into memory when the printer is turned on Error Handler is a...

Page 93: ...n Menu No equivalent Left Margin Identifies the amount in 01 increments the image is adjusted horizontally on the page Configuration Menu Administration Engine Image Alignment Horiz Offset Top Margin...

Page 94: ...ze of media currently installed in the upper tray The choices are Automatic or Thick Stock Configuration Menus Operator Control Custom Bin Upper Operator Control Media For Upper Bin Optional Identifie...

Page 95: ...KB of the Font Cache also known as K Mem for PS Fonts This memory client stores bitmapped representations of previously scaled PostScript fonts Configuration Menu Administration Memory Manual Config K...

Page 96: ...the size in KB of the Disk Cache This memory client stores frequently used data in system memory instead of continually storing and retrieving it from a hard disk Configuration Menu Administration Me...

Page 97: ...he printer processes a PostScript job before it ends the job Configuration Menu Administration Communications Timeouts Job Timeout Emulation Shows the maximum number of seconds emulations other than P...

Page 98: ...Printer Jobs hotlink on the home page jumps to the Printer Jobs page This page contains information about the current jobs the printer is processing and information on the previous five jobs printed 8...

Page 99: ...ng Printed Configuration Menu No equivalent Prio rity Shows the priority of each job Configuration Menu No equivalent Owner Shows the name of the owner of each current job Configuration Menu No equiva...

Page 100: ...ach consumable is based on printing under specific operating conditions such as media type number of color planes page size and page coverage usually 5 coverage of letter A4 size media The actual life...

Page 101: ...ck Toner or 30K PM Service Configuration Menus Operator Control Consumables and Administration Consumables Consumable Max Number Shows the maximum capacity of the consumable for example 14 000 planes...

Page 102: ...ent Output Style List box containing the accounting report format choices Users can select HTML or Comma Separated Values as the format choice Configuration Menu No equivalent Display Fields List box...

Page 103: ...B 9 After running the accounting report you ll be given the choice to display the report in the browser or to save the report to a file 0...

Page 104: ...g and Count Remaining of consumables Configuration Menu No equivalent Maintenance Shows Max Life Remaining and Count Remaining for maintenance Configuration Menu No equivalent Sheets Shows LIfetime Us...

Page 105: ...lanes Shows LIfetime User and service statistics measured in planes Configuration Menu No equivalent Coverage Shows LIfetime User and service statistics measured coverage Configuration Menu No equival...

Page 106: ...B The System Support hotlink on the home page jumps to the System Support page This page can be used to set up internal support for the printer as well as to link to the QMS web site 3...

Page 107: ...for entering a local or QMS printer help URL web address Configuration Menu No equivalent QMS Corporate URL The QMS corporate URL web address Configuration Menu No equivalent For Product or Dealer In...

Page 108: ...ters contact information the QMS Answer Base go to http www qms com support then click on Answer Base printer manu als and online performance support B The Online Help hotlink on the home page jumps t...

Page 109: ...hen click on Answer Base The QMS web site contains links to information documentation software drivers help and support tools The QMS Answer Base can quickly guide you to the topic that applies to you...

Page 110: ...This page provides a listing of all printer menus the options available and the current setting The format of the page and information provided is similar to that provided by the Advanced Status Page...

Page 111: ...nguage format such as PostScript PDF or PCL Enter the host path and file name of the file to be printed up to 32 characters and press the Send the File button If the path and file name information are...

Page 112: ...Chapter 4 Color Printing provides guidelines and background information you can use to optimize your printer s ability to produce accurate color reproductions...

Page 113: ...1 1 1 QMS QCOLOR Technology on page 4 2 Printer Drivers on page 4 10 Downloading Custom Profiles on page 4 22...

Page 114: ...on t want to hassle with cumber some color control devices just to get color output that matches what they see on their screen The magicolor 6100 Print System was designed with both sectors in mind of...

Page 115: ...he best output quality based on the contents of the document and the media on which it will be printed QCOLOR matching capabilities include automatic color correction CIE based Commission Internationa...

Page 116: ...alibrated RGB or CMYK color files Printer resident CMS Because QMS QCOLOR automatic color correction is built into the printer it works well in all computing environments and with most design publishi...

Page 117: ...printer a printing press or a predetermined printing standard Listed below are the simulation choices avail able through the operator control panel or the software driver SWOP Specifications for Web O...

Page 118: ...ry basic color matching and one to one conversion of CIE color to CMYK color For those colors that cannot be produced on the printer the closest color the printer can produce is substituted The Photog...

Page 119: ...dows ICM device profile Instructions for installation and use are included on the QMS Software Utilities CD ROM or on the supplemental color disk provided with the printer Here is a list of some appli...

Page 120: ...w process color specification the CMYK values may be entered directly The magicolor 6100 ships with software on the QMS Software Utilities CD ROM to print a complete set of PANTONE Charts with the app...

Page 121: ...to printer color matching Colorific software must be used to calibrate the monitor Once the monitor is calibrated the printer s built in ICC color matching when set to sRGB source data ensures that pr...

Page 122: ...ovides maximum color balance color gamut and minimizes color variations At 1200 dpi ABS provides approximately 256 shades per primary color for Contone quality images Selecting Agfa Screening in the A...

Page 123: ...rinter Color Matching Internal ICC Color Matching RGB CMYK SWOP Simulation CMYK Eurocolor Simulation CMYK Commercial Press Simulation Photographic RGB w CRD Business Graphics RGB w CRD Text and Spot C...

Page 124: ...olor Matching Configure Use custom halftone settings E 5 This listbox will allow you to add predefined color configurations for custom modifica tion After selecting one of the predefined color setting...

Page 125: ...etting for RGB Source is set to sRGB The printer resident simulations are Commercial Eurocolor or SWOP When Internal ICC Color Matching is selected the Simulation can be set from the above list to all...

Page 126: ...ault CRD for Images is Photographic and for Graphics and Text the default CRD is Business 2 You are able to select a CRD Color Space within the Color tab You will be able to select sRGB Trinitron G1 8...

Page 127: ...tting allows 8 bit black and white printing 2 From the tree structure you will be able to select a CRD You may choose from Pho tographic Business and Colorimetric This feature is on by default for the...

Page 128: ...l ICC Color Matching is selected the Simulation can be set from the above list to allow the magicolor 6100 to simulate another color output device s color space such as SWOP or Eurocolor Note The defa...

Page 129: ...elect this option to use the printer resident ICC color matching instead of CRD color matching Use the printer front panel to configure ICC color matching options Customize if you want to customize th...

Page 130: ...Since the magicolor 6100 offers multiple color matching options remember that only one color management system can drive the printer at a time Please read the fol lowing sections thoroughly to ensure...

Page 131: ...tion that was included with your Macintosh 6 In the Printer Profile pop up menu you will need to select magicolor 6100 from the list of printers If you do not see the magicolor 6100 listed then you do...

Page 132: ...rofile 4 You will need to change the Print Color pop up menu from ColorSync Color Matching to Color Grayscale If this selection is not made you will not acti vate the printer resident color matching 5...

Page 133: ...ce you are in the main print dialog box select Color Matching from the General pop up menu 3 You will be presented with three pop up menus once you are in the Color Matching section Listed below are t...

Page 134: ...can be accessed through a PPD or a QMS supplied driver on a per job basis From the keypad you can also set a custom profile as the default on the printer To view the current profiles on the magicolor...

Page 135: ...Destination as Other Select the Local Files button and specify the ICC profile to download Click Open Select Remote Path and go to USR Click Select 5 Verify the destination as SYS USR You might need t...

Page 136: ...ps file to ensure that the new custom profile is available for use or restart the magicolor 6100 The magicolor 6100 may be profiled using third party software such as ColorBlind MatchBox Refer to the...

Page 137: ...page 5 3 Understanding the Media Path on page 5 5 Understanding Media Jam Status Messages on page 5 7 Removing Media Jams on page 5 7 Installation Troubleshooting on page 5 14 Status and Service Messa...

Page 138: ...list on page 5 37 OPC Belt Cartridge Problems on page 5 39 Control Panel Problems on page 5 39 Windows Driver Problems on page 5 42 CrownNet Problems on page 5 42 Output Problems on page 5 45 Duplexer...

Page 139: ...through the Administration Engine Page Recovery menu After you remove any jammed media printing automatically resumes from the page the printer stopped at when the jam occurred Note For automatic jam...

Page 140: ...a in a dry location away from moisture and humidity Make sure you ve loaded the media printing side up Many manufacturers place an arrow on the end of the wrapper to indicate the printing side If you...

Page 141: ...n case of a media jam is through the printer s rear cover 2 0 Understanding the printer s media path will help you locate media jams The media cassette is located at the bottom front of the printer Th...

Page 142: ...ia jam is through the duplexer s and the printer s rear covers Note Since several sheets are cycling through the printer duplexer at the same time recovering from a media jam may require the removal o...

Page 143: ...xit area Access to this area is through the printer s and or duplexer s rear cover and or duplexer s lower rear assembly Outer jams occur in the fuser media exit area Jams of this type usually means t...

Page 144: ...rea until the fuser unit cools ACHTUNG Die Fixiereinheit wird sehr hei Bitte achten Sie darauf da sie diese einige Zeit abk hlen lassen bevor Sie einen Papierstau beseitigen Caution Media that hasn t...

Page 145: ...media by pulling it toward you 3 Close the printer s rear cover 4 If there still is a jam message open the printer s top cover Pull the top latch to release the top cover 5 Remove the jammed media by...

Page 146: ...pulling it from the bottom of the fuser through the printer s rear cover not from the top of the fuser This prevents any unfused toner from dirtying the fuser rollers Caution Be careful not to touch...

Page 147: ...still is a jam message open the duplexer s lower cover and paper guide Lift the inner paper guide Caution Hold the paper guide by its handles to avoid catching your fingers between it and the cover 8...

Page 148: ...top cover Pull the top latch to release the top cover 11 Remove the jammed media by pulling it toward you 12 If the media doesn t come out easily open the fuser roller pres sure release levers one at...

Page 149: ...ful not to touch the transfer drum while removing jammed media Removing the media from the bot tom prevents any unfused toner from dirtying the fuser rollers 14 Close the fuser roller pressure release...

Page 150: ...indow The waste toner pack isn t properly installed Make sure it sits loosely in its compartment and that the top of the pack is not wedged under the top of the compartment Printouts seem faded on one...

Page 151: ...er using the Operator Control Consumables Print Statistics menu or the printer web page 240K PM SERVICE The consumable usage information indicates that 240 000 pages have been printed since the last t...

Page 152: ...empty After a reset the files are removed This prevents you from wasting disk space with empty accounting files No action needed ACC x FILE FULL The job or paper file is full x identifies the file If...

Page 153: ...sed and one or more of the print jobs in the print queue are being canceled Press Select and the oldest job in the print queue will be canceled CHECK CLEANING ROLLER The cleaning roller needs to be re...

Page 154: ...ng file Wait No other action needed DRUM JAM Media has jammed in the drum area Locate and remove the jam DUPLEX JAM Media has jammed in the duplexer Locate and remove the jam DUPLEX UNIT PANEL OPEN On...

Page 155: ...a print job is received or until the printer is manually switched from offline to online EXTENDED ACCOUNTING FILE SIZE The size of the non empty accounting file has been increased successfully No acti...

Page 156: ...p and getting ready to go on line Wait No other action needed INNER JAM Media has jammed leaving the OPC belt cartridge area Locate and remove the jam INPUT IDLE PRINTING The printer is on line and pr...

Page 157: ...sette Locate and remove the jam NO PRNTREQ ERROR A printer hardware error has occured Reboot printer If message continues to appear contact your service provider or Support See appendix A QMS Customer...

Page 158: ...printing the 3 minute cooldown pause occurs every 50 pages until the continuous printing stops After an extended idle period this 50 page limit automatically resets to 200 pages This process is provid...

Page 159: ...ied size media PUT SIZE PAPER IN INPUTBIN BIN The Operator Control Chain Inputbins is set to Off and the displayed cassette is empty Refill it with the specified size media SIZE is the media size dete...

Page 160: ...talled incorrectly Check the transfer unit installation TRANSPORT JAM Media has jammed while passing through the engine Locate and remove the jam WAITING FOR IDLE An active job is in process Access to...

Page 161: ...toner cartridge is empty Replace the toner cartridge x TONER LOW The x color toner is low There is enough toner left to print approximately 100 pages before the printer stops Redistribute the toner in...

Page 162: ...vice calls should be placed to the vendor from whom you purchased the printer If you cannot get service from your vendor see appendix A QMS Customer Support for more information CALL FOR SERVICE C4 EN...

Page 163: ...G HV UNIT CALL FOR SERVICE H0 FUSER THERM CALL FOR SERVICE H2 FUSER TEMP 2 CALL FOR SERVICE H3 FUSER TEMP 3 CALL FOR SERVICE H4 FUSER TEMP 4 CALL FOR SERVICE L1 BEAM DETECTR CALL FOR SERVICE L2 SCANNE...

Page 164: ...ory for job 0 Not enough memory for job 1 Too many transformations 1 State lost 2 Math error 2 Math error 3 Job aborted 3 Job aborted 4 Instruction not recognized 4 Out of memory for macros 5 Wrong nu...

Page 165: ...shown Showpage is a PostScript command that prints a blank page The symbol means to press the Enter key To produce the D and Z press and hold down the Ctrl key while you type the appropriate letters d...

Page 166: ...working correctly your screen will display information similar to the following If your printer isn t detected on the network which is usually caused by bad cabling or connectors your screen will disp...

Page 167: ...nd put a job to make sure that the jobs are going through to the printer Open an ftp session at your PC or workstation by typing one of the following com mands ftp printername for example ftp pctdv6 f...

Page 168: ...his test you can type in one of the following choose the line applicable to your workstation type a For Windows 95 98 type put c autoexec bat b For Windows NT type put c winnt system ini c For UNIX ty...

Page 169: ...may want to check your AUTOEXEC BAT file to see if LPT1 the parallel port is being directed to COM1 the serial port a If the AUTOEXEC BAT file contains the line MODE LPT1 COM1 delete it b Then type MO...

Page 170: ...to add this statement to your AUTOEXEC BAT file b Restart the PC and then check the startup page which prints when you turn on the printer unless you disabled it This tells you the current serial port...

Page 171: ...NS TIMEOUTS Next Advance to the Serial menu COMMUNICATIONS SERIAL Select Access the Serial menu SERIAL MODE Next one or more times Advance to the Baud Rate menu SERIAL BAUD RATE Select Access the Baud...

Page 172: ...m the printer the printer and the PC are communicating If a blank page doesn t eject and you typed the file correctly refer to your DOS documentation for more information Online Offline Access the Sav...

Page 173: ...hoose OK 3 Print a directory or a window a From the File menu choose Print Directory or Print Window A dialog box appears b Select the printing options you want and then choose OK This section contain...

Page 174: ...cator lights Are all the printer covers closed securely Is there a media jam If a paper jam message displays and the Error indi cator lights go to one of the following sections in this chapter on clea...

Page 175: ...ting the appro priate printer emulation contact Support Refer to appendix A QMS Customer Support The OPC belt is extremely sensitive to bright light and direct sunlight Always leave it in its protecti...

Page 176: ...s If the Ready indicator is on but no startup page prints check the following 1 Make sure the option to print startup is enabled in Administration Startup Options Do Startup Page 2 Did you wait long e...

Page 177: ...eding section on clearing media jams for more information Occasionally software applications interfere with each other Some applications send a printer prep file to the printer at the beginning of eac...

Page 178: ...cting Your QMS Print System manual 8 If you have trouble installing and setting up your QMS CrownNet interface check the following If the printer requires a network interface card is it correctly inst...

Page 179: ...t arrow until you see Communications Press Select 5 Press Next right arrow until you see Resident NIC If you are printing from Token Ring when you will see Optional NIC 6 Press Next right arrow until...

Page 180: ...ample TCP IP Lan Man etc 4 Verify that your information is void of typographical errors for example in the Print Server Context in all caps For example NETWARE411 6100 PRINTERS SUPPORT CRC Note Leadin...

Page 181: ...r resolu tion you may need additional memory allocated to the frame buffer To allocate the correct amount of memory use the Memory Quick Config menu to choose the correct resolution and paper size for...

Page 182: ...nd port 2 Make sure no one pressed the Cancel key while your job was printing 3 Check the message window to see if the cassette you are using is out of media After 200 1 sided pages or 100 2 sided pag...

Page 183: ...n the printer driver Paper tab Duplex option choose On flipped as in a loose leaf notebook or Tumble flipped as on a clipboard 6 Remove media that is still jammed Caution Always open the duplexer s re...

Page 184: ...e appendix B Technical Specifications in the Reference manual for media specifications 2 If you are printing on thick stock ensure that you have set both the driver Paper tab Paper Type option and the...

Page 185: ...nted pages try the following If the TONER OUT message is on and the printer continues to print try distributing the toner to improve print quality If the print quality does not improve replace the ton...

Page 186: ...e the OPC belt cartridge Check that the printer is on a hard level surface Reinstall the OPC belt cartridge If necessary replace the OPC belt cartridge One or more toner cartridges may be defective Ch...

Page 187: ...lossy stock labels transfer media and thick stock have to be set in the Thick Stock mode The paper being used may have absorbed moisture perhaps due to high humidity or having water spilled on the pap...

Page 188: ...closed Remove the toner cartridges and gently rock them five or six times to redistribute the toner Then reinstall the cartridges One or more toner cartridges may be defective Check the toner cartrid...

Page 189: ...5 2 If spots appear on the printed image Check the surface of the OPC belt gently clean up the foreign particle using a soft dry cloth and replace the OPC belt if necessary Install new toner cartridg...

Page 190: ...Remove the toner cartridges and gently rock them five or six times to redistribute the toner Then reinstall the cartridges One or more toner cartridges may be defective Check the toner cartridges and...

Page 191: ...Day Operations and Printer Care The corona wire inside the OPC belt cartridge might be dirty Clean the corona wire as described in chapter 2 Every Day Operations and Printer Care One or more toner car...

Page 192: ...ng be sure you have the answers to these questions handy to help our technicians serve you more quickly 1 What is your printer model and serial number 2 What kind of host computer do you have 3 What o...

Page 193: ...page 6 3 Remove the Toner Cartridges on page 6 3 Remove the OPC Belt Cartridge on page 6 3 Prepare the Fuser Unit on page 6 5 Change the Waste Toner Pack on page 6 8 Remove the Lower Feeder Unit on pa...

Page 194: ...ns are secured using disposable banding and buckling supplies These supplies must be replaced prior to re shipping the printer If you need replacement packaging in the US call QMS Spares at 1 334 633...

Page 195: ...to bright light and direct sunlight Limit exposure to 2 minutes While the printer is being moved store the cartridge in its original shipping box If you don t have this box carefully wrap it in a piec...

Page 196: ...OPC belt cartridge 3 Repack the OPC belt cartridge in its original shipping box If you don t have this box carefully wrap the cartridge in a piece of dark heavy cloth Store the cartridge where it wil...

Page 197: ...ei werden so da Verbrennungsgefahr besteht Bitte lassen Sie die Fixiereinheit einige Zeit abk hlen bevor Sie diese ber hren 1 Open the printer s top cover 2 At the top of the fuser rotate the two lock...

Page 198: ...any excess oil from the fuser Dispose of the oil following local safety laws and regulations 6 Stuff several clean wadded paper towels into the space normally occupied by the oil bottle to absorb any...

Page 199: ...ng roller 10 Pull the two tension release levers toward the front of the printer until they lock into place The tension release levers in their frontmost position protect the fuser rollers from damage...

Page 200: ...on the side of the waste toner pack to seal the opening and then dispose of the pack in accordance with safety laws and regulations in your area 3 Install a new waste toner pack This ensures that no...

Page 201: ...the left plastic side cover from the lower feeder unit Note If you have two lower feeder units installed remove the left plastic side cover from the top lower feeder unit only 2 Locate the cable at t...

Page 202: ...the printer 4 Lift duplexer up and away from rear of printer 5 Repack the duplexer unit in its original shipping carton for storage or shipment 6 Insert the two plugs and upper paper exit cover remove...

Page 203: ...u have two lower feeder units installed remove the plastic side covers from the top lower feeder unit only 2 Locate the cable at the left rear of the lower feeder unit that connects it to the printer...

Page 204: ...G Your printer weighs approximately 119 lbs 54 kg without consumables Be sure to have help when lifting and moving it ACHTUNG Das Gewicht dieses Druckers betr gt ohne Verbrauchsmaterial ca 54 kg Bitte...

Page 205: ...manuals with the printer place them in the package Note Don t ship these items if you re returning the printer for service 4 Ensure that the top of the car ton is securely taped 5 Secure the shipping...

Page 206: ......

Page 207: ...0 1 1 1 Sources of Support on page A 2 QMS World wide Offices on page A 4...

Page 208: ...oduct announcements a trade show schedule and other general information about QMS The QMS ftp resource is ftp qms com 8 The QMS Answer Base is a free interactive online technical support system for ma...

Page 209: ...r serial or TCP IP for network The application and version you re using The emulation of the file you re trying to print listed on both the status and startup pages An advanced status page or startup...

Page 210: ...net http www qms com Latin_America Service Service Information Installation and Maintenance Pricing 1 800 858 1597 24 hrs closed on national holidays On Site Service and Depot Repair 1 800 858 1597 24...

Page 211: ...dering and Information 1 334 633 4300 x2530 8 00 am 5 00 pm Central Time Email service qms com Internet http www qms com service then click on Place A Call http www qms com service then click on Custo...

Page 212: ...4 Hampden Road Artarmon New South Wales 2064 Australia Telephone 61 2 9884 9966 Fax 61 2 9884 9977 Internet http www qmsaus com au Helpdesk Email helpdesk qms nl Internet http www qms com support 0 Be...

Page 213: ...tria and Switzerland Gustav Heinemann Ring 212 D 81739 Munich Germany Telephone 49 89 63 02 67 0 Fax 49 89 63 02 67 67 Internet http www qms gmbh de Helpdesk Email helpdesk qms nl Internet http www qm...

Page 214: ...Midrand South Africa Telephone 27 11 807 6957 Fax 27 11 807 6960 Internet http www qms nl Helpdesk Email helpdesk qms nl Internet http www qms com support United Kingdom Ireland and all unlisted count...

Page 215: ...PDF Printing 3 5 Adobe Acrobat Reader 1 3 Advanced printing features Memory 3 3 Agfa Balanced Screening ABS 4 10 Agfa FotoFlow 4 7 AM screening 4 9 Amplitude modulation AM 4 9 Apple ColorSync 4 7 App...

Page 216: ...sabling 3 8 Color 4 3 Colorific 4 9 Color Calibration 4 8 Color Control Color matching with PostScript Level 2 4 5 Color Matching 3 31 Color matching 3 26 Color Matching for Macintosh 4 18 Color Match...

Page 217: ...nsitometer 4 9 Disk Cache 3 32 Display Fields 3 38 Display List 3 31 Do Error Handler 3 28 Do Startup Page 3 28 Do Sys Start 3 28 DOS mode command 5 34 Drum jam message 5 7 5 18 Duplex 3 26 3 28 Duple...

Page 218: ...isk status 3 32 Home 3 24 Input buffer sizes 3 29 Media sources 3 30 Options 3 30 Printer jobs 3 34 Printer setting 3 28 Timeouts 3 33 HP Storage Pool 3 32 ICC Color Matching 4 15 ICC PCL Source 3 26...

Page 219: ...swer Base A 2 Maintenance Laser lens 2 33 Ozone filter 2 26 Paper exit rollers 2 36 Transfer roller 2 28 Maintenance statistics 3 40 Manual Typographic conventions 1 6 Manuals on the CD ROM 1 3 Media...

Page 220: ...selection 3 7 3 8 Type 2 3 Paper discharger 2 31 Paper guide 2 36 Paper jam See Jams Parallel Testing communication 5 29 Parallel IF 3 29 Parallel port 5 29 Pass definition 2 40 Path media 5 5 Pause C...

Page 221: ...abels 2 9 Letterhead 2 6 Memo media 2 6 Quality troubleshooting 5 48 Transparencies 2 14 Printing Preformatted Files Using CrownView 3 6 Printing status message 5 23 Printout too dark 5 53 Printout to...

Page 222: ...already disabled 5 15 Acc already enabled 5 15 Acc disabled 5 16 Acc enabled 5 16 Acc file x full 5 16 Acc files got removed 5 16 Acc paper file full 5 16 Adjust x bin 5 16 Back panel open 5 23 Belt...

Page 223: ...e 5 24 Top Margin 3 29 Total free space 3 32 TR unit misinstalled message 5 24 Transfer roller Cleaning 2 28 Removal and cleaning 2 30 Transparencies 2 13 Transport jam message 5 24 Tray Chaining 3 7...

Page 224: ...0 Weight 6 12 White lines 5 55 Windows driver Troubleshooting 5 42 I x Active jobs message 5 25...

Reviews: