Graphics
4-4
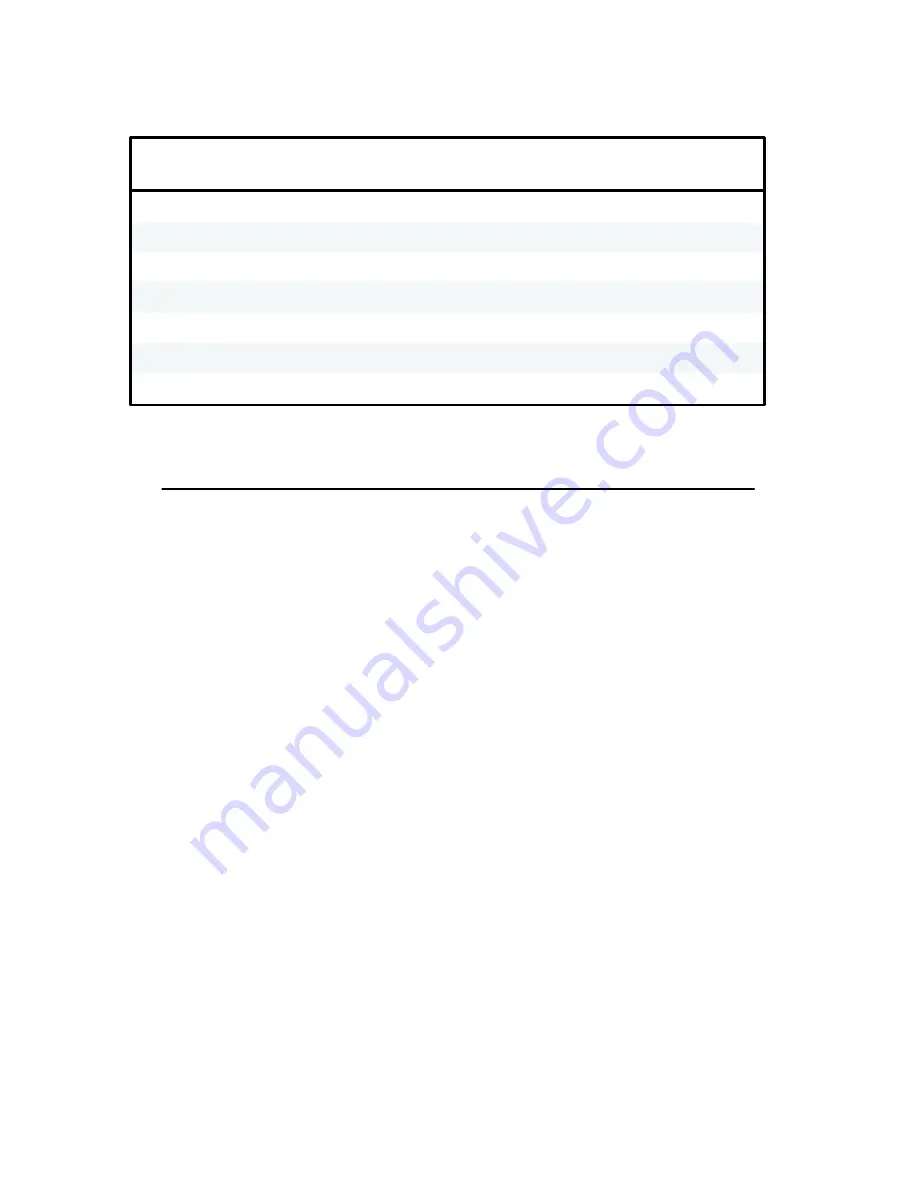
Table 4-1. Example Bit Image Pattern Decimal Values
BIT IMAGE
DATA BYTE
DECIMAL WEIGHT
DECIMAL VALUE
1
2
3
4
5
6
7
st byte
nd
rd
th
th
th
th
byte
byte
byte
byte
byte
byte
64 + 8 + 1
128 + 16 + 2
32 + 4
128 + 64 + 32 + 16 + 8 + 4 + 2 + 1
32 + 4
128 + 16 + 2
64 + 8 + 1
= 73
= 146
= 36
= 36
= 146
= 73
= 255
Bit Image Density
Bit Image graphics may be printed in different dot densities selected by control code.
Control code ESC K selects the Single Density mode.
Control code ESC L selects the Double Density mode.
Control code ESC Y selects the Double Speed, Double Density mode.
Control code ESC Z selects the Quadruple Density mode.
In Single Density Bit Image graphics from the Data Processing print mode, printed dot density
is 60 dots per inch (dpi) horizontal and 72 dpi vertical. From the Correspondence print mode,
horizontal dot density is 120 dpi and vertical density is 144 dpi.
The Double Density mode prints up to twice the number of dots per inch horizontally (up to
120 dpi from the Data Processing mode). The vertical dot density remains the same as in the
Single Density mode. Double horizontal density requires twice the number of input data bytes
to print the same length line as Single Density. Printing the additional dots reduces the printing
speed by half.
When the Double Density, Double Speed control code is received, the data can be printed up
to double the current horizontal dot density but all adjacent dots are removed which will affect
the final density of the printed image. Since double density graphics are printed at half speed,
double density double speed graphics are printed at the same speed as single density graphics.
Quadruple Density graphics is printed by pairing adjacent bit image bytes. The paired data is
then printed in the Double Density mode
Summary of Contents for P6000L
Page 1: ...P600L P6200L Line Printers User s Reference Manual R...
Page 2: ......
Page 3: ...P6000L P6200L Line Printers User s Reference Manual R P N 140576 001 Rev C...
Page 20: ...Overview 1 6...
Page 28: ...Operation 2 8 Figure 2 4 Paper Adjustment Controls Floor Cabinet Model...
Page 34: ...Operation 2 14 Figure 2 10 Loading Paper...
Page 51: ...3 7 Configuration Figure 3 1 Sample Configuration Printout...
Page 56: ...Configuration 3 12 Figure 3 4 PCBA Removal Pedestal Model Printer...
Page 100: ...Vertical Format Units 5 16...
Page 167: ...7 9 Interfaces Figure 7 1 Alternate Terminating Resistor Location Floor Cabinet Model...
Page 169: ...7 11 Interfaces Figure 7 2 Alternate Terminating Resistor Location Pedestal Model...
Page 190: ...RibbonMinder 9 14...
Page 200: ...Installation 10 10 Figure 10 9 Side Shock Mount Restraint Screw Removal Floor Cabinet Model...
Page 202: ...Installation 10 12 Figure 10 10 Pedestal Legs Installation Pedestal Model...
Page 206: ...Installation 10 16 Figure 10 14 Shipping Restraint Removal Pedestal Model...
Page 208: ...Installation 10 18 Figure 10 16 Cable Connections Pedestal Model...
Page 210: ...Installation 10 20...
Page 212: ...Appendix A 2...
Page 213: ...B 1 Appendix APPENDIX B Serial Emulation Mode Character Set 1 80 9F Control Codes...
Page 214: ...Appendix B 2 Serial Emulation Mode Character Set 2 80 9f Printable Symbols...
Page 215: ...B 3 Appendix P Series Mode Character Set 1 80 9f Control Codes...
Page 216: ...Appendix B 4 P Series Mode Character Set 2 80 9f Printable Symbols...
Page 217: ...B 5 Appendix International Characters...
Page 218: ...Appendix B 6...
Page 232: ...P6000L P6200L User s Reference Manual Index 6...
Page 233: ......


