156
4.
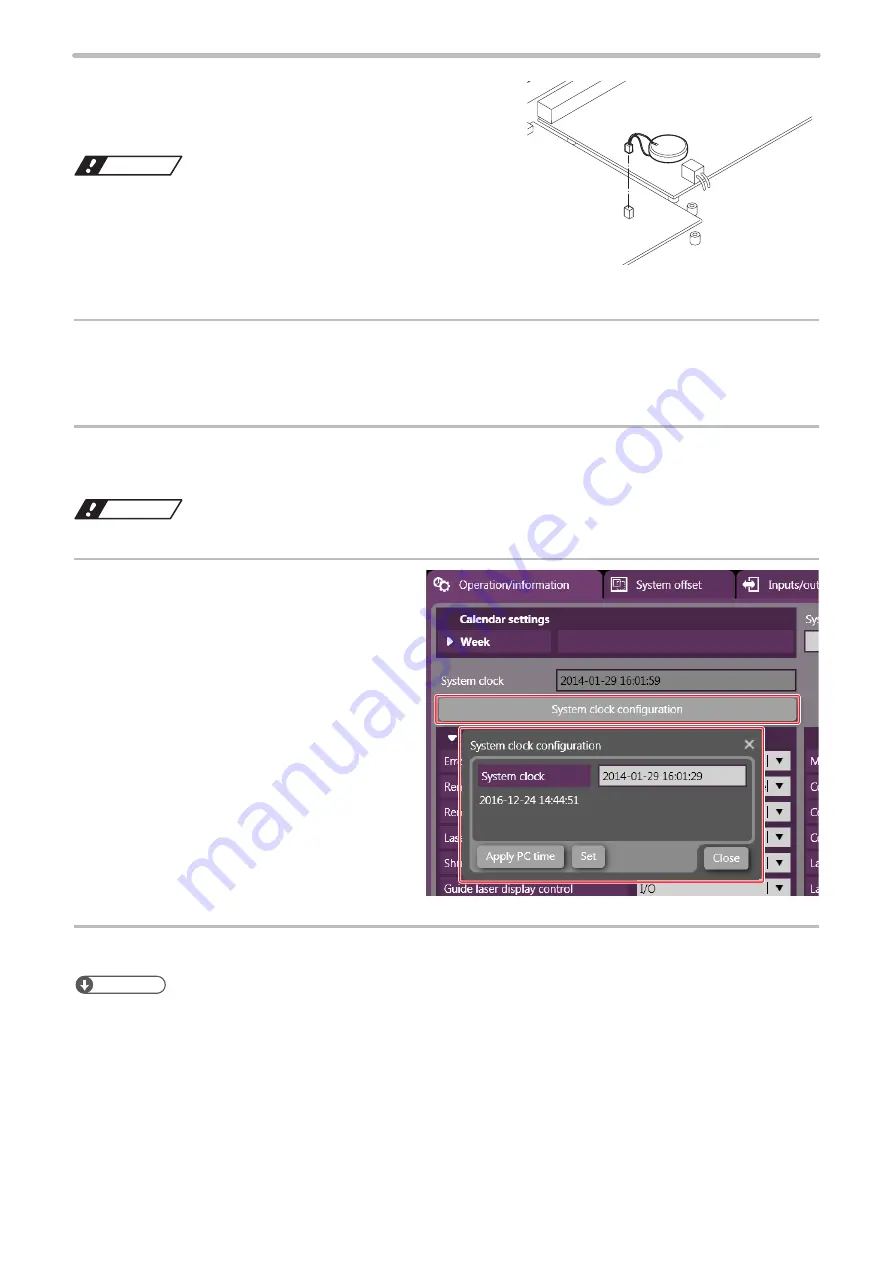
Remove the connector for the battery inside the
controller (coin-type).
Attach the connector to the new battery.
ワㄐㄕㄊㄆ
• If you wish to dispose used batteries, please comply with its
regional regulation. For the correct method of disposal, please
contact your local municipality, waste disposal services, or the
point of sale where you purchased the batteries.
5.
Tighten the screws (two locations) on the cover panel of the battery inside the controller and install
the cover.
Tightening torque: 0.5 N·m
6.
Tighten the screws (six locations) on the side panel, and attach the panel.
Tightening torque: 0.5 N·m
ワㄐㄕㄊㄆ
• Be careful not to let the inside cables get caught while installing.
7.
Connect the Laser Marker NAVI smart
online, and click “Operation/Information”
tab on the environment setting screen.
Click “Internal Clock Setting” to set the
date and time.
8.
Click “Set” on the lower right corner of the screen.
ンㄆㄇㄆㄓㄆㄏㄆ
• An alarm for system clock stop may be generated when the laser marker is started for the first time since the battery
replacement. To release the alarm, reset the date and time and click the confirmation button in the error dialog.
ME-LPGS-SM-8
Summary of Contents for LP-GS Series
Page 17: ...1 Product Overview ME LPGS SM 8 ...
Page 32: ...2 Laser Marker Installation ME LPGS SM 8 ...
Page 48: ...3 Operation Method ME LPGS SM 8 ...
Page 68: ...4 External Control Using I O ME LPGS SM 8 ...
Page 107: ...5 External Control by Communication Commands ME LPGS SM 8 ...
Page 116: ...6 Link Control with External Devices ME LPGS SM 8 ...
Page 141: ...7 Maintenance ME LPGS SM 8 ...
Page 161: ...161 MEMO ME LPGS SM 8 ...
Page 162: ...Troubleshooting ME LPGS SM 8 ...
Page 186: ...Index ME LPGS SM 8 ...
Page 189: ......
Page 190: ... Panasonic Industrial Devices SUNX Co Ltd 2014 2019 April 2019 ...


