Getting Started FLUOVIEW
/Online Help
OPERATION INSTRUCTIONS
1 - 3 7
Page
When the mouse pointer is placed on a word in enhanced display, the mouse
pointer turns into a “finger pointer”.
One Point!
Click the <Contents> button to the initial display. Click the <Back> button to
return to the previous information page.
1-3-2 Microscope Help
The microscope, scan unit and laser types can be set up from the FLUOVIEW software, by
selecting the dyeing method and following the displayed guidance information.
•
Selecting the Dyeing Method
1. From the page tabs on the bottom right of the [Acquire] panel, select the [Dyes] sub-
panel.
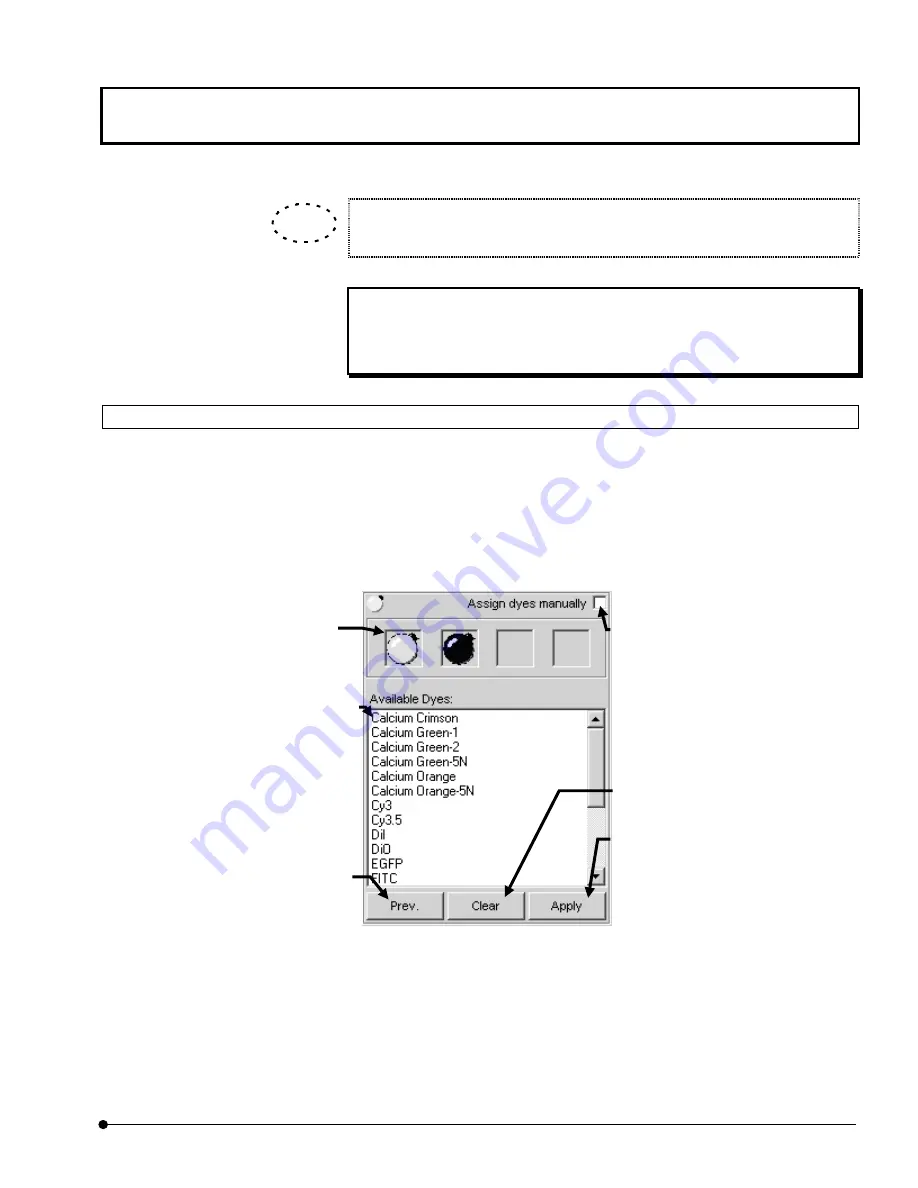
Fig. 1-14 [Dyes] Sub-panel
2. Select the specimen dyeing method by dragging desired dye names in the [Available
Dyes] list box in the [Selected Dyes] group box to the field immediately above the list
box.
TIP
[Available Dyes] list box
Lists the available dyes. Select the
desired items from this list and drag
them to the field above it to select the
dyeing method.
<Clear> button
Clear the set dyeing method.
<Prev.> button
Sets the dyeing method which was
set last time by clicking the <Apply>
button.
<Apply> button
Applies the dyeing method
dragged in the [Selected Dyes]
group box to the [Ch] group in
the [Acquire] panel.
Place the pointer on the icon
displayed in the [Selected
Dyes], and the dyeing method
is shown in the pop-up display.
[Assign dyes manually] check box
Checking this enables the manual
setting. Dragging the dyeing method
directly to the [Ch] group box assigns
the dyes to the desired channel.


