APPLIED OPERATIONS
/Image Acquisition
OPERATION INSTRUCTIONS
2 - 5 8
Page
2 Setting the numbers of steps and acquired image slices
1.
Set the number of steps using the <
> or <
> button in the [Step Size] text box.
The number of steps shown in the [Step Size] text box has been calculated by
the system so that the depth scale of the acquired image is identical to the
horizontal scale.
The number of acquired images shown in the [Slices] text box can also be input
from the keyboard.
After setting [Start Z] (Z-direction scan start position) and [Stop Z] (Z-direction
scanning stop position), input the desired number of images in the [Slices] text
box. This automatically sets [Step Size] (number of steps).
3 Setting the observation mode
1.
In the [Mode] group box in the [Acquire] panel, select the [Surface] option button.
2. In the [Acquire] panel, select the XYZT observation mode option button.
4 Setting the interval time
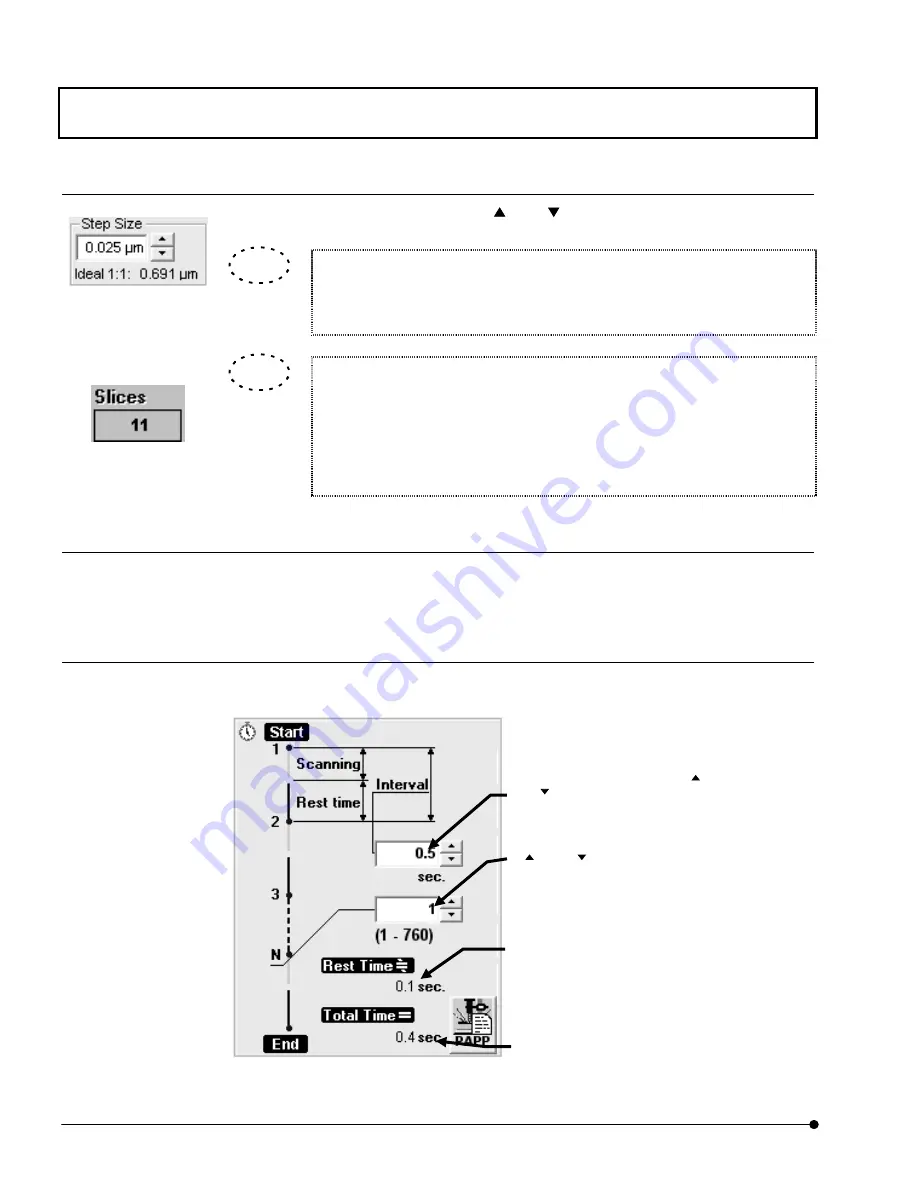
1. From the page tabs on the bottom right of the [Acquire] panel, select the [Time Series]
sub-panel. A panel as shown below will be displayed.
Fig. 2-19 [Time Series] Sub-panel
[Step Size] text box
[Slices] text box
TIP
TIP
[N] text box
Set the number of scans using the
<
> or <
> button or by input
from the keyboard. Under text box,
it displays max. number of slices
that can be acquired with use of
physical memory only available at
that time.
[Interval] text box
Set the interval time using the <
>
or <
> button or by input from the
keyboard.
[Total Time] text box
Shows the total time required for
image acquisitions.
[Rest Time] text box
Shows the time after end of
acquisition of an image until the
start of next acquisition.


