APPLIED OPERATIONS
/Image Acquisition
OPERATION INSTRUCTIONS
2 - 4 4
Page
5 Setting the interval time
1. From the page tabs on the bottom right of the [Acquire] panel, select the [Time Series]
sub-panel.
2.
Set the interval time using the <
> or <
> button in the [Interval] text box.
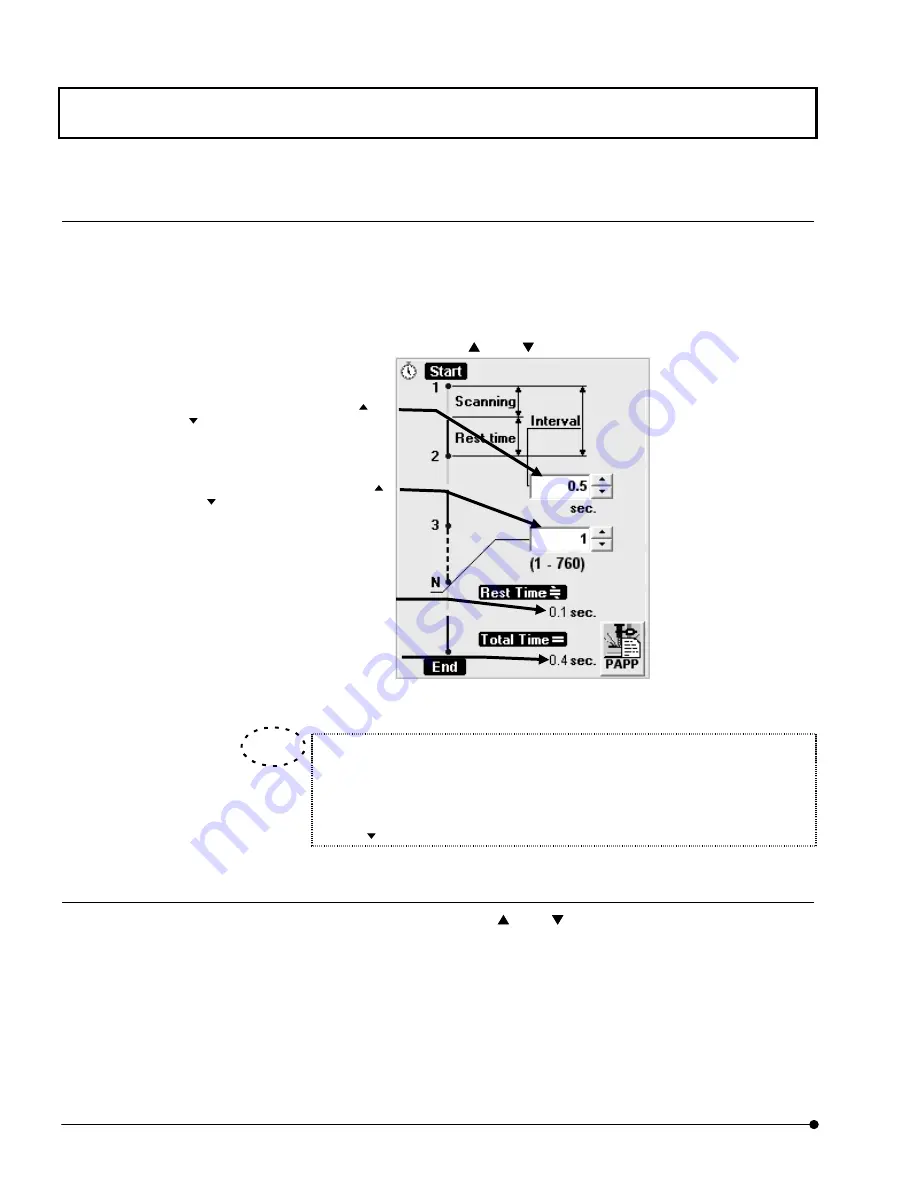
Fig. 2-15 [Time Series] Sub-panel
An image with no interval can be acquired by entering [0] in the [Interval] text
box.
In this case, the [Interval] text box shows “Free Run” message.
Using < > button also sets the [Interval] text box to “Free Run”.
6 Setting the number of scans
2. Set the number of scans using the <
> or <
> button in the [N] text box in the [Time
Series] sub-panel.
[Rest Time] text box
Shows the time after end of acquisition
of an image until the start of next
acquisition.
[N] text box
Set the number of scans using the <
>
or <
> button or by input from the
keyboard. Under text box, it displays
max. number of slices that can be
acquired with use of physical memory
only available at that time.
[Interval] text box
Set the interval time using the <
> or
<
> button or by input from the
keyboard.
[Total Time] text box
Shows the total time required for image
acquisitions.
TIP


