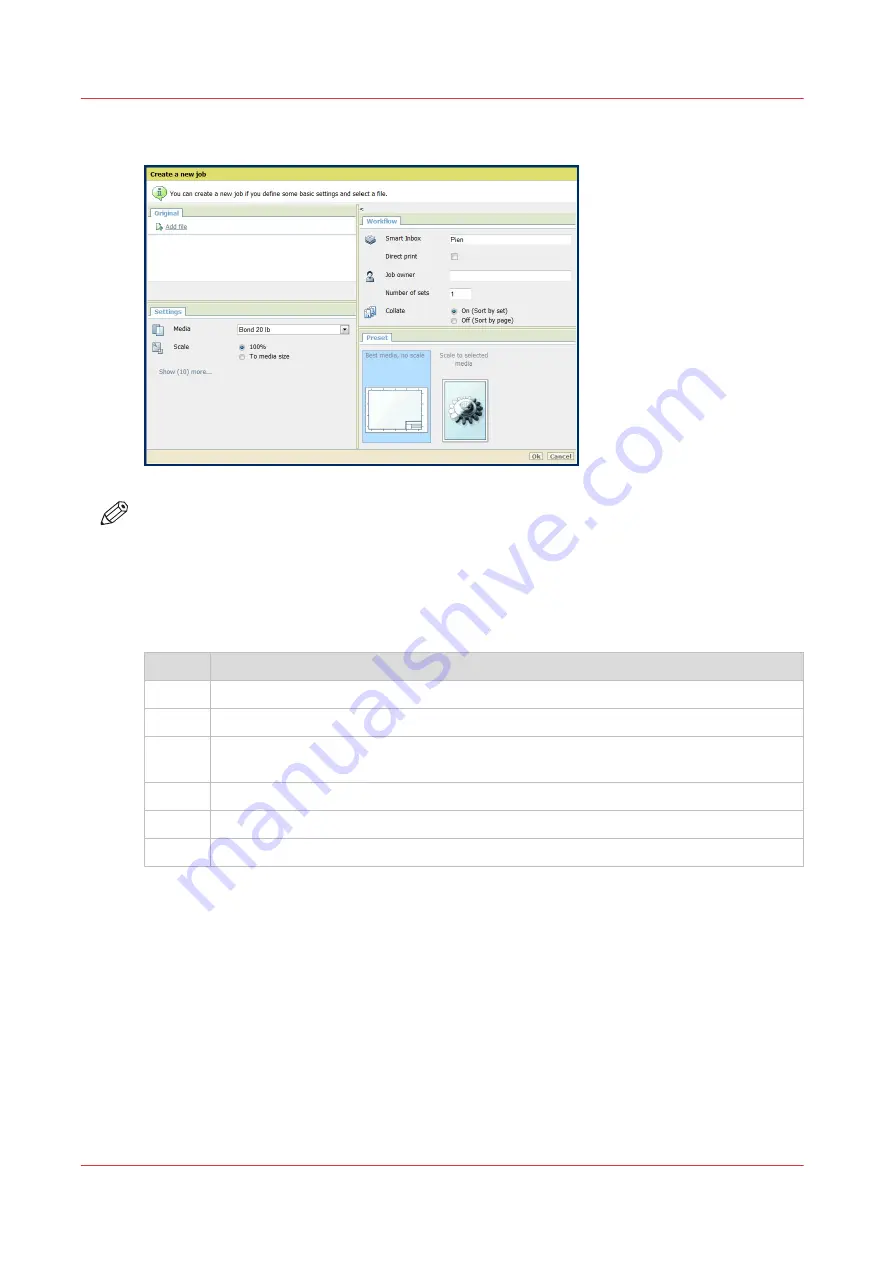
Create a Smart Inbox in the [Jobs] tab - Publisher Express section
NOTE
• With this procedure you not only create a Smart Inbox, but you also send a job to the printer.
• The Smart Inboxes created in Publisher Express are, while empty, only visible on your
personal browser. Once there is a job in the specific Smart Inbox, that Smart Inbox also
becomes visible on the user panel and in other browser sessions.
• The Smart Inboxes created in Publisher Express are not permanent. Once the Smart Inbox is
empty, it will disappear from the user panel and from not-personal browser sessions.
Step
Action
1.
Select the [Jobs] tab.
2.
Click on [Create new job] in the Publisher Express section.
3.
In the [Workflow] section, click on the Smart Inbox field. A drop-down list with Smart
Inboxes that contain one or more jobs opens.
4.
Enter the name of the new Smart Inbox and press Enter.
5.
Click [Ok] to send the print job to the printer via the new Smart Inbox.
6.
The Smart Inbox is now displayed in the Smart Inbox section and on the user panel.
Create and open a Smart Inbox
72
Chapter 3 - Define your Workflow with Océ Express WebTools
Summary of Contents for ColorWave 500
Page 1: ...Operation guide Océ ColorWave 500 ...
Page 4: ......
Page 10: ...Contents 10 ...
Page 11: ...Chapter 1 Introduction ...
Page 16: ...Available documentation 16 Chapter 1 Introduction ...
Page 17: ...Chapter 2 Get to Know the Printing System ...
Page 49: ...Chapter 3 Define your Workflow with Océ Express WebTools ...
Page 177: ...Chapter 4 Use the Printing System ...
Page 253: ...Chapter 5 Maintain the Printing System ...
Page 282: ...Calibrate the scanner 282 Chapter 5 Maintain the Printing System ...
Page 283: ...Chapter 6 License Management ...
Page 289: ...Chapter 7 Account Management ...
Page 297: ...Chapter 8 Solve Problems ...
Page 310: ...Print a test print 310 Chapter 8 Solve Problems ...
Page 311: ...Chapter 9 Support ...
Page 317: ...Chapter 10 Contact ...
Page 329: ......


