


Make a scan and remove a strip
Introduction
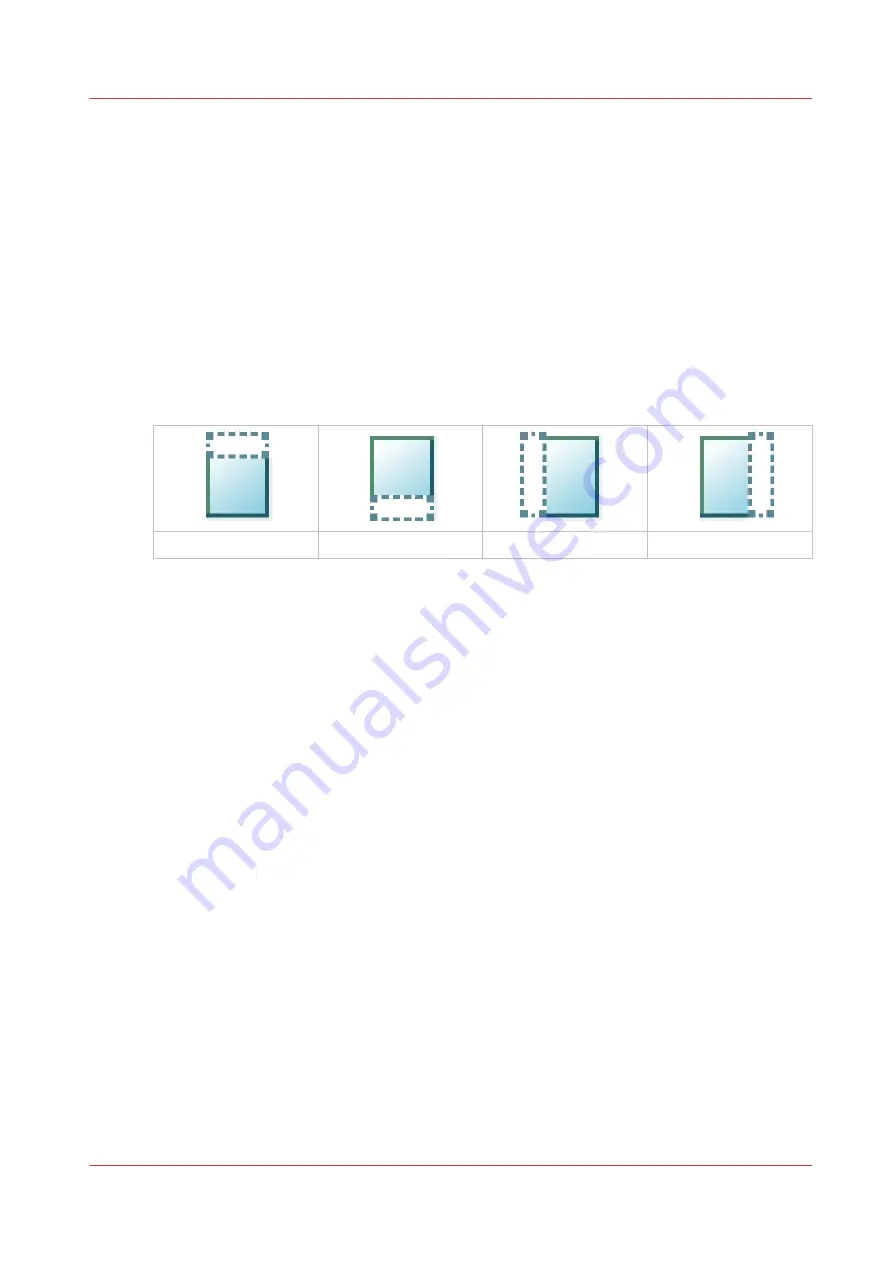
If you have an original with a strip, you can remove the strip from your scanned file.
Use the option [Remove strip] on the user panel to scan an original with a strip and remove the
strip from the file. You can remove a strip from the top, the bottom, the left or the right side of the
original.
Procedure
1.
Feed the original face up and centered on the original feeding table.
2.
Tap the scan tile on the user panel and select your preferred template in the scan Smart Access.
3.
Tap the scan tile again.
4.
Tap [Remove strip] under the [Original] category.
[Remove top strip]
[Remove bottom strip]
[Remove left strip]
[Remove right strip]
5.
Select [Remove top strip], [Remove bottom strip], [Remove left strip], or [Remove right strip] and
define the values.
6.
Make your settings and tap [OK].
7.
Tap the green button.
Result
The printer scans the original to file without the defined strip. The file is sent to the location
defined in the template.
Make a scan and remove a strip
Chapter 4 - Use the Printing System
247
Summary of Contents for ColorWave 500
Page 1: ...Operation guide Océ ColorWave 500 ...
Page 4: ......
Page 10: ...Contents 10 ...
Page 11: ...Chapter 1 Introduction ...
Page 16: ...Available documentation 16 Chapter 1 Introduction ...
Page 17: ...Chapter 2 Get to Know the Printing System ...
Page 49: ...Chapter 3 Define your Workflow with Océ Express WebTools ...
Page 177: ...Chapter 4 Use the Printing System ...
Page 253: ...Chapter 5 Maintain the Printing System ...
Page 282: ...Calibrate the scanner 282 Chapter 5 Maintain the Printing System ...
Page 283: ...Chapter 6 License Management ...
Page 289: ...Chapter 7 Account Management ...
Page 297: ...Chapter 8 Solve Problems ...
Page 310: ...Print a test print 310 Chapter 8 Solve Problems ...
Page 311: ...Chapter 9 Support ...
Page 317: ...Chapter 10 Contact ...
Page 329: ......


