


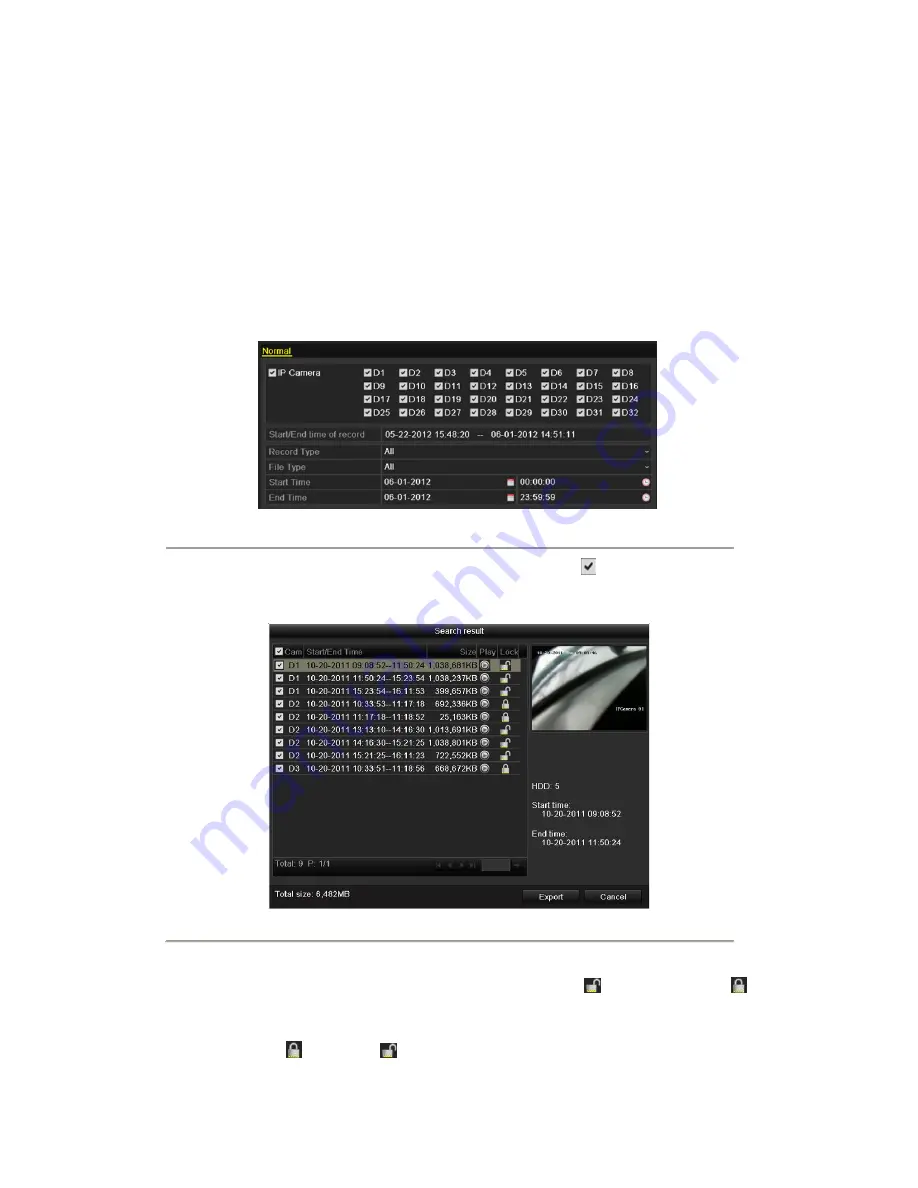
2.
Select the channels you want to investigate by checking the checkbox to
.
3.
Configure the record type, file type start/end time.
4.
Click
Search
to show the results.
5.9 Files Protection
Purpose:
You can lock the recorded files or set the HDD property to Read-only to protect the record files from being
overwritten.
Protect file by locking the record files:
Steps:
1.
Enter Export setting interface.
Menu> Export
Figure 5. 30 Export
Figure 5. 31 Export- Search Result
5.
Protect the record files.
1)
Find the record files you want to protect, and then click the
icon which will turn to
,
indicating that the file is locked.
Note:
The record files of which the recording is still not completed can t be locked.
2) Click
to change it to
to unlock the file and the file is not protected.
Summary of Contents for NVR-52 Series
Page 1: ...NVR 52XX 58XX 60XX Series NVR...
Page 11: ...Chapter 1 Introduction...
Page 26: ...Chapter 2 Getting Started...
Page 38: ...Chapter 3 Live View...
Page 44: ...Figure 3 6 Live View Strategy...
Page 49: ...Chapter 4 PTZ Controls...
Page 59: ...Chapter 5 Record and Capture Settings...
Page 66: ...Figure 5 12 Copy Schedule to Other Channels...
Page 80: ...Chapter 6 Playback...
Page 92: ...Figure 6 21 Interface of External File Playback...
Page 97: ...Chapter 7 Backup...
Page 116: ...Chapter 8 Alarm Settings...
Page 121: ...inputs to copy the settings to them Figure 8 8 Copy Settings of Alarm Input...
Page 130: ...Chapter 9 Network Settings...
Page 148: ...Chapter 10 HDD Management...
Page 150: ...Figure 10 5 HDD Status Changes to Normal Note Initializing the HDD will erase all data on it...
Page 160: ...Figure 10 22 View HDD Status 2...
Page 164: ...Chapter 11 Camera Settings...
Page 168: ...Chapter 12 NVR Management and Maintenance...
Page 172: ...Figure 12 5 HDD Information Interface...
Page 180: ...Chapter 13 Others...
Page 189: ...Appendix...
Page 192: ......


