Backup using USB writer and SATA writer
Steps:
1.
Enter Export interface.
Menu>Export>Normal
2.
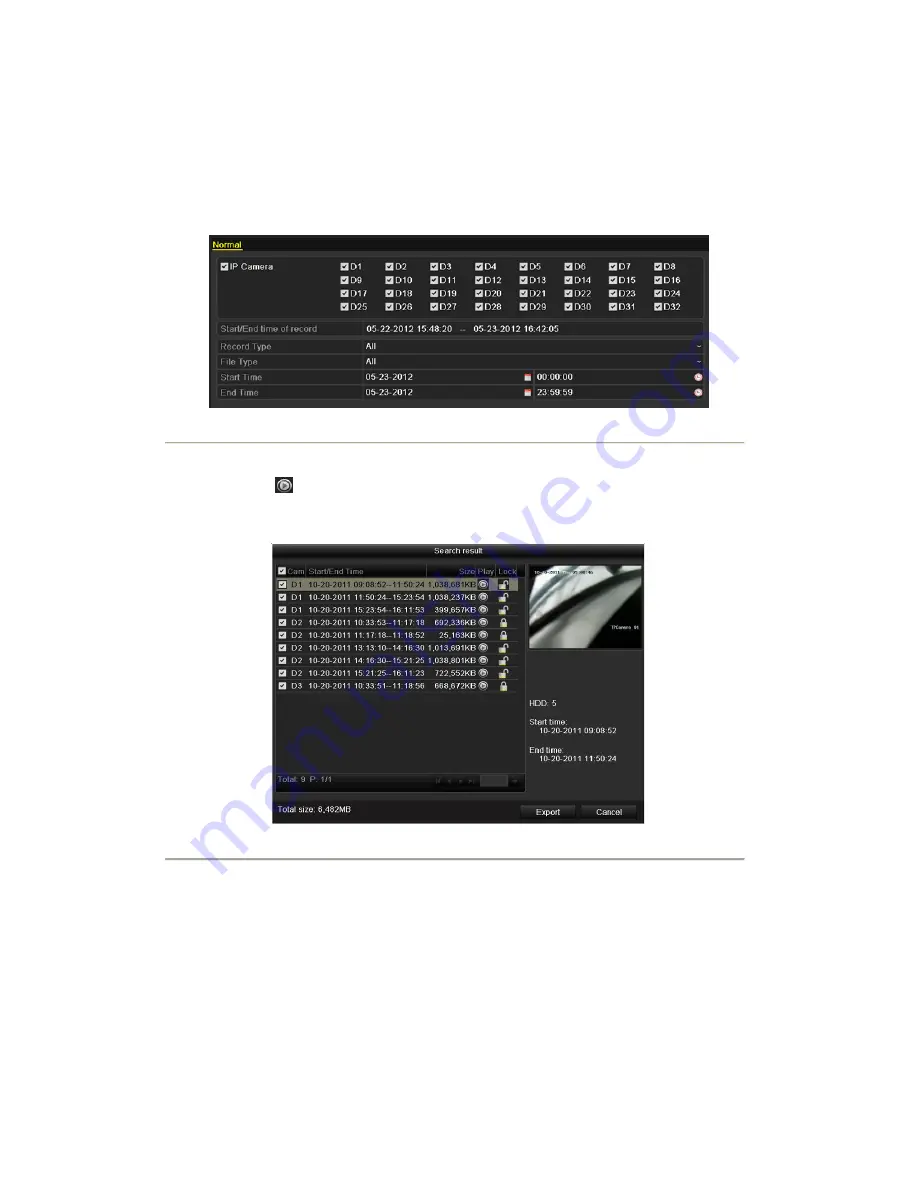
Set search condition and click
Search
button to enter the search result interface.
Figure 7. 10 Normal Video Search for Backup
3.
Select record files you want to back up.
Click button
to play the record file if you want to check it.
Check the checkbox before the record files you want to back up.
Note:
The size of the currently selected files is displayed in the lower-left corner of the window.
Figure 7. 11 Result of Normal Video Search for Backup
4.
Export.
Click
Export
button and start backup.
Note:
If the inserted USB writer or SATA writer is not recognized:
•
Click the
Refresh
button.
•
Reconnect device.
•
Check for compatibility from vendor.
Summary of Contents for NVR-52 Series
Page 1: ...NVR 52XX 58XX 60XX Series NVR...
Page 11: ...Chapter 1 Introduction...
Page 26: ...Chapter 2 Getting Started...
Page 38: ...Chapter 3 Live View...
Page 44: ...Figure 3 6 Live View Strategy...
Page 49: ...Chapter 4 PTZ Controls...
Page 59: ...Chapter 5 Record and Capture Settings...
Page 66: ...Figure 5 12 Copy Schedule to Other Channels...
Page 80: ...Chapter 6 Playback...
Page 92: ...Figure 6 21 Interface of External File Playback...
Page 97: ...Chapter 7 Backup...
Page 116: ...Chapter 8 Alarm Settings...
Page 121: ...inputs to copy the settings to them Figure 8 8 Copy Settings of Alarm Input...
Page 130: ...Chapter 9 Network Settings...
Page 148: ...Chapter 10 HDD Management...
Page 150: ...Figure 10 5 HDD Status Changes to Normal Note Initializing the HDD will erase all data on it...
Page 160: ...Figure 10 22 View HDD Status 2...
Page 164: ...Chapter 11 Camera Settings...
Page 168: ...Chapter 12 NVR Management and Maintenance...
Page 172: ...Figure 12 5 HDD Information Interface...
Page 180: ...Chapter 13 Others...
Page 189: ...Appendix...
Page 192: ......


