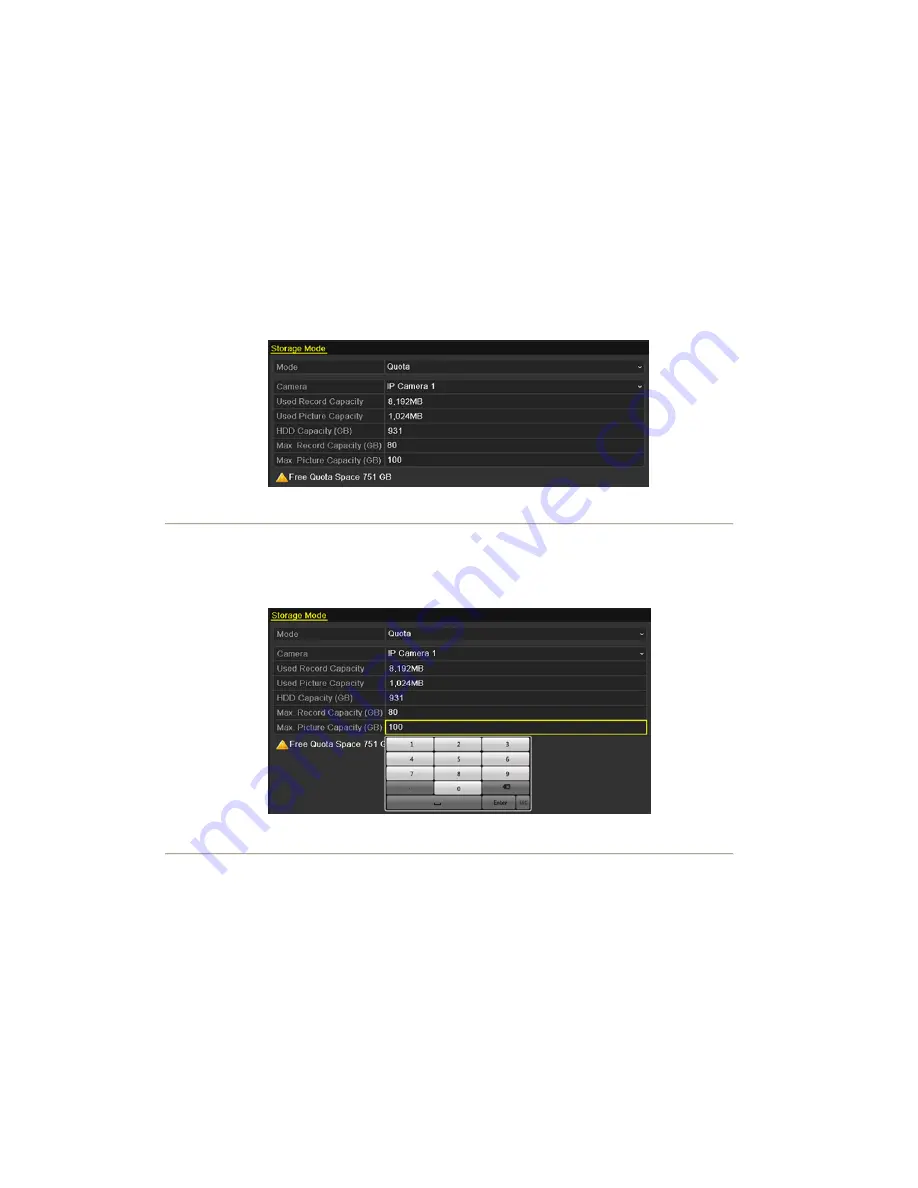
10.5 Configuring Quota Mode
Purpose:
Each camera can be configured with allocated quota for the storage of recorded files or captured pictures.
Steps:
1.
Enter the Storage Mode interface.
Menu > HDD > Advanced
2.
Set the
Mode
to Quota, as shown in Figure 10. 18.
Note:
The NVR must be rebooted to enable the changes to take effect.
Figure 10. 18 Storage Mode Settings Interface
3.
Select a camera for which you want to configure quota.
4.
Enter the storage capacity in the text fields of
Max. Record Capacity (GB)
and
Max. Picture Capacity
(GB)
, as shown in Figure 10. 19.
Figure 10. 19 Configure Record/Picture Quota
5.
You can copy the quota settings of the current camera to other cameras if required. Click the
Copy
button to
enter the Copy Camera menu, as shown in Figure 10. 20.
Summary of Contents for NVR-52 Series
Page 1: ...NVR 52XX 58XX 60XX Series NVR...
Page 11: ...Chapter 1 Introduction...
Page 26: ...Chapter 2 Getting Started...
Page 38: ...Chapter 3 Live View...
Page 44: ...Figure 3 6 Live View Strategy...
Page 49: ...Chapter 4 PTZ Controls...
Page 59: ...Chapter 5 Record and Capture Settings...
Page 66: ...Figure 5 12 Copy Schedule to Other Channels...
Page 80: ...Chapter 6 Playback...
Page 92: ...Figure 6 21 Interface of External File Playback...
Page 97: ...Chapter 7 Backup...
Page 116: ...Chapter 8 Alarm Settings...
Page 121: ...inputs to copy the settings to them Figure 8 8 Copy Settings of Alarm Input...
Page 130: ...Chapter 9 Network Settings...
Page 148: ...Chapter 10 HDD Management...
Page 150: ...Figure 10 5 HDD Status Changes to Normal Note Initializing the HDD will erase all data on it...
Page 160: ...Figure 10 22 View HDD Status 2...
Page 164: ...Chapter 11 Camera Settings...
Page 168: ...Chapter 12 NVR Management and Maintenance...
Page 172: ...Figure 12 5 HDD Information Interface...
Page 180: ...Chapter 13 Others...
Page 189: ...Appendix...
Page 192: ......


