background image

AutoOCR Toolbar Settings

OmniPage Pro Settings - 64

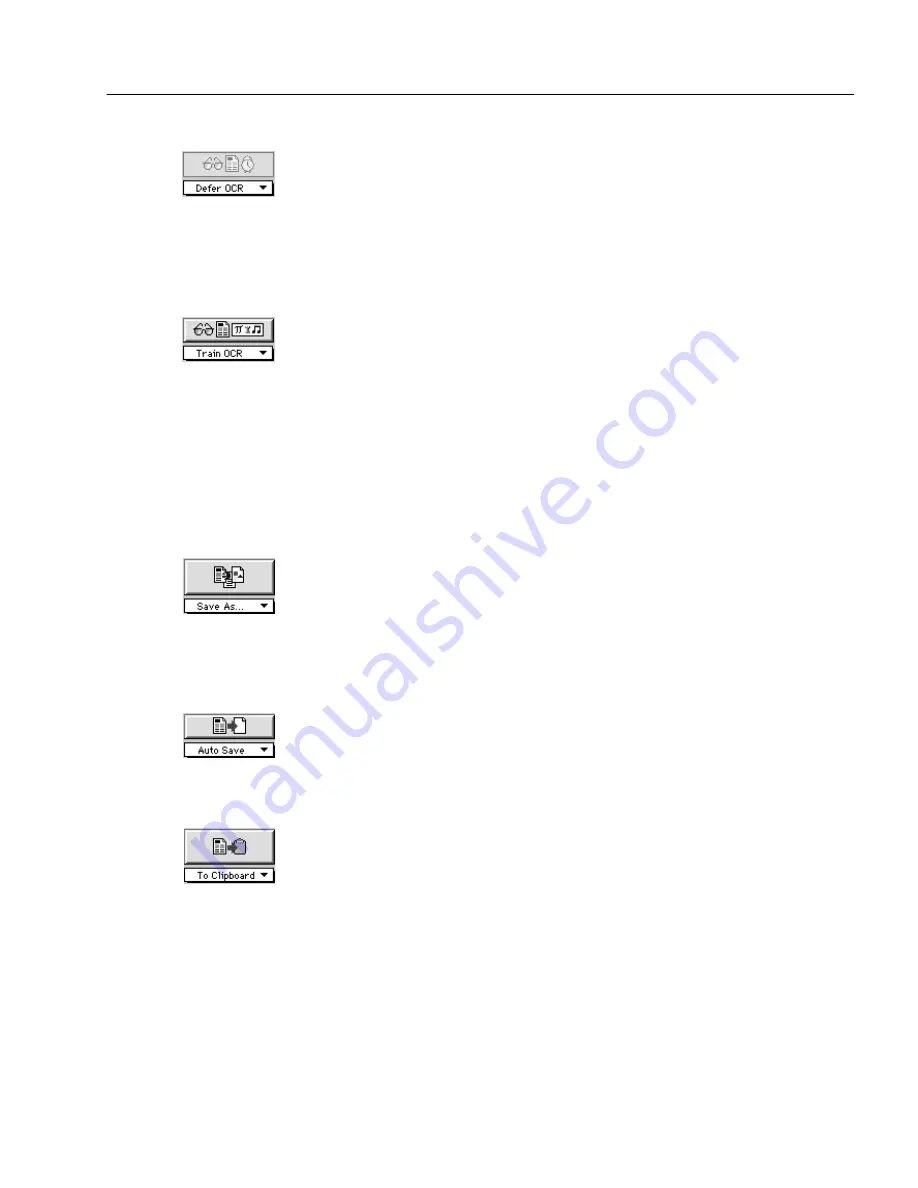
Defer OCR

Select Defer OCR to tell OmniPage Pro to delay text recognition during 
automatic processing. When you click AUTO, OmniPage Pro does the 
selected Image and Zone operations, but stops before OCR. You can 
then save the document as an OmniPage Document and process it later. 
Or, you can change the OCR command and activate another OCR 
operation.

Train OCR

Select Train OCR to teach OmniPage Pro how to recognize special 
characters. 

For more information, see “Training OCR for Special Characters” on 
page 103.

Export Commands

You can set the following Export commands. Unless otherwise noted, 
the selected commands are activated by clicking the Export button or at 
the end of automatic processing. 

Save As

Select Save As to save a document in a specified file format. The Save As 
command is not activated during automatic processing; you must click 
the button separately after OCR takes place.

For more information, see “Saving a Document as You Work” on page 
50.

Auto Save

Select Auto Save to save a document to a preselected location and format 
at the end of automatic processing.

For more information on auto saving, see page 64.

To Clipboard

Select To Clipboard to place a copy of a document’s recognized text on the 
Clipboard. The To Clipboard command is not activated during automatic 
processing; you must click the button separately after OCR takes place.

Graphics and page formatting are not retained when you copy a 
document to the Clipboard. For more information, see “Copying a 
Document to the Clipboard” on page 59.

Summary of Contents for OMNIPAGE PRO 8

Page 1: ...OmniPage Pro for Macintosh User s Manual CAERE CORPORATION 100 Cooper Court Los Gatos California 95032 3321 USA...

Page 2: ...e menus dialog boxes or scroll bars OmniPage Pro for Macintosh Version 8 800 1267 030 Copyright 1998 Caere Corporation All rights reserved Caere OmniPage OmniPage Pro AnyPage True Page Language Analys...

Page 3: ...tallation and setup instructions task oriented instructions ways to customize tools settings guidelines and technical information OmniPage Pro Guide This provides online information on features and pr...

Page 4: ...sed in this manual Convention Purpose Italicized text Emphasizes menu commands dialog box options labeled buttons and file names For example Choose Open in the File menu Emphasizes new terms the first...

Page 5: ...icle into your computer Painstakingly retyping the article is not an appealing solution OmniPage Pro offers a smart solution to increase your work productivity OmniPage Pro s optical character recogni...

Page 6: ...a variety of word processing page layout and spreadsheet applications About OmniPage Pro OCR In addition to text OmniPage Pro can retain the following elements in a document during OCR Graphics Photo...

Page 7: ...es are borders that enclose the parts of a document image that will get processed You can create zones manually automatically or with a template Any areas not enclosed by zones are ignored during OCR...

Page 8: ...Interface The main parts of OmniPage Pro s user interface include The AutoOCR Toolbar The Document Window The Thumbnail Window Zone Info and Tool Palettes The Settings Panel AutoOCR Toolbar Thumbnail...

Page 9: ...read OCR are shortcuts for opening the Settings Panel and checking for errors in a recognized document See Basic Steps of OmniPage Pro OCR on page 25 for more information on OCR procedures The Documen...

Page 10: ...t s Text View and make it active You can select options in the Document section of the Settings Panel to specify how views in the Document window are displayed See Document Display Settings on page 74...

Page 11: ...applications Choose Show Thumbnails in the Window menu to open the Thumbnail window if it is closed See Working With Documents on page 48 for more information on working with thumbnails The bars bene...

Page 12: ...Window menu if the Zone Info palette does not appear when the Image View is active You can move the palettes anywhere on your desktop as you work in the Image View The palettes are automatically hidde...

Page 13: ...vailable in the Guide menu after you install and launch OmniPage Pro If you are using Macintosh OS 8 or later the Guide menu has been re named as the Help menu and appears as the right most menu selec...

Page 14: ...he Guide menu Different balloons appear as you move the mouse pointer over items in the interface Choose Hide Balloons in the Guide menu when you want to turn off balloon help OmniPage Pro Guide Choos...

Page 15: ...choose Get Info in the File menu in the Finder The make and model of your computer system and peripheral devices scanner printer monitor and so on The amount of memory in your system To get informatio...

Page 16: ...niPage Pro Registering OmniPage Pro System Requirements To install and run OmniPage Pro you need the following setup A Power Macintosh or compatible computer System 7 5 or later 10MB RAM if virtual me...

Page 17: ...on software manual Some versions of OmniPage Pro are designed only for customers upgrading from previous versions of Caere OCR software To install these special upgrade versions you may be prompted to...

Page 18: ...ve successfully installed the new OmniPage Pro select Edit User Dictionary from the Settings menu 5 Click Import To reuse your previous style sets 1 Remove the style set files from the Styles folder 2...

Page 19: ...es will be installed If you have a previous version of OmniPage Limited Edition or Pro install your new version into a new folder 6 Choose the drive and folder and click Install to proceed with instal...

Page 20: ...ming a standard installation or if you picked Languages during a Custom installation a dialog appears prompting you to select the languages you wish OmniPage Pro to recognize Click to select one or mo...

Page 21: ...mniPage Pro Folder or whatever installation folder you selected The installation of OmniPage Pro leaves the OmniPage Pro Folder open 2 Double click the OmniPage Pro 8 0 application icon 3 Type in the...

Page 22: ...your Macintosh See the Scanner Setup Notes included in your OmniPage Pro package for more information on scanner support Use the OmniPage Pro installer program to install driver extensions for additi...

Page 23: ...ars automatically the very first time you start OmniPage Pro and each time you start it after the first 20 unregistered sessions 2 Select your country in the pop up menu if it is not already selected...

Page 24: ...r example you can use toolbar buttons or menu commands to start certain procedures You can also have OmniPage Pro do certain OCR jobs automatically or you can step through the jobs manually Please con...

Page 25: ...ough these steps automatically or you can start each step individually Selecting Process Commands You can set different commands for the Image Zone OCR and Export operations you want OmniPage Pro to p...

Page 26: ...ically scanned zoned recognized and saved Large documents take longer to save especially if they contain color You can also click AUTO again assuming that you have checked Scan until empty in the Sett...

Page 27: ...ructions for Scanning Pages Loading Image Files Opening Documents Scanning Pages You can scan a paper document to convert it to an electronic image See Starting OmniPage Pro on page 21 for more inform...

Page 28: ...s 3 Open the folder where your image files are located 4 Select the file you want to load and then click Add Or double click the file The file appears in the Selected Files list To add all image files...

Page 29: ...document open you are prompted to close the current document However you can add pages to your current document using the Load Image or Scan Image command in the Image button or Process menu To open a...

Page 30: ...Zone Templates on page 102 This section describes how to create and modify zones including Creating Zones Automatically Specifying Zone Types Drawing Zones Manually Modifying Zones A useful feature of...

Page 31: ...cating the order in which it will be recognized The color of the zone border indicates the zone type Make sure zones are identified correctly before performing OCR For example if you want to retain an...

Page 32: ...areas to ignore Ignore zones have red borders and stripes You can change the zone type of individual zones any time before OCR For example suppose zones are created automatically on a page and the re...

Page 33: ...ol 2 Click the appropriate zone type in the Zone Info palette For example click the Graphic type if you are going to draw the zone around a graphic such as a photo See Specifying Zone Types on page 31...

Page 34: ...ul for drawing non rectangular zones To draw a zone one side at a time 1 Click the Polygon tool in the Tool palette The mouse pointer in the Image View becomes a drawing tool 2 Click the appropriate z...

Page 35: ...3 Hold down the mouse button and drag the zone where you want to move it You can also press the arrow keys to move the zone You can copy the zone by holding down the Option key while you drag it Only...

Page 36: ...be automatically numbered for you when you select another tool or start OCR Unless you are using the True Page style set the order of zones determines the order in which text will be placed on a recog...

Page 37: ...you want the separation to occur 4 Release the mouse button when you are done The zone border changes to display the modified zone area To delete zones 1 Click the Draw Select Zones tool in the Tool p...

Page 38: ...retain handwritten text such as a signature as a graphic element See page 77 for guidelines on retaining graphics To perform OCR 1 Set Perform OCR as the command in the OCR button s pop up menu The de...

Page 39: ...ed reject character is the default Words not found in the main or user dictionary When OmniPage Pro stops on a word it highlights the word in the Text View The Proofread OCR dialog box shows the origi...

Page 40: ...fread OCR dialog box or Verification window it is likely that Save Page Image in OmniPage Document is deselected in the Document section of the Settings Panel In this case the image is discarded if yo...

Page 41: ...e Show Markers in the Edit menu The current marker setting is used for all documents For example if Hide Markers is currently chosen markers will not be displayed in any documents Color markers are no...

Page 42: ...image files Scheduled documents will be opened unfinished pages will be recognized and the documents will be saved as specified Choose Schedule OCR in the Process menu to open the Schedule OCR dialog...

Page 43: ...Schedule OCR dialog box appears 2 Select Automatically OCR files in the folder Input Files This tells OmniPage Pro to check the input folder every 30 seconds while it is running Detected files are aut...

Page 44: ...log box for adding files 3 Locate and select the files you want to add to the schedule Click Add to place a selected file on the Selected Files list Click Add All to place all files in the current fol...

Page 45: ...e recognized If you have selected Automatically OCR files in the folder Input Files and you do not select Delete input file after OCR is finished original files in the default input folder are moved t...

Page 46: ...into Other Applications The Direct Input feature allows you to activate OmniPage Pro from the Apple menu perform OCR on an image and automatically paste the resulting text into another application For...

Page 47: ...in OmniPage Pro normally and then save the document in a file format compatible with your application Using Direct Input Direct Input settings should be selected in OmniPage Pro before you use the Dir...

Page 48: ...enever you are ready to insert recognized text into your open application Or click the AUTO button if you want all steps started automatically Auto Pasting does not support graphics If you need to ret...

Page 49: ...esizing a Page View Saving a Document as You Work Changing Pages Reordering Pages Deleting a Page Undoing Edits Modifying Images Modifying Text Printing a Document Closing a Document Quitting OmniPage...

Page 50: ...elect the desired zoom setting in the pop up menu Image View only click the Zoom tool in the Tool palette and then click the area of the image you want to enlarge Option click to reduce the view Savin...

Page 51: ...the Thumbnail window if it is closed Click the forward or backward arrow buttons next to the current page number located along the bottom of the Document window Choose Go to Page in the Edit menu or...

Page 52: ...at was poorly scanned To delete the current page choose Delete Current Page in the Edit menu Or click the thumbnail of the page you want to delete and press the Delete key Everything is discarded incl...

Page 53: ...age 90 degrees left 180 degrees or 90 degrees right Choose Rotate Left Flip Vertical or Rotate Right in the Window menu Erasing Areas of an Image You can erase areas of the actual image using the Eras...

Page 54: ...o invert by clicking it 3 Choose Invert Selection in the Edit menu The black and white elements within the selected zone are reversed To invert an entire image 1 Make the Image View active but do not...

Page 55: ...py of selected text or graphics on the Clipboard Copied items are not removed from the Text View You cannot cut or copy text and graphics at the same time If both are selected only the text will be pl...

Page 56: ...Page option Select this to ensure that each page image fits on one printed page 4 Click Print to start the print job If the Image View is showing a color image and you have a color capable printer yo...

Page 57: ...mage file formats retain only the original image To save a document 1 Choose Save As in the File menu You can also click the Export button with Save As selected in the pop up menu The Save As dialog b...

Page 58: ...in a file format other than OmniPage Document 6 Click Save The document is saved to disk as specified Retained graphics are saved with the file if the selected format supports them The maximum file n...

Page 59: ...rt button or choose To Clipboard in the Process menu Every page of recognized text is copied to the Clipboard Text formatting such as bold and italics is retained if you paste it into an application t...

Page 60: ...ging Zones from the Image View You can drag zones from the Image View to the desktop or to another application that supports drag and drop functionality The contents of the zones are converted to line...

Page 61: ...r your document before you start processing it You may have to experiment with different settings to get the results you want Please continue reading this chapter for information on these topics AutoO...

Page 62: ...ds are activated by clicking the Image button or during automatic processing Scan Image Select Scan Image to scan paper documents in your scanner For more information see Scanning Pages on page 27 Loa...

Page 63: ...order zones on each page For more information see Drawing Zones Manually on page 33 Zone Template Select the name of a zone template file that you want to use to create zones on pages Any zone templat...

Page 64: ...icking the Export button or at the end of automatic processing Save As Select Save As to save a document in a specified file format The Save As command is not activated during automatic processing you...

Page 65: ...by clicking its icon on the left To select Settings Panel settings 1 Choose Settings Panel in the Settings menu to open the Settings Panel 2 Click the icons on the left side of the Settings Panel to d...

Page 66: ...load pages correctly in your scanner Select Portrait for a vertically oriented page Select Landscape for a horizontally oriented page Select Flipped to automatically rotate a portrait page image 180...

Page 67: ...rol over the scanner you use with OmniPage Pro Color Depth Three buttons appear on the left side of the Scanner options Color Grayscale and Monochrome Choose the setting that corresponds to the type o...

Page 68: ...s like the contrast setting used on a television This setting is only activated if you have Grayscale or Color selected in the Scanner settings and can compensate for variations in the gray shades or...

Page 69: ...cognized text characters that OmniPage Pro compares with characters it is trying to recognize Select a training file that you want OmniPage Pro to use in the Training File pop up menu None is the only...

Page 70: ...set contains one or more zone styles that you can apply to zones before OCR This is similar to applying styles to paragraphs in your word processor During OCR the selected styles specify how recogniz...

Page 71: ...is displayed in the Text View Type the character you want to use in the Reject Character edit box The default character is a tilde For example if OmniPage Pro could not recognize the J in REJECT and t...

Page 72: ...ct Input Deselect Close OmniPage Document after Paste if you want to continue working with a document in OmniPage Pro after text is pasted into your application Spelling Settings Click the Spelling ic...

Page 73: ...og appears 2 Select the appropriate language for the document you plan to recognize Command click to select more than one language OmniPage Pro uses the character sets and determines that a line of te...

Page 74: ...ot beginning a sentence that has a capitalized first letter followed by three or more lowercase letters for example He saw Jane throw Select Ignore Abbreviations if you want OmniPage Pro to ignore a c...

Page 75: ...gs of the Settings Panel When this option is selected you can save use or export the color images from the scanner for other work For example you can click the Save button in the AutoOCR Toolbar to sa...

Page 76: ...View Otherwise the page image is discarded when you change pages or close a document Once an image is discarded you must reload or rescan it to get it back Generally you should only deselect Save Pag...

Page 77: ...tion See Deleting a Page on page 52 for more information Straightening Page Discards Color Gray Image Select Straightening Page Discards Color Gray Image if you want OmniPage Pro to discard all color...

Page 78: ...ences Settings Panel These settings are ignored if you have selected Monochrome or Gray Scale in the Scanner selection of the Settings Panel You can take advantage of these settings if you intend to u...

Page 79: ...you processing Magazine or newspaper article page 80 Memo or letter page 81 Spreadsheet or table page 82 Legal document page 83 Mixed formats or not sure page 84 What is the quality of the original do...

Page 80: ...al For magazine or newspaper articles this may be either the Multicolumn or Mixed setting Modify zones manually if auto zoning does not successfully create zones around all page areas you want to proc...

Page 81: ...zones manually around any graphics you want to retain Identify them as Graphic zone types See Specifying Zone Types on page 31 Modify zones manually if the One Column setting does not successfully cr...

Page 82: ...reate zones around all page areas you want to process See Drawing Zones Manually on page 33 Make sure an entire table is within one Text zone Identify graphics you want to retain as Graphic zones See...

Page 83: ...lude line numbers in a zone if you plan to renumber lines in your word processor You can also erase parts of the image you do not need See Erasing Areas of an Image on page 53 Identify text only areas...

Page 84: ...this is probably the Mixed setting Modify zones manually if auto zoning does not successfully create zones around all page areas you want to process Delete zones around unnecessary parts of the page...

Page 85: ...characters and or dark backgrounds Darken the setting for thin broken text characters Other recommendations Select 3D OCR in the Scanner section of the Settings Panel if you are loading a grayscale im...

Page 86: ...ect Manual Brightness in the Scanner section of the Settings Panel for the fastest processing if you are scanning Use a setting near the middle of the scrollbar Deselect Use Language Analyst in the Sp...

Page 87: ...ther Applications on page 46 Some Keep font characteristics and some paragraph formatting Recommendations For single column documents select Similar Formats as the style set for the page For multiple...

Page 88: ...format that supports frame formatting Recommended formats are marked with a TP in the Format pop up menu in the Save As dialog box See Saving a Document as You Work on page 50 Please refer to your app...

Page 89: ...ct Save Page Image in OmniPage Document in the Document section of the Settings Panel Make sure separate zones are drawn around graphic areas and that they are identified as Graphic zone types See Spe...

Page 90: ...language Recommendations Select the appropriate language for the language in your document See page 72 for information on selecting a language Select the appropriate main and user dictionaries in the...

Page 91: ...and save the text in the desired file format OmniPage Pro will automatically detect on a line by line basis the multiple languages Are you processing a large document No Recommendations Set the desir...

Page 92: ...u can save pages between blank pages as separate files after OCR Other recommendations Create and use a zone template if all pages have similar zoning requirements See Creating Zone Templates on page...

Page 93: ...s Creating Zone Templates Training OCR for Special Characters Creating User Dictionaries Creating Custom Settings Files Applying Styles to Zones Much like applying styles to paragraphs in your word pr...

Page 94: ...aph and page formatting as possible Contemporary Memo does not use frames to preserve page layout Plain Format This style set contains one style called Plain which formats text in a default plain 10 p...

Page 95: ...ng File formats that support frame formatting have a TP in front of their names in the Save As dialog box Even though you remove frames while exporting you still have a file format that supports frame...

Page 96: ...To apply styles to zones 1 Make the Image View of the page active The Zone Info palette appears automatically if it is open If it is closed choose Show Zone Info Palette in the Window menu 2 Click th...

Page 97: ...se custom style sets This is useful for keeping formatting consistent for particular types of documents For example if you often recognize recipes you can design a special style set that contains a st...

Page 98: ...alog box appears 6 Enter a name for the style you want to add and click OK For example you could enter Heading as the name if you are creating a style for heading type paragraphs 7 Select the desired...

Page 99: ...e the formatting attributes for the style as desired Click the button to the left of any formatting attribute if you want to turn on an auto detect option This tells OmniPage Pro to detect the formatt...

Page 100: ...the next dialog box if you do not want to edit any other style sets Font Mapping If Auto is selected as the font setting for a zone style OmniPage Pro automatically maps specified fonts to detected f...

Page 101: ...pping in the Edit Style Set dialog box The Automatic Font Mapping dialog box appears 4 Select the font you want mapped to each font type You can select any fonts available on your system Specifying Zo...

Page 102: ...zone contents setting is dimmed if a Graphic or Ignore zone type is selected 3 Select the desired content focus in the Zone Contents pop up menu in the Zone Info palette Creating Zone Templates You c...

Page 103: ...s You can create a training file for special characters that might normally be difficult to recognize A training file is a set of up to 256 pre recognized text characters that OmniPage Pro compares wi...

Page 104: ...ned to assume the task of recognizing ordinary characters Thus you should not create a training file to accommodate a specific font or type style Likewise do not attempt to create a training file for...

Page 105: ...save the specified characters to a training file Or click Append to add the specified characters to another training file After saving or appending a file you are asked if you want to make this the c...

Page 106: ...e training file 3 Double click a character you want to edit The Specify Character dialog box appears 4 Edit the characters associated with the selected character as desired You can type characters int...

Page 107: ...ion and error checking A user dictionary is a personal dictionary that you build and customize To customize a user dictionary 1 Choose Edit User Dictionary in the Settings menu A dialog box lists all...

Page 108: ...Spelling section of the Settings Panel Creating Custom Settings Files You can save customized settings to a settings file A settings file contains Settings Panel and language selections This is usefu...

Page 109: ...Files Customizing OCR 109 To load settings 1 Choose Load Settings in the File menu 2 Double click the settings file you want to load Settings Panel and language selections are changed according to th...

Page 110: ...ro Please also read the Release Notes and Scanner Setup Notes that came in your OmniPage Pro package These contain the latest information on OmniPage Pro and its supported scanners Please continue rea...

Page 111: ...ce Problems Solutions to Try First Try these possible solutions first if you experience problems with OmniPage Pro Make sure that your system meets all requirements as listed in System Requirements on...

Page 112: ...the amount of free hard disk space Turn on Virtual Memory Increase the memory partition for OmniPage Pro see page 112 Install more memory This is the most effective solution if you plan to have a lot...

Page 113: ...the Preferred size text box and highlight the number in it 6 Type in the number or some amount greater than 10475 for a Power Macintosh with virtual memory turned off OmniPage Pro will reserve this m...

Page 114: ...ve files that you do not need by dragging them to the Trash icon on the desktop Empty the Trash icon regularly by choosing Empty Trash in the Finder s Special menu Deselect Save Page Image in OmniPage...

Page 115: ...e a scanner error message when you launch OmniPage Pro Make sure the scanner is supported by OmniPage Pro A list of tested scanners is provided in the Scanner Setup Notes If your scanner is not listed...

Page 116: ...ere OmniPage Pro comes with special scanner drivers that allow it to communicate with supported scanners The driver for your scanner must be installed during OmniPage Pro installation The driver must...

Page 117: ...tter recognition results than low quality documents Shaded colored or low quality documents may result in poor recognition accuracy unless adjustments are made before scanning See What is the quality...

Page 118: ...e 112 for more information Resolve low disk space problems See Low Disk Space Problems on page 113 for more information Restart your computer and test OmniPage Pro by performing OCR on the Test TIFF R...

Page 119: ...e 89 for guidelines on retaining graphics Problems With Fax Recognition Try these solutions to improve OCR accuracy on fax images Ask senders to select Fine or Best mode when they send you a fax This...

Page 120: ...lowing file formats ASCII Text ASCII Text with Line Breaks ClarisWorks RTF MacLink Excel 3 0 4 0 5 0 FrameMaker MIF 4 0 5 0 5 5 HTML Macintosh PICT MacWrite II MacWrite Pro Microsoft RTF 1 0 2 0 Micro...

Page 121: ...eyond the frame s border To view the text place the cursor in the text frame and use the arrow keys on your keyboard to scroll to the top or bottom of the frame You can also select the text in a frame...

Page 122: ...t Event Class DHYW Event ID RGRF Print Document Event Class DHYW Event ID SGRF Custom Apple Events OmniPage Pro s custom Apple Event events work with the Schedule OCR feature in OmniPage Pro In OmniPa...

Page 123: ...st of supported formats If you do not specify the output format before creating a new job the default format is ASCII text set output file to file name Event Class RFU Event ID RXIO Parameter keyword...

Page 124: ...OmniPage Pro immediately starts scanning and recognizing the job in the background Once recognition is complete the text is saved with the file name and format specified by the set output file and se...

Page 125: ...niPage Pro immediately starts loading the image files and recognizing the job in the background Once recognition is complete the text is saved with the file name and format specified by the set output...

Page 126: ...mniPage Pro immediately started handling it you can use this call to check on the status of your job The status will be N RE Q3URJUHVV until the job is finished then it will be N 6XFFHVV Return Values...

Page 127: ...tell application OmniPage Pro 8 0 Output format is MacWrite Pro set output format to MacWrite Pro Output file should be called Output Doc set output file to HD Output Doc Create a job to recognize th...

Page 128: ...scanner Some ADFs are built into scanners others are add on products automatic processing Using OmniPage Pro s AUTO button to process an open document or a new document from start to finish according...

Page 129: ...is organized or presented The general shape and appearance of a printed page including page size character width and spacing line spacing and so on frame A formatting box containing text or graphics t...

Page 130: ...ure element A dot on the graphics screen point A typographic unit of measurement equal to 1 72 inch measured vertically Points are used to describe font size proportional font Any font in which charac...

Page 131: ...ormatting as closely as possible during OCR zone contents A setting that specifies the text characters OmniPage Pro will look for within zones during OCR zone style A setting that comprises formatting...

Reviews: