


NTI
Mini Server Environment Monitoring System
7
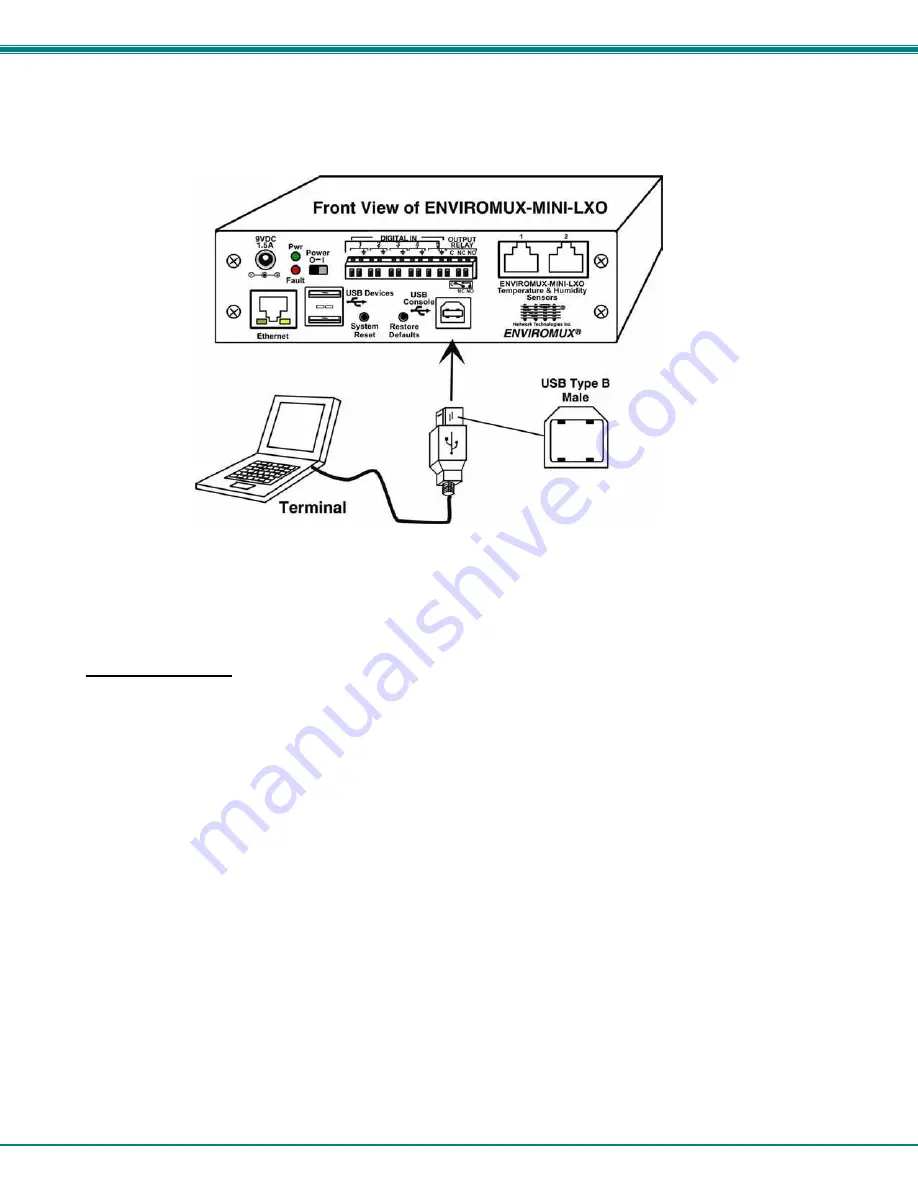
USB Console Port
Your ENVIROMUX includes a USB Type B connector labeled “USB Console”. If you connect a USB cable between the
ENVIROMUX and your PC you will be able to control your ENVIROMUX serially from a terminal console using this connection.
Figure 7- Connect terminal to USB Console port
Installing Drivers
You will only need to install drivers the first time the ENVIROMUX is connected to your PC. After the first time, when the
ENVIROMUX is connected, your PC should recognize the ENVIROMUX and re-assign the COM port. Follow the steps below to
install the drivers.
1. Make sure the USB cable is connected between the ENVIROMUX and your PC.
2. Power ON the ENVIROMUX. The PC will see the ENVIROMUX as “New Hardware” and create a virtual COM port to
communicate with it.
3. You will be prompted to load drivers. A driver file compatible with Windows XP, 2000, Vista and 7 (32 and 64 bit versions) can
be found on the CD that came with your ENVIROMUX. Browse to the drive your Product Manual CD is in and locate and select
the file named “
enviromux.inf”
in a directory named
“windows-drivers\32bit or \64bit”
depending upon your
operating system.
The .inf file will direct your PC to locate and install the file
usbser.sys
(already on your PC, comes with Windows). Installing
the usbser.sys file should happen automatically. When finished, Windows will indicate installation is successful.


