


Chapter 9: Tools
Testing Tools
297
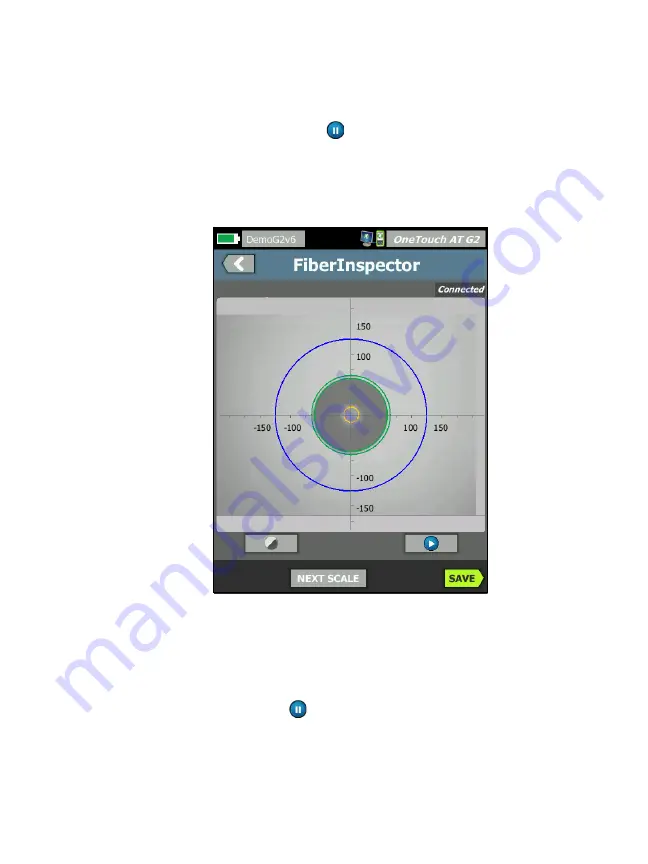
Using the Scales
1
To show the scales, tap
, then tap
SCALE ON
.
2
Drag the image of the core to the center of the screen.
3
To change the size of the measurement ring for the fiber core,
tap
NEXT SCALE
.
Figure 127. FiberInspector Image with Measurement Scales
(fiber with 50
m core shown)
Note
To see the buttons for the measurement axes and core
scales and to change the magnification of the screen,
you must first tap
to put the screen in still mode.
You can use the round, horizontal, and vertical scales to mea-
sure the size of the fiber core and cladding. You can also mea-
sure the size of particles, scratches, and other defects on the
Summary of Contents for OneTouch AT G2
Page 48: ...OneTouch AT and OneTouch AT G2 User Manual 32 ...
Page 58: ...OneTouch AT and OneTouch AT G2 User Manual 42 ...
Page 133: ...Chapter 5 User Tests Web HTTP Test 117 Figure 55 Web HTTP Test Results ...
Page 176: ...OneTouch AT and OneTouch AT G2 User Manual 160 ...
Page 182: ...OneTouch AT and OneTouch AT G2 User Manual 166 ...
Page 207: ...Chapter 7 Wired Analysis 191 ...
Page 208: ...OneTouch AT and OneTouch AT G2 User Manual 192 ...
Page 224: ...OneTouch AT and OneTouch AT G2 User Manual 208 Figure 87 AP Details ...
Page 291: ...Chapter 9 Tools Testing Tools 275 Figure 118 Wi Fi Network Validation Results Tab ...
Page 334: ...OneTouch AT and OneTouch AT G2 User Manual 318 ...
Page 356: ...OneTouch AT and OneTouch AT G2 User Manual 340 ...
Page 358: ...OneTouch AT and OneTouch AT G2 User Manual 342 2 Scroll down to the File Tools section ...
Page 370: ...OneTouch AT and OneTouch AT G2 User Manual 354 ...
Page 374: ...OneTouch AT and OneTouch AT G2 User Manual 358 ...
Page 382: ...OneTouch AT and OneTouch AT G2 User Manual 366 ...
Page 395: ...379 Notes ...
Page 396: ...OneTouch AT and OneTouch AT G2 User Manual 380 Notes ...


