4 - 32
(00292)H
□ Custom Settings for Frame Rate and Frame Size
In addition to the predetermined values for the HX, GX camera frame rate and frame size, the
image width, height and frame rate can be set to the desired values.
The parameters of HX-3 cameras are restricted, with the width a factor of 64 less than 2560, the
height a factor of 8 less than 1920 and the frame rate an integer 50 or greater.
To increase the value for the frame rate, the upper limit for the frame size will be reduced.
In this case, an adjustment is made using the priority for the frame rate and frame size.
Open the "Camera Parameter" toolbar, the "Camera Details" dialogue or the "Control" dialogue,
and click on Frame Rate
or Frame Size
to display the "Custom Settings"
dialogue.
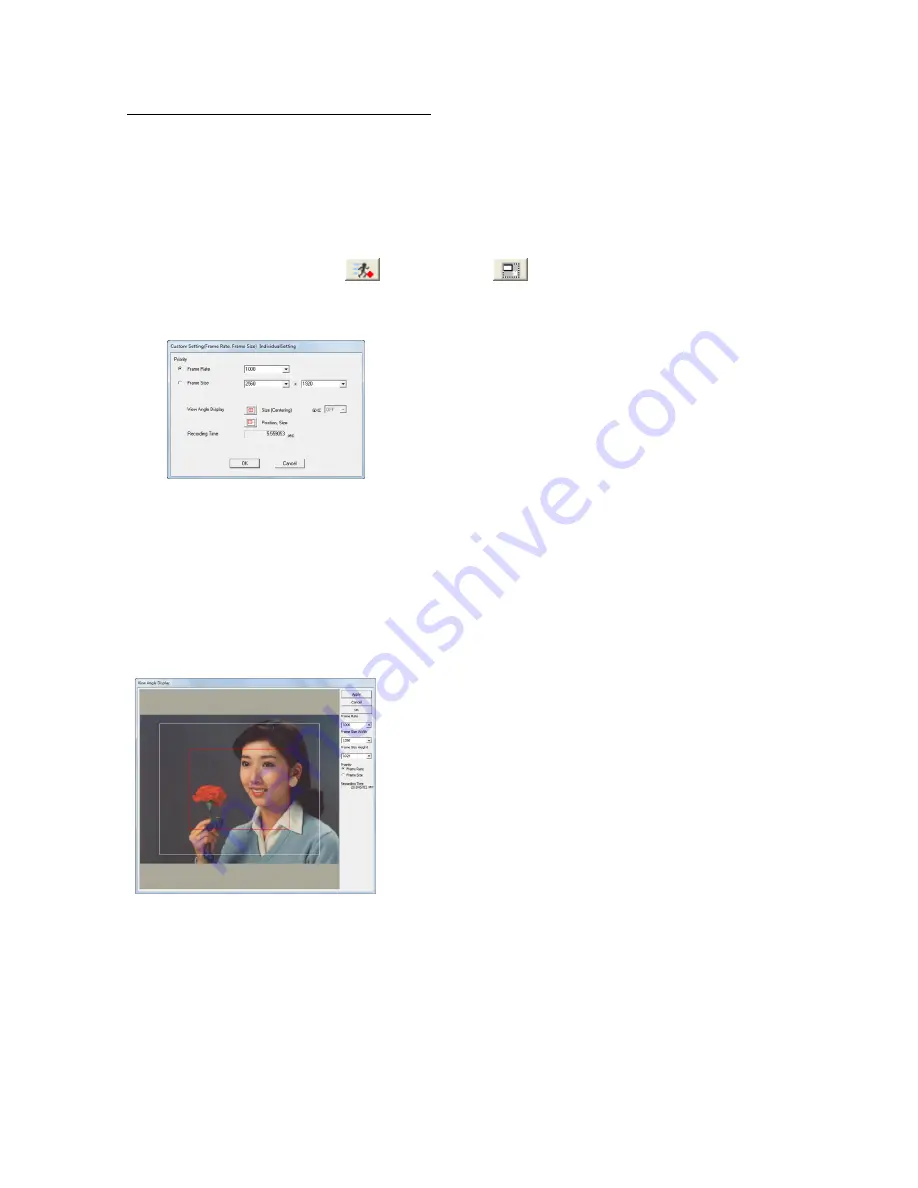
CUSTOM Settings Dialogue (HX camera connection)
Field angle display
Size specification (Center)
Select the frame rate and frame size
priority. Select the frame rate and
frame size width and height, or enter
a number. After setting, click "OK" to
set the parameters to the camera. Or,
use "Display Angle" to select the two
types of settings, depending on the
camera connected.
Specify size (center)
:
HX, GX camera
position
・
specify size
:
HX camera
Click to open the display angle
dialogue and the entire image and
frame for the frame size is displayed.
<
Specify Size (Center)
>
In the angle display dialogue, the
camera live image (still image) and the
currently set frame size area (white
border) are displayed.
Change the frame size corresponding
to the position by clicking or dragging
the image. At this point, the changed
frame size is shown with a red border.
If the priority is the frame rate, it isn’t
possible to drag to an area that exceeds
the upper limit of the frame size.
If the priority is the frame rate, it isn’t
possible to drag in a range that exceeds
the upper limit of the frame size
relative to the frame rate.
If the priority is the frame size, the
frame rate will automatically be
reduced if the upper limit of the frame
size is exceeded when dragged.
Numerical input is also possible. Input
the parameter to be changed and click
"Apply" to update the frame size (red
frame) and frame rate.
After updating the settings, click “OK”
to set the parameters to the camera.
Summary of Contents for SP-642
Page 1: ...800292 0H Oct 2015 User s Manual DigitalHighSpeed HXLink SP 642 ...
Page 2: ... Blank page ...
Page 4: ... Blank page ...
Page 6: ... Blank page ...
Page 10: ...iv 00292 H Blank page ...
Page 18: ...xii 00292 H Blank page ...
Page 19: ... 00292 H 1 1 1 Overview ...
Page 25: ... 00292 H 2 1 2 Installation ...
Page 49: ... 00292 H 3 1 3 Basic Operations ...
Page 77: ... 00292 H 4 1 4 Camera Operation ...
Page 106: ...4 30 00292 H Q series Detail Settings dialog ...
Page 179: ... 00292 H 5 1 5 File Operation ...
Page 221: ... 00292 H 6 1 6 Camera Connection Settings ...
Page 238: ...6 18 00292 H Blank Page ...
Page 239: ... 00292 H 7 1 7 Setting Options ...
Page 263: ... 00292 H 8 1 8 Settings for the Recording Methods ...
Page 295: ... 00292 H 9 1 9 Menus ...
Page 308: ...9 14 00292 H Blank page ...
Page 309: ... 00292 H 10 1 10 System Settings HXUtility ...
Page 326: ...10 18 00292 H Blank Page ...
Page 327: ... 00292 H 11 1 11 Batch Conversion of Files Batch Conversion Software ...
Page 340: ...11 14 00292 H Blank page ...
Page 341: ... 00292 H 12 1 12 Auto Pilot ...
Page 357: ... 00292 H 13 1 13 Measurement Functions ...
Page 384: ...13 28 00292 H Blank page ...
Page 385: ... 00292 H 14 1 14 Troubleshooting ...
Page 400: ...14 16 00292 H blank page ...
Page 401: ... 00292 H 15 1 15 Specifications ...
Page 404: ...15 4 00292 H Blank page ...
Page 405: ... 00292 H A 1 Appendix A ...
Page 408: ...A 4 00292 H Blank page ...
Page 409: ... 00292 H B 1 Appendix B ...
Page 415: ... 00292 H C 1 Appendix C ...
Page 418: ...C 4 00292 H Blank Page ...
Page 419: ... 00292 H D 1 Appendix D ...
Page 421: ... 00292 H E 1 Appendix E ...
Page 425: ... 00292 H F 1 Appendix F ...
Page 436: ...F 12 00292 H Blank Page ...


