


© 2016 MA Lighting T e chno lo gy Gm bH | Da chde ck e rstr. 16 | D-97297 W a ldbütte lbrunn | Ge rm a ny
P ho ne +49 5251 688865-27 | suppo rt (a t) m a -do t2.co m | www.m a lighting.co m
1 of 1
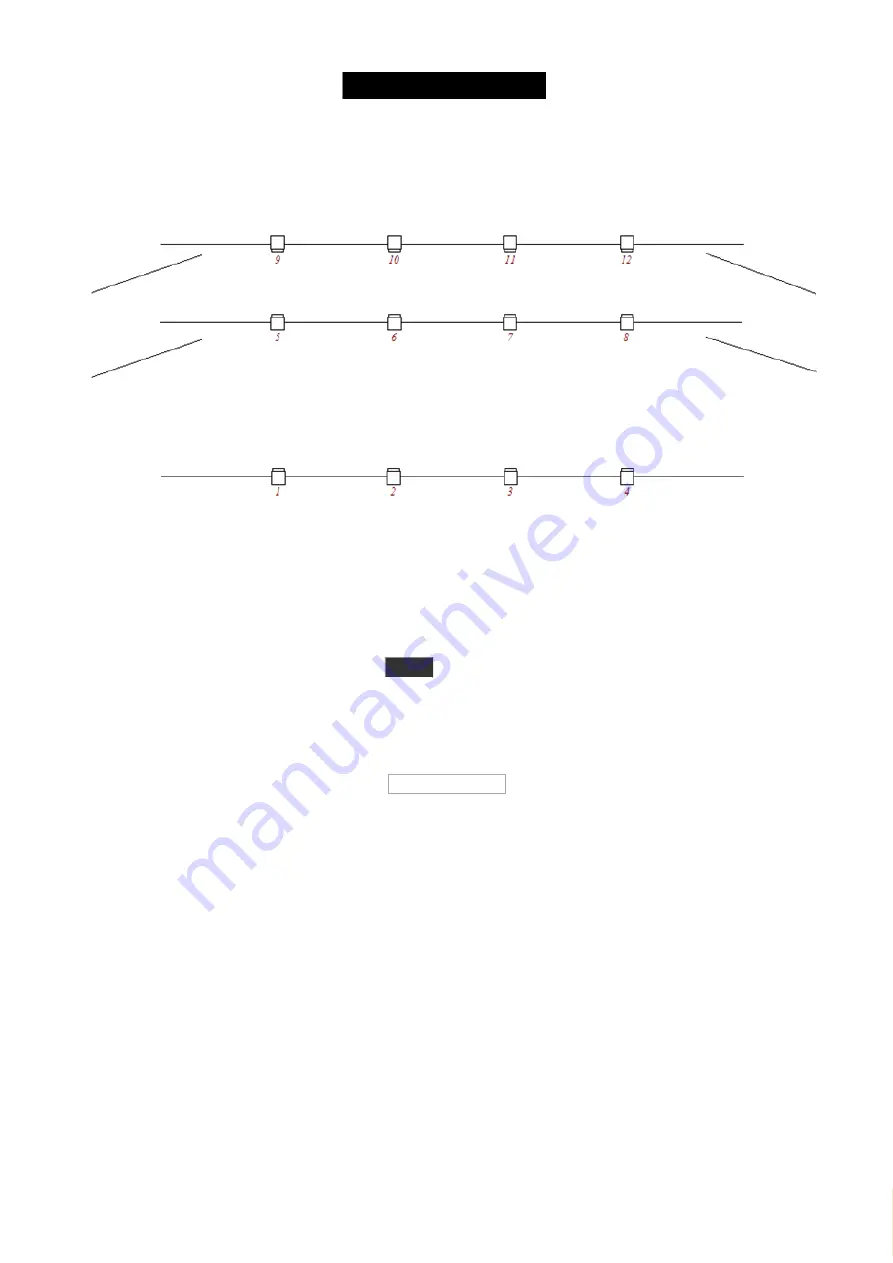
Figure 1: Light Plot - only dimmers.
So let's add those 12 dimmers to the setup in the console (don't worry, we'll add more fun stuff later).
Ignore what your screen says and just press the
Setup
key. Now turn the rightmost encoder until it says "
Select
Patch & Fixture Schedule" and then shortly press the encoder.
Notice how the external screen (and screens 3 to 5, if you have them) now shows you the help file for this view.
Please ignore it for now - I'm going to tell you what to do and what's what.
Press on the right side of screen 1 where it says Add New Fixtures .
This gives you
Add New Fixtures window
. All the green areas can be adjusted to make sure we add the correct
fixtures.
There are already a generic dimmer fixture selected in the 'Type' (don't worry about the number "2" and the "00"
part of the name).
We need to change the quantity to 12. The best way to do this is by turning the second encoder from the left until it
says "
Quantity 12".
We want to have a Fixture ID that begins with number 1 and the name can be changed later (so can the rest by the
way). We are also happy with patching them to universe 1 and from the first address and forward. It should look like
this when we are gone with our adjustment:
23


