3. Use the
Range in
or
Range out
controls to
switch the active application between splitscreen
and fullscreen views.
Switching the active pane or display using
the keypad
The Switch Active button is used to switch the active
pane on a multi application page and / or to switch
the active display.
With multiple displays connected and / or a multiple
application page displayed:
Cycle sequence
4
1
2
3
5
D12703-1
1. Press the
Switch Active
button to enter switch
mode.
2. Use the
Rotary Control
to cycle through the
available panes and / or displays.
The keypad will cycle through displays in the
order in which they were paired. On multi
application pages the Range buttons can be used
to switch the active application between full and
splitscreen.
3. Press the
Back
button or the
Switch Active
button to exit switch mode.
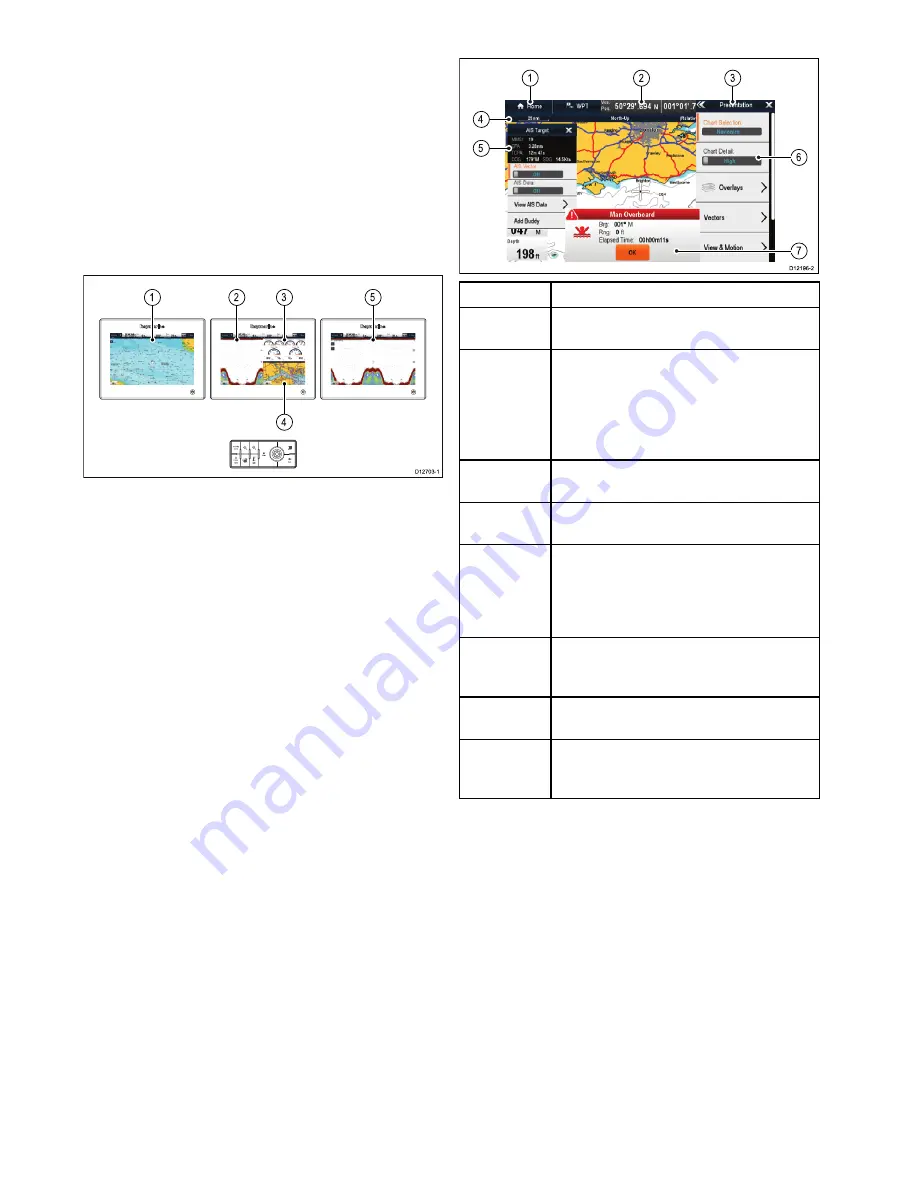
6.7 Screen overview
D12196-2
7
6
1
2
3
4
5
Screen item
Description
1
Home
— select the
Home
icon to access the
homescreen.
2
Databar
— provides information about your
vessel and its environment. The position
and type of information in the databar can
be customized from the
Homescreen >
Customize > Databar Set-up
menu, if
required.
3
Menu
— the menu options are specific to the
application that you are currently using.
4
Pop-up menu
— menu options are displayed
when the Menu is selected.
5
Pop-up messages
— alert you to a situation
(such as an alarm), or unavailable function.
Pop-up messages may require a response
from you — for example, select
OK
to silence
alarms.
6
Dialogs
— enable data to be selected, edited
or entered. Use in many common functions
— for example, editing a waypoint.
7
Context menu
— provides information and
options specific to each application.
8
Status bar
— provides information specific
to each application. This information cannot
be edited or moved.
Menus
Menus enable you configure settings and
preferences.
Menus are used in the:
•
Homescreen
— to configure your multifunction
display and externally-connected equipment.
•
Applications
— to configure the settings for that
particular application.
90
gS Series
Summary of Contents for Raymarine gS 195
Page 2: ......
Page 26: ...26 gS Series...
Page 43: ...D 36 mm 1 4 in E 39 2 mm 1 5 in F 90 mm 3 5 in Planning the installation 43...
Page 44: ...44 gS Series...
Page 110: ...110 gS Series...
Page 146: ...146 gS Series...
Page 174: ...174 gS Series...
Page 178: ...178 gS Series...
Page 196: ...196 gS Series...
Page 218: ...218 gS Series...
Page 328: ...328 gS Series...
Page 362: ...362 gS Series...
Page 418: ...418 gS Series...
Page 438: ...438 gS Series...
Page 439: ......
Page 440: ...www raymarine com...


