


Chapter 4
30
Installing or replacing print
cartridges
If you are replacing a print cartridge, begin with “Removing a print cartridge
from the printer.”
If you are installing a print cartridge for the first time, see “Installing or
changing a print cartridge.”
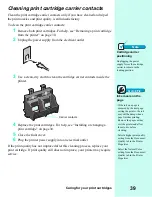
Removing a print cartridge from the printer
1
Make sure the Power light is on.
2
If you need to remove a print cartridge before you install a different
one, follow these steps:
3
Store or dispose of the print cartridge you remove.
4
Continue with “Installing or changing a print cartridge.”
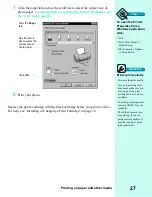
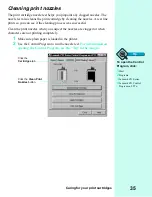
Installing or changing a print cartridge
For the best print quality, you must install the print cartridge in the printer and
update the printer software to reflect the changes you made.
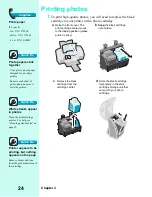
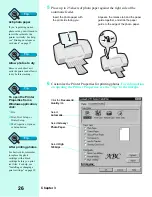
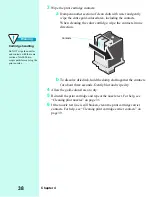
Raise the front cover. The
print cartridge carrier
moves to the loading
position unless the printer
is busy.
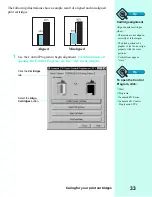
Pull the handle of
the print cartridge
you are replacing
toward you until
you hear a snap
.
Remove the print
cartridge by lifting
it up and out of
the printer.
a
b
c
Supplies
Black cartridge
•
Standard yield
P/N 12A1970
•
High yield
P/N 12A1975
Color cartridge
•
Standard yield
P/N 12A1980
•
High yield
P/N 12A1985
Photo cartridge
P/N 12A1990
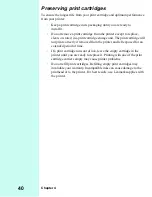
Note
Storing an extra
print cartridge
Use the print cartridge
storage unit that came with
your photo cartridge to keep
your extra print cartridge
fresh when you are not using
it.
Note
Cartridge disposal
Do not shake a used print
cartridge. The remaining ink
can leak. Before discarding
the used print cartridge,
place it in a leak-proof bag.
Summary of Contents for Z31 Color Jetprinter
Page 1: ...User s Guide ...
Page 16: ...Chapter 2 12 ...