


Chapter 3
16
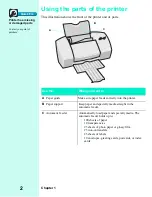
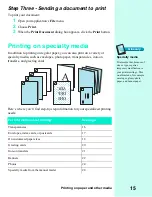
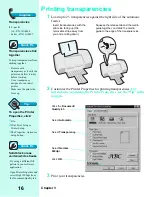
Printing transparencies
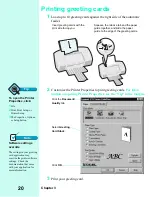
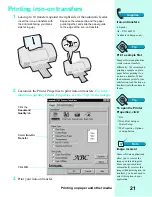
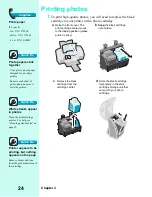
1
Load up to 25 transparencies against the right side of the automatic
feeder.
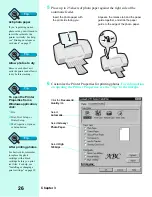
2
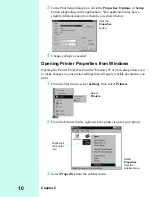
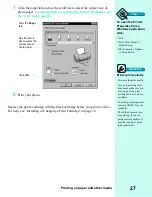
Customize the Printer Properties for printing transparencies.
For
instructions on opening the Printer Properties, see the “Tip” in the
margin
.
3
Print your transparencies
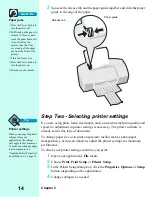
.
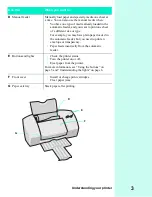
Squeeze the release tab and the media
guide together, and slide the media
guide to the edge of the transparencies.
Insert transparencies with the
print side facing up (the
removable stripe away from
you and pointing down).
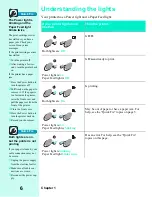
Click the Document/
Quality tab.
Select Automatic.
Select Normal
600dpi.
Click OK.
Select Transparency.
Supplies
Transparencies
(50 - pack)
•
A4 - P/N 12A0808
•
Letter - P/N 12A0807
Quick Fix
Transparencies stick
together
To keep transparencies from
sticking together:
•
Remove each
transparency as it exits the
printer and allow it to dry
before stacking.
•
Use a transparency
designed for an inkjet
printer.
•
Make sure the print side
faces up.
Tip
To open the Printer
Properties, click:
1
File.
2
Print, Print Setup or
Printer Setup.
3
The Properties, Options or
Setup button.
Quick Fix
Solid black areas
contain white streaks
•
Try using a different fill
pattern in your software
application.
•
Open Printer Properties and
select High 1200dpi from
the Document/Quality tab.
Summary of Contents for Z31 Color Jetprinter
Page 1: ...User s Guide ...
Page 16: ...Chapter 2 12 ...