Note:
When the printer software and any hardware options are installed, you may need to manually add the
options in the printer driver to make them available for print jobs. For more information, see
available options in the print driver” on page 27
Attaching cables
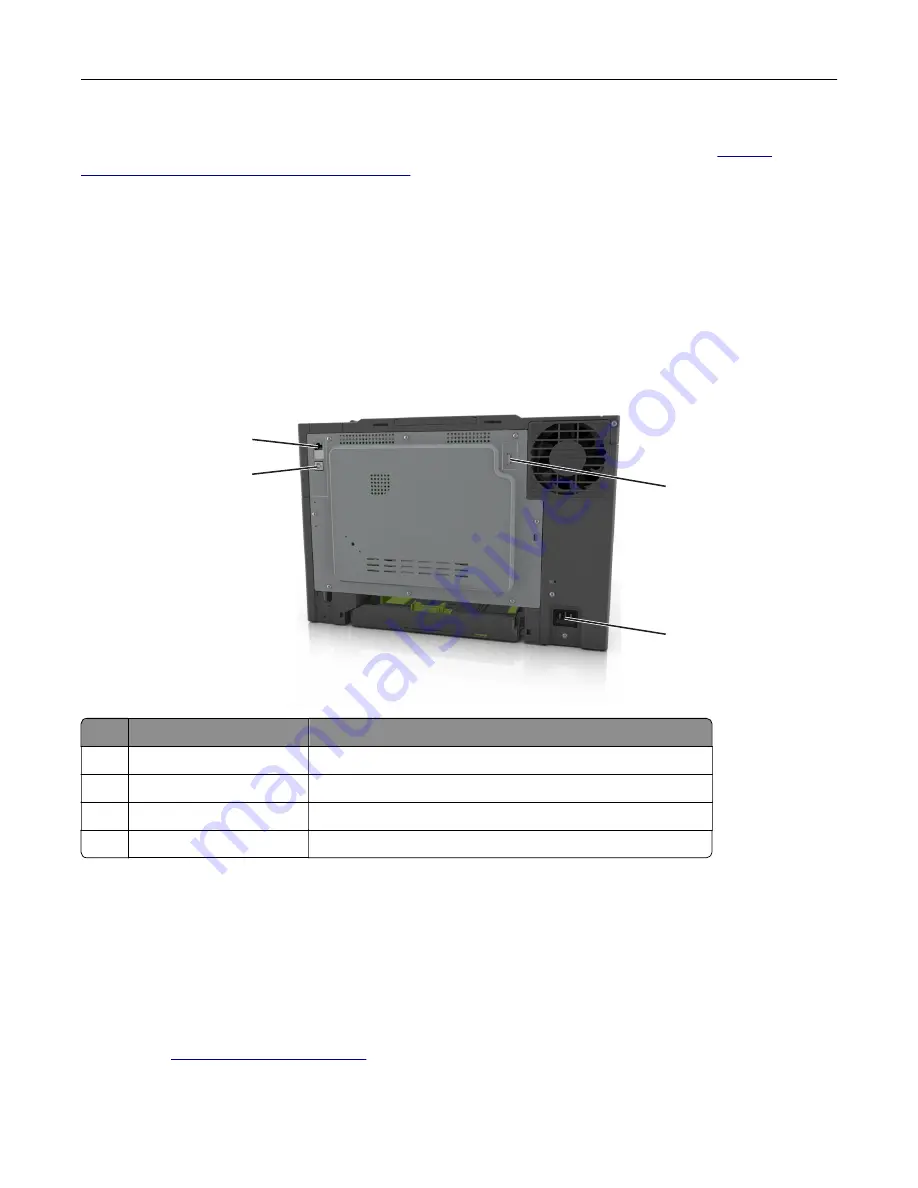
Connect the printer to the computer using a USB cable or to the network using an Ethernet cable.
Make sure to match the following:
•
The USB symbol on the cable with the USB symbol on the printer
•
The appropriate Ethernet cable to the Ethernet port
Warning—Potential Damage:
Do not touch the USB cable, any wireless network adapter, or the printer in the
area shown while actively printing. A loss of data or a malfunction can occur.
1
2
4
3
Use the
To
1
USB printer port
Connect the printer to a computer.
2
Ethernet port
Connect the printer to a network.
3
USB port
Attach an optional wireless network adapter.
4
Printer power cord socket Connect the printer to a properly grounded electrical outlet.
Setting up the printer software
Installing the printer software
1
Obtain a copy of the software installer package.
•
From the software CD that came with your printer.
•
Go to
, and then select your printer and operating system.
2
Run the installer, and then follow the instructions on the computer screen.
Additional printer setup
26
Summary of Contents for CS410 series
Page 114: ...3 Open the top door 1 2 4 Remove the right side cover 1 2 Maintaining the printer 114...
Page 122: ...16 Insert the waste toner bottle 17 Insert the right side cover Maintaining the printer 122...
Page 126: ...2 Open the top door 1 2 3 Remove the toner cartridges 1 2 Maintaining the printer 126...
Page 140: ...Below the fuser In the fuser access door 3 Close the front door Clearing jams 140...
Page 144: ...4 Reload paper Clearing jams 144...


