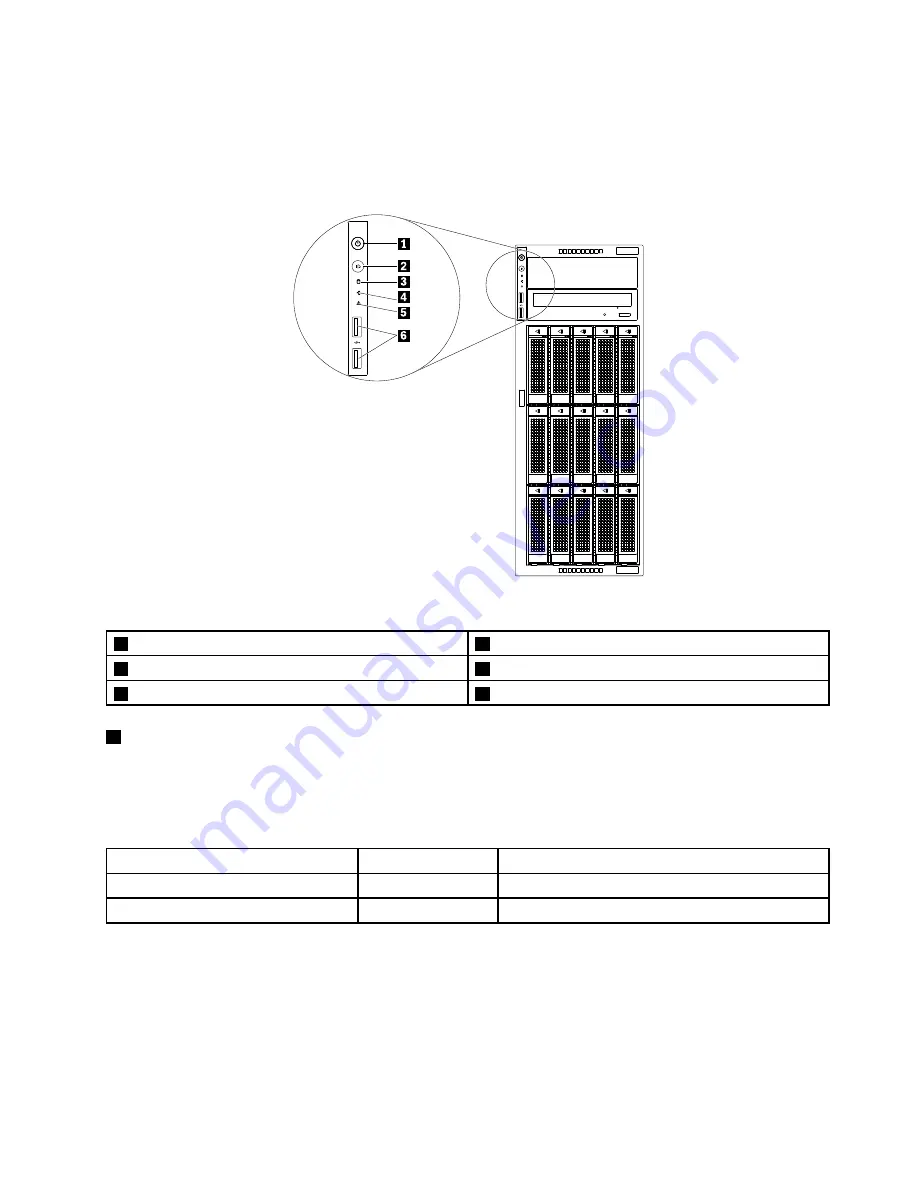
Front panel
The following illustration shows the control, connectors, and LEDs on the front panel of the server.
Note:
Depending on the model, your server might look different from the illustration in this topic.
Figure 4. Front panel
1
Power button with power status LED
2
System ID button with ID LED
3
Storage-drive activity LED
4
Network status LED
5
System health LED
6
USB 2.0 connectors (2)
1
Power button with power status LED
Press the power button to turn on the server when you finish setting up the server. Hold the power button
for several seconds to turn off the server if you cannot turn it off from the operating system. See Chapter
4 “Turning on and turning off the server” on page 53. The power status LED helps you to identify the
current power status.
Power status LED
Color
Description
On
Green
The server is on.
Off
None
The server is off.
Chapter 3
.
Product overview
21
Summary of Contents for ThinkServer TD350 70DG
Page 14: ...xii ThinkServer TD350 User Guide and Hardware Maintenance Manual ...
Page 18: ...4 ThinkServer TD350 User Guide and Hardware Maintenance Manual ...
Page 20: ...6 ThinkServer TD350 User Guide and Hardware Maintenance Manual ...
Page 66: ...52 ThinkServer TD350 User Guide and Hardware Maintenance Manual ...
Page 192: ...178 ThinkServer TD350 User Guide and Hardware Maintenance Manual ...
Page 202: ...188 ThinkServer TD350 User Guide and Hardware Maintenance Manual ...
Page 217: ...guidelines 69 Copyright Lenovo 2014 2015 203 ...
Page 218: ...204 ThinkServer TD350 User Guide and Hardware Maintenance Manual ...
Page 219: ......
Page 220: ......


