4.2 Selecting the Paper
4
4-7
Ma
ki
ng
C
o
pi
es
Chap
ter
4
7
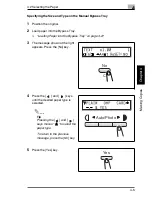
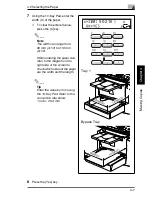
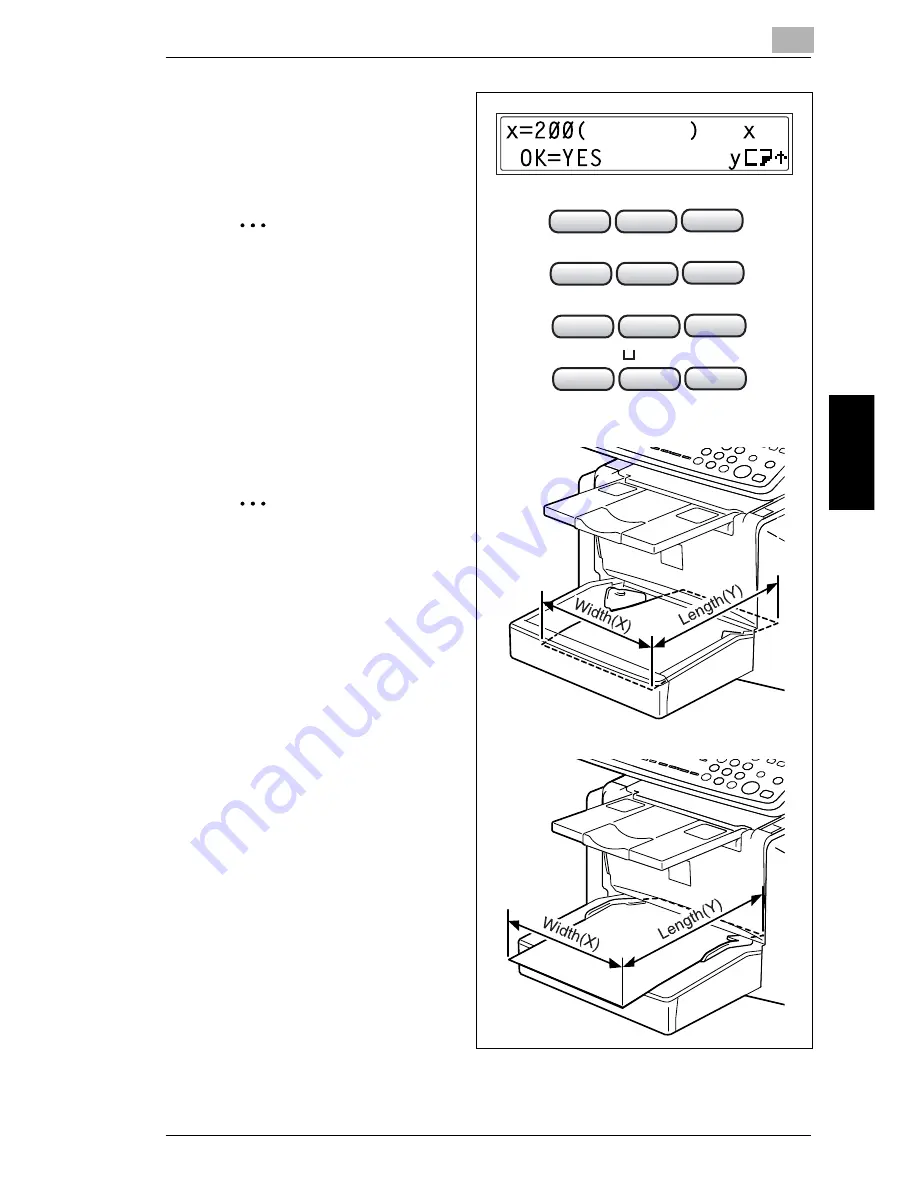
Using the 10-Key Pad, enter the
width (X) of the paper.
H
To clear the entered value,
press the [C] key.
Note
The width can range from
90 mm (3-1/2) to 216 mm
(8-1/2).
When entering the paper size,
refer to the diagram on the
right side of the screen to
check which sides of the paper
are the width and the length.
Tip
Enter the value by mm using
the 10-Key Pad. Refer to the
conversion rate below.
1 inch = 25.4 mm
8
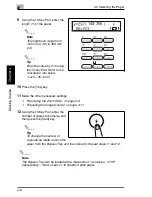
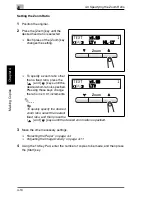
Press the [Yes] key.
90-216
Tray 1
Bypass Tray
A
HIJ
QPST
BCD
KLM
UVW
EFG
NOP
XYZ[
6
2
3
4
5
7
8
1
9
$
:
+
Summary of Contents for FAX 2900
Page 1: ...User s Guide KONICA MINOLTA FAX2900 FAX3900 ...
Page 11: ...Contents x ...
Page 12: ...Introduction Chapter 1 1 1Introduction ...
Page 34: ...Precautions Chapter 2 2 2Precautions ...
Page 40: ...Before Making Copies or Faxing Chapter 3 3 3Before Making Copies or Faxing ...
Page 77: ...3 3 11 Print Area 3 38 Before Making Copies or Faxing Chapter 3 ...
Page 78: ...Making Copies Chapter 4 4 4Making Copies ...
Page 93: ...4 4 6 Finishing Copies 4 16 Making Copies Chapter 4 ...
Page 94: ...Faxing Chapter 5 5 5Faxing ...
Page 109: ...5 5 4 Checking Transmission Results 5 16 Faxing Chapter 5 ...
Page 110: ...Fax Transmission Reception Methods Chapter 6 6 6Fax Transmis sion Reception Methods ...
Page 138: ...Using the Utility Mode Chapter 7 7 7Using the Utility Mode ...
Page 216: ...When a Message Appears Chapter 8 8 8When a Message Appears ...
Page 247: ...8 8 11 When Faxing Is Not Performed Correctly 8 32 When a Message Appears Chapter 8 ...
Page 248: ...Internet Fax Network Scan Chapter 9 9 9Internet Fax Network Scan ...
Page 332: ...Miscellaneous Chapter 10 10 10Miscella neous ...
Page 342: ...Copyright 2004 1392 7701 01 http konicaminolta com ...

