background image

107

„

{

Connecting the Instrument to a PC

With the PC as a host, a connection to the instrument can be established using Bluetooth communication.

Operating Procedure

Verify that the instrument power has been turned 
ON.

Verify that the instrument’s Bluetooth function has 
been turned ON. Also make sure the Bluetooth 
function is not being used to connect to a printer 
and that the USB cable is not being used to connect 
to the PC.

Start the Bluetooth utility on the PC.

Search for nearby Bluetooth devices, and select 
“CM-A219” from the list of displayed devices.

Enter the PIN code for the instrument (refer to step 4 
on page 106
) on the PC.

Open the Bluetooth serial port to connections.

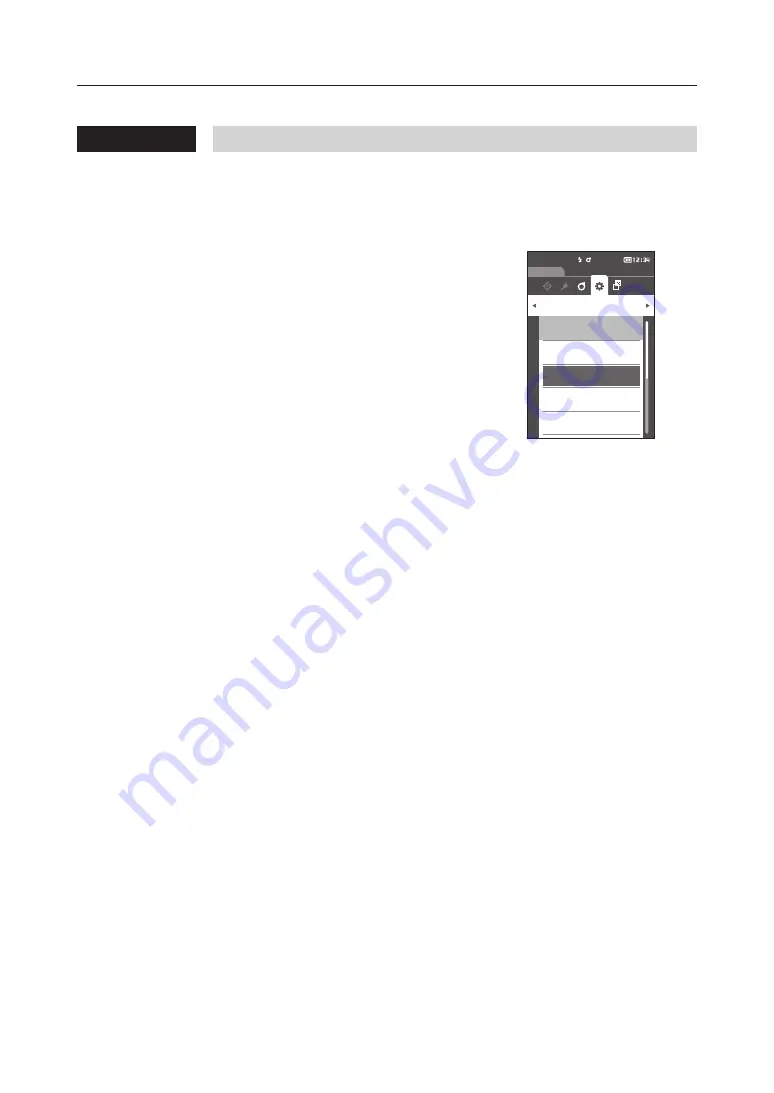
Once the connection has been established, the remote icon 
will be displayed in the status bar on the instrument.

Communication setup

Sample

Setting

0002 TARGET-2

USB host

ON

Meter PIN code

0000

Printer address

000000000000

Auto print

OFF

Summary of Contents for CM-M6

Page 1: ...Instruction Manual Please read before using the instrument...

Page 2: ...ng used in text Official name Bluetooth Bluetooth Trademarks The Bluetooth mark and logo are registered trademarks of The Bluetooth SIG Inc and are used under license The KONICA MINOLTA logo and symbo...

Page 3: ...notes a prohibited operation Never disassemble the instrument This symbol indicates alternating current AC This symbol indicates direct current DC This symbol indicates class II protection against ele...

Page 4: ...ratch or place heavy objects on the cables Doing so may damage the cable and cause a fire or electric shock Do not disassemble or modify the instrument or the AC adapter Doing so may cause a fire or e...

Page 5: ...ture or catch fire If the lithium ion battery is found to be leaking or emitting an unusual odor keep the battery away from any open flames The electrolytic solution from the battery may catch fire ca...

Page 6: ...ld be used in an environment with an ambient temperature between 0 C and 40 C and a relative humidity of 85 or less at 35 C with no condensation Use of the instrument outside this range will result in...

Page 7: ...ose the cap so that the plate is not exposed to light Hold the white calibration cap attached to the instrument and do not allow the instrument to move Doing so may cause the instrument to become sepa...

Page 8: ...The white calibration plate may become discolored if left exposed to light Therefore make sure to close the cap when the plate is not in use in order to prevent the plate from being exposed to light T...

Page 9: ...erials are either disposed of or recycled correctly in accordance with local laws and regulations In the United States and Canada you can recycle your lithium ion battery through the Call2Recycle prog...

Page 10: ...25 Display Language 26 Instrument Operation Display 26 Display LCD Screen 26 Status Bar Icons 27 Control Keys 28 Data Saving 29 Chapter 2 Measurement 30 Flow of Measurement 31 Calibration 32 Zero Cali...

Page 11: ...lock 91 Screen Brightness 92 Display Orientation 93 Buzzer 94 Measurement Button 95 Power saving 96 Displaying Diagnosis Information 97 Displaying the Instrument Information 98 Chapter 4 Other Functio...

Page 12: ...to select OFF or ON Memo If the annual calibration notification message is set to ON the annual calibration message will be displayed when the specified day approaches The date of the next calibratio...

Page 13: ...strument Accessories 11 Standard Accessories 11 Optional Accessories 12 System Diagram 14 Names and Functions of Parts 15 Handling the Instrument 17 White Calibration Cap 20 Zero Calibration Box 21 Cl...

Page 14: ...nt Insert the battery into the instrument and connect the instrument to the AC adapter to charge The battery itself can also be charged using a separately sold charger White Calibration Cap CM A226 Us...

Page 15: ...ium ion battery Bluetooth Module CM A219 Used for establishing wireless communication and transferring data between the instrument and a PC or a printer Cable Set for Bluetooth Module CM A225 Used to...

Page 16: ...e lithium ion battery The battery charger must be connected to the AC adapter AC A311 supplied with the instrument for use Color Plates White black and 12 other colors Used for simple diagnosis of ins...

Page 17: ...uetooth Printer commercially available USB Cable commercially available USB Converter Cable commercially available Lithium Ion Battery CM A223 White Calibration Cap CM A226 Zero Calibration Box CM A22...

Page 18: ...15 Names and Functions of Parts 1 8 9 4 6 5 2 3 10 11 12 14 13 7...

Page 19: ...connection terminal Type B Used to connect the instrument to a PC when using the supplied USB cable IF A17 Memo Power will not be supplied through the cable while the instrument is connected to the PC...

Page 20: ...he strap to become detached allowing the instrument to fall and become damaged 1 Pass one end of the hand strap through the hand strap attachment hole 2 Pass the strap through the buckle and secure it...

Page 21: ...leak and damage the instrument Do not use any battery other than the dedicated lithium ion battery Doing so may cause the batteries to rupture or result in decreased battery life Do not touch or shor...

Page 22: ...Adapter CAUTION To supply AC power to the instrument always use the AC adapter AC A311 supplied with the instrument Before connecting or disconnecting the AC adapter jack or plug make sure that the in...

Page 23: ...ation cap nameplate Serial No Instrument nameplate Attaching to Removing from Instrument Attaching the White Calibration Cap 1 Hold the instrument securely 2 Align the notches on the outer circumferen...

Page 24: ...x 1 Hold the instrument securely 2 Align the specimen measuring port on the instrument with the hole of the zero calibration box and place the instrument on the zero calibration box so that there is n...

Page 25: ...ion box as shown in the diagram 2 Place the white calibration cap so that the white calibration plate is facing downward align the screw holes for mounting the white calibration cap two locations with...

Page 26: ...23 Removing the White Calibration Cap 1 Open the zero calibration box 2 Release the screws holding the white calibration cap in place in the zero calibration box 3 Re assemble the zero calibration box...

Page 27: ...e dirty When not in use prevent the white calibration plate from being exposed to light by ensuring the white calibration plate is facing downward storing it in the hard case optional or taking other...

Page 28: ...e displayed followed by the date and time setting screen Configure the settings according to pages 89 and 91 OperatingProcedure Turning the Power OFF 1 Slide the power switch to the side Memo When pow...

Page 29: ...tions or to change displays MENU ESC LCD screen Control keys Display LCD Screen The LCD screen displays measurement settings measurement results and messages It also indicates the status of the instru...

Page 30: ...lash status Flash ready Insufficient light 5 Calibrating Measurement possible Measurement possible calibration recommended Measurement not possible calibration required 6 None Auto print Auto print ON...

Page 31: ...Settings screen or changes the selected value To select the item indicated by the cursor press the Confirmation key 4 Confirmation key Sets the item or setting indicated by the cursor on the various s...

Page 32: ...nstrument are saved automatically within the instrument This instrument can store data for up to 200 targets and 800 measurements Data on the instrument can also be imported to a PC using the optional...

Page 33: ...ero Calibration 32 White Calibration 34 Measurement 36 Average Measurement 37 Measurement Color Difference 38 Target Setting 38 Checking Color Differences 38 Pass Fail Judgment for Color Difference 39...

Page 34: ...ssary such as when the power is first turned ON Measurement condition settings Page 66 Zero calibration Page 32 Only when required White calibration Page 34 When color difference is measured When colo...

Page 35: ...or dirt that has collected in the optical system humidity repeated operation or vibration and shock exerted on the instrument In this case performing zero calibration periodically is recommended Note...

Page 36: ...ation Notes Do not move the instrument during zero calibration Memo White calibration must be performed when performing zero calibration After zero calibration is complete a screen prompting white cal...

Page 37: ...dure Start the procedure from the measurement screen Although white calibration can be performed from the prompt when the power is turned ON and from the screen following zero calibration the followin...

Page 38: ...e measurement key or the measurement button White calibration will be performed 5 After white calibration is complete the display will return to the Calibration screen Calibration Calibrating to white...

Page 39: ...en is measured and the results are displayed on the screen The measurement data No is automatically assigned sequentially in the order of measurement Memo When the number of measurement data sets reac...

Page 40: ...the color of the sample is not uniform Measurements are performed at different positions and the average is calculated This allows an average to be obtained for the entire specimen Notes After an ave...

Page 41: ...tant OperatingProcedure 1 Press to bring up the Target screen 2 Use or to move the cursor to the number to be set 3 Set the specimen measuring port on the sample to measure 4 Press the measurement key...

Page 42: ...data recalculations and pass fail judgments will be performed Pass Fail Judgment Based on Tolerances If the measured color difference is outside the tolerances set for the target color the value will...

Page 43: ...1 0 18 0 31 0 31 0 89 0 62 0 20 0 06 0 28 0 26 0 07 0 09 0 08 0 03 0 03 0 02 2 C 10 D65 1 2 The pass judgment mark is displayed and the background color is changed to the warning color yellow The back...

Page 44: ...12 0 12 0 12 0 12 15 15 25 45 75 110 FF Ec m Ec EcMax 0001 T 1 2016 08 23 16 28 14 0001 T 1 None 10 F10 1 2 Sample 0010 S 10 0 02 0 04 0 10 0 05 0 05 0 03 0 05 0 05 0 05 0 05 0 05 0 05 0 10 0 10 0 10...

Page 45: ...e Common Aspects of Target List and Detail Screens If no data exists the data value column will be blank Press to bring up the Sample screen Press MENU to bring up the Target menu screen Pressing the...

Page 46: ...the Display type setting Press to display the previous sample Press to display the following sample Press to bring up the previously displayed page Press to bring up the following displayed page Comm...

Page 47: ...ndling the Sample 58 Print 59 Edit Name 60 Sample Data Management 61 Measurement Condition Settings 66 Measurement Condition Settings 66 Measurement Option Settings 67 Display Condition Settings 72 Di...

Page 48: ...ample No selection Delete all data P 65 OK Cancel Measurement cond Measurement setup Measurement angle P 68 15 15 25 45 75 110 Auto average P 69 1 to 10 Times Manual average P 70 1 to 10 Times Manual...

Page 49: ...0000 Instrument setup User type P 88 Administrator Worker Language P 89 English Deutsch Fran ais Espa ol Italiano Portugu s Polski T rk e Date format P 90 yyyy mm dd mm dd yyyy dd mm yyyy Date time P...

Page 50: ...ts are still possible Delete all data Deletes all of the target color data Pass Fail Edit tolerance Specify the tolerance used for pass fail judgment of measured data for each target color Warning lev...

Page 51: ...printing is attempted Display the target color to be printed on the Target screen in advance OperatingProcedure Start the procedure from the Target menu screen 1 Use or to move the cursor to Print da...

Page 52: ...To delete the character to the left of the cursor in the text box move the cursor to and press the Confirmation key 4 After inputting the characters move the cursor to OK and press the Confirmation k...

Page 53: ...the Confirmation key The Delete data screen is displayed 2 Use or to move the cursor to OK and press the Confirmation key to delete Memo Even if deletion is performed numbers do not shift upward That...

Page 54: ...ta number Use or to specify a value Use or to move between digits 3 Press the Confirmation key The selection is confirmed and the screen returns to the Target screen Notes If ESC is pressed without pr...

Page 55: ...ect data and then press the Confirmation key The Protect data screen is displayed 2 Use or to move the cursor to the desired item Settings OFF Do not protect the data ON Protect the data 3 Press the C...

Page 56: ...to move the cursor to OK and press the Confirmation key to delete all data When the deletion is complete the screen returns to the Target screen Moving the cursor to Cancel and pressing the Confirmat...

Page 57: ...ther display color values do not exceed the tolerance judgment will be shown as Warning Memo The default judgment criteria is set before judgment criteria for each target is set For details refer to p...

Page 58: ...if Audi2000 Ec or Audi2000 Ep is enabled in addition to the tolerance for each angle the tolerances for average m Ec or m Ep and maximum EcMax or EpMax can also be set When setting the tolerance for...

Page 59: ...firmation key The Warning level screen is displayed 2 Use or to change the value Settings 000 to 100 3 Press the Confirmation key after completing the changes The setting is confirmed and the screen r...

Page 60: ...to change the value Move the cursor between the digits of the value by pressing or Settings 0 01 to 30 00 Press the Confirmation key to confirm every time the setting of an item is changed 4 After al...

Page 61: ...gement Delete data Delete the selected measurement data Set Sample as Target Set the measurement data as the target data Change Target reference Change target reference Change list position Jump to th...

Page 62: ...s such as the printer being turned off when printing is attempted Display the sample to be printed on the Sample screen in advance SettingProcedure Start the procedure from the Sample menu screen 1 Us...

Page 63: ...step 2until the necessary characters have been entered To delete the character to the left of the cursor in the text box move the cursor to and press the Confirmation key 4 After inputting the charact...

Page 64: ...art the procedure from the Sample menu Data management screen 1 Use or to move the cursor to Delete data and then press the Confirmation key The Delete data screen is displayed 2 Use or to move the cu...

Page 65: ...as Target screen is displayed 2 The target color data number being used will be highlighted Use or to move the cursor to the color difference reference color number and then press the Confirmation key...

Page 66: ...ess the Confirmation key When the target color data is set the screen returns to the Sample screen If ESC is pressed the target changes will not be applied and the screen will return to the Data manag...

Page 67: ...tween digits 3 Press the Confirmation key The selection is confirmed and the screen returns to the Sample screen Notes If ESC is pressed without pressing the Confirmation key the settings will not be...

Page 68: ...and press the Confirmation key to delete all data When the deletion is complete the screen returns to the Sample screen Moving the cursor to Cancel and pressing the Confirmation key will cancel the de...

Page 69: ...as the measurement conditions Measurement setup Sets the measurement angle number of auto average or manual average measurements to perform and whether the tilt detection function should be turned OF...

Page 70: ...erforming manual averaging Tilt detection OFF ON OperatingProcedure Start the procedure from the measurement screen 1 Press MENU and then use or to display the Measurement cond menu screen Memo To ret...

Page 71: ...pecified angle Selections 15 15 25 45 75 110 3 After selecting the angle use or to move the cursor to ON and then press the Confirmation key The selection is confirmed and the screen returns to the Me...

Page 72: ...above and below the count in the count selection Use or to specify a value Settings 01 to 10 Times Specify the number of measurements from 1 to 10 to perform when using auto averaging 3 Press the Con...

Page 73: ...sed without pressing the Confirmation key the settings will not be changed and the screen will return to the Measurement setup screen With manual average measurement measurement is performed for the c...

Page 74: ...screen Tilt Detection This instrument features a warning function that alerts users if the instrument is tilted beyond the measurement range Turning this function ON will cause a warning to appear if...

Page 75: ...figured for the display conditions Observer Illuminant 1 Select the observer illuminant used to measure the colorimetric data Observer Illuminant 2 Select the secondary illuminant used for MI metameri...

Page 76: ...alue of spectral distribution in the ultraviolet region Color temperature 6774K D65 Standard illuminant D65 Daylight Color temperature 6504K D50 Standard illuminant D50 Daylight Color temperature 5003...

Page 77: ...desired item Settings The setting values are the same as those for Observer Illuminant 1 and None 3 Press the Confirmation key The selection is confirmed and the screen returns to the Observer Illumin...

Page 78: ...OperatingProcedure Start the procedure from the measurement screen 1 Press MENU and then use or to display the Measurement cond menu screen Memo To return to the previous screen press MENU or ESC 2 Us...

Page 79: ...Determines whether the color difference related to the target are within the tolerance range set in advance If within the tolerance the judgment will be displayed as Pass If even one difference is not...

Page 80: ...lor space Selections L a b L a b color space L C h L C h color space 3 Press the Confirmation key to confirm and then press ESC The selection is confirmed and the screen returns to the previous screen...

Page 81: ...uation Parameters can be changed E00 E2000 CIE DE2000 color difference equation Parameters can be changed Ec DIN6175 Ec DIN 6175 2 color difference equation Ep DIN6175 Ep DIN 6175 2 color difference e...

Page 82: ...Moreover measuring with Left selected requires the use of a sample with a flat measurement surface and the instrument must not be tilted when measurement is performed 3 Press the Confirmation key to c...

Page 83: ...r each target is set Changing the default judgment criteria after the judgment criteria has already been set for individual target colors the judgment criteria specified for these target colors will n...

Page 84: ...ting the tolerance for m Ec m Ep EcMax or EpMax setting a value for any angle will cause that value to be shown for all angles in the tolerance setting screen Settings L a b C H FF 20 00 to 20 00 Othe...

Page 85: ...anged and the screen will return to the Default data setup screen Parametric Coefficient Setting Memo The parametric coef is set to 1 00 under the initial settings Parametric coefficients can be edite...

Page 86: ...tem is changed 4 After all settings have been configured use or to move the cursor to OK and then press the Confirmation key The setting is confirmed and the screen returns to the Parametric coef scre...

Page 87: ...procedure from the Setting screen 1 Use or to move the cursor to Calibration setup and then press the Confirmation key Sample Default data setup 0002 TARGET 2 Calibration setup Diagnosis info Instrume...

Page 88: ...tion key 2 and will be displayed above and below the numbers representing the time until the message is displayed Use or to specify a value Settings 01 to 24 h Set the time interval between the previo...

Page 89: ...age even if the next calibration date is near ON Show the annual calibration message when the next calibration date approaches 2 Use or to move the cursor to select OFF or ON Memo If the annual calibr...

Page 90: ...s MENU or ESC 2 Use or to move the cursor to Instrument setup and then press the Confirmation key The Instrument setup screen is displayed 3 After setting the measurement instrument conditions press t...

Page 91: ...an perform are as follows Sample browsing measurement printing deletion Target browsing printing Calibration Instrument info displaying Change user type 3 Press the Confirmation key to confirm and the...

Page 92: ...age Moving the cursor past the top or bottom of the list will show additional language settings that cannot fit on the screen Settings English English Japanese Deutsch German Fran ais French Espa ol S...

Page 93: ...d yyyy Display the date in the format of month day year dd mm yyyy Display the date in the format of day month year 3 Press the Confirmation key to confirm and then press ESC The selection is confirme...

Page 94: ...o 59 The value increases decreases by one with each button press Holding down or increases decreases the value by one continuously 4 Press the Confirmation key The setting is confirmed Notes If ESC is...

Page 95: ...2 Use or to move the cursor to the desired brightness Settings 5 Light 4 3 Standard 2 1 Dark 3 Press the Confirmation key to confirm and then press ESC The selection is confirmed and the screen return...

Page 96: ...tart the procedure from the Setting Instrument setup screen 1 Use or to move the cursor to Direction and then press the Confirmation key The display will flip upside down and return to the Instrument...

Page 97: ...or to move the cursor to ON or OFF Settings OFF ON Standard 3 Press the Confirmation key to confirm and then press ESC The selection is confirmed and the screen returns to the Instrument setup screen...

Page 98: ...ed 2 Use or to move the cursor to ON or OFF Settings OFF Disabled ON Enabled 3 Press the Confirmation key to confirm and then press ESC The selection is confirmed and the screen returns to the Instrum...

Page 99: ...to 00 power saving is off 3 Press the Confirmation key to confirm and then press ESC The selection is confirmed and the screen returns to the Instrument setup screen Notes If ESC is pressed without p...

Page 100: ...tion key 2 The instrument status is diagnosed and the results are displayed Display 3 Press ESC The display will return to the Setting screen Sample Default data setup 0002 TARGET 2 Calibration setup...

Page 101: ...or to Instrument info and then press the Confirmation key 2 The instrument information is displayed Display Items Product name Instrument product name Version Instrument firmware version Serial No Ins...

Page 102: ...99...

Page 103: ...100 4 Other Functions Chapter 4 Other Functions Connecting to an External Device 101 Connecting to a Personal Computer 101 Communication Setup 105 Connecting to a Printer 108...

Page 104: ...o use the instrument s Bluetooth function to connect to a PC with Bluetooth communication capabilities the CM A219 Bluetooth module must be correctly connected to the instrument and a Bluetooth commun...

Page 105: ...hat the cable has sufficient length Putting tension on the cable may cause connection failure or wire breakage Firmly push in the USB cable connector that matches the shape of the port connection term...

Page 106: ...Connecting to both a PC and a printer at the same time however is not possible A simultaneous connection via the USB cable and the Bluetooth function is not possible Should both connections be establ...

Page 107: ...ting the Bluetooth Module OperatingProcedure 1 Attach the Bluetooth module CM A219 to the Micro USB connector on the Spectrophotometer CM M6 using the cable set for Bluetooth module CM A225 USB connec...

Page 108: ...setting must be set to ON in order to use the instrument via Bluetooth Memo The USB host is set to OFF under the initial settings OperatingProcedure Start the procedure from the Setting Communication...

Page 109: ...00 4 and are displayed above and below the PIN Use or to specify a value Use or to move between digits The personal identification number PIN should consist of between four and eight numbers 0 to 9 5...

Page 110: ...er and that the USB cable is not being used to connect to the PC 3 Start the Bluetooth utility on the PC 4 Search for nearby Bluetooth devices and select CM A219 from the list of displayed devices 5 E...

Page 111: ...nection failure or wire breakage Firmly push in the USB cable connector that matches the shape of the port connection terminal until it can go in no further When connected to a printer make sure that...

Page 112: ...rinter other than the CM A234 optional Bluetooth printer may result in incorrect operation Printing is possible at distances up to 10 m but the distance at which operation can be performed properly de...

Page 113: ...ice Notes This section describes general procedures For more information please refer to the instruction manuals included with the Bluetooth printer CM A234 OperatingProcedure 1 Ensure use of the Blue...

Page 114: ...oth ON Meter PIN code 0000 Printer address 000000000000 Auto print ON 2 Enter the address of the Bluetooth device to be connected Sample 0002 TARGET 2 0123456789AB Printer address 0 1 2 3 4 5 A B C D...

Page 115: ...fy a value Use or to move between digits The personal identification number PIN should consist of between four and eight numbers 0 to 9 Sample 0002 TARGET 2 01234567 Printer PIN code 0 1 2 3 4 5 6 OK...

Page 116: ...tingProcedure Start the procedure from the Target or Sample screen 1 To print the target and sample display press the MENU key with the data to be printed displayed The Target menu screen or the Sampl...

Page 117: ...34 56 14 65 5 44 110 35 67 15 54 6 55 2014 01 01 09 00 00 T001 TARGET name Serial No Measurement Data Color Difference Target Color Data Pass Fail Result Measurement Data Color Difference Target Colo...

Page 118: ...ation Print Example 4 Ec Audi2000 Ave and Max output S N 0123456 SAMPL D001 FAIL SAMPLE name 10 D65 Ec m Ec EcMax 15 0 55 0 64 0 88 15 0 57 0 64 0 88 25 0 44 0 64 0 88 45 0 66 0 64 0 88 75 0 73 0 64 0...

Page 119: ...116 5 Troubleshooting Chapter 5 Troubleshooting Message List 117 Troubleshooting 119...

Page 120: ...r The USB host is not working Restart the device If the error occurs again please contact the nearest service center The battery status cannot be obtained Please contact the nearest service center An...

Page 121: ...unction Display The flow of operation is displayed Perform the operation according to the information displayed Perform zero calibration Please set the instrument on the zero calibration box and calib...

Page 122: ...fluctuate Is the instrument and specimen kept stationary during measurement Do not allow the instrument and specimen to move during measurement Data cannot be input to a PC No commands from the PC ar...

Page 123: ...120 6 Appendix Chapter 6 Appendix Main Specifications 121 Dimensions 122...

Page 124: ...lluminant A C D50 D65 F2 F6 F7 F8 F10 F11 F12 User configured illuminant simultaneous evaluation with two illuminants possible Displayed data Colorimetric values color difference values graph line gra...

Page 125: ...122 6 Appendix Dimensions Unit mm 50 M6 1 0 DEPTH 6 M6 1 0 DEPTH 6 55 33 152 3 49 5 81 239...

Page 126: ...123...

Page 127: ...RESULTING FROM THE MISUSE MISHANDLING UNAUTHORIZED MODIFICATION ETC OF THIS PRODUCT OR FOR ANY INDIRECT OR INCIDENTAL DAMAGES INCLUDING BUT NOT LIMITED TO LOSS OF BUSINESS PROFITS INTERRUPTION OF BUS...

Page 128: ...En 9222 A9DT 13 2016 KONICA MINOLTA INC BIFCGK...

Reviews: