bizhub 42/36
8-10
8.2
Default settings of the fax driver
8
8.2
Default settings of the fax driver
When you have installed the fax driver, you need to change the initialization conditions such as options, user
authentication and account track functions and enable functions of the machine from the [Printing Preferenc-
es] window of the fax driver.
NOTICE
If the installed options, user authentication and account track functions for the machine are not specified on
the [Configure] tab, the option functions cannot be used from the [Printing Preferences] window of the fax
driver. Be sure to configure the settings for the installed options.
8.2.1
Displaying the Properties window
1
Open the [Printers] window (in Windows 7/Server 2008 R2, open the [Devices and Printers] window, in
Windows XP/Server 2003, open the [Printers and Faxes] window).
%
In Windows Vista/Server 2008, click [Start], open [Control Panel], and then click [Printers] in [Hard-
ware and Sound].
When [Control Panel] is displayed in Classic View, double-click [Printers].
%
In Windows 7/Server 2008 R2, click [Start], then [Devices and Printers].
%
In Windows 7/Server 2008 R2, if [Devices and Printers] is not displayed in the [Start] menu, open
[Control Panel] from the [Start] menu, and select [View devices and printers] under [Hardware and
Sound].
%
In Windows XP/Server 2003, click [Start], then [Printers and Faxes].
%
In Windows XP/Server 2003, if [Printers and Faxes] is not displayed in the [Start] menu, open [Con-
trol Panel] from the [Start] menu, select [Printers and Other Hardware], then [Printers and Faxes].
When [Control Panel] is displayed in Classic View, double-click [Printers and Faxes].
2
Open [Printer Properties].
%
In Windows XP/Vista/Server 2003/Server 2008, right-click the icon for the installed fax driver, and
then click [Properties].
%
In Windows 7/Server 2008 R2, right-click the icon for the installed fax driver, and then click [Printer
Properties].
8.2.2
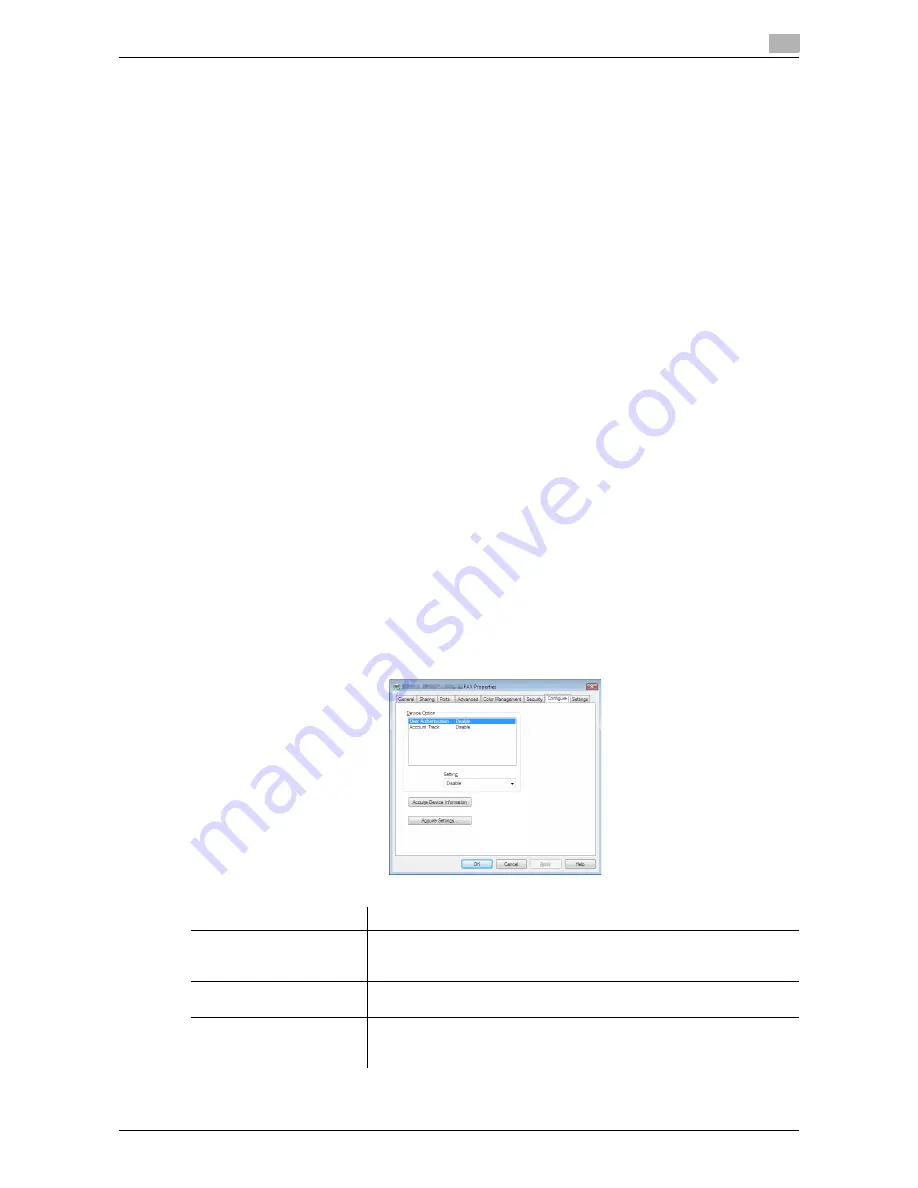
[Configure] tab
Item Name
Functions
[Device Option]
Configure the status of the options installed on this machine and user au-
thentication/account track. Specify the status of each item in the [Setting]
box.
[Acquire Device Informa-
tion]
Click this button to communicate with this machine and load the status of
the installed options.
[Acquire Settings...]
Click this button to configure conditions such as the destination when you
perform [Acquire Device Information].
When automatically acquiring device information, enable [Auto].
Summary of Contents for bizhub 36
Page 1: ...User s Guide Fax Operations ...
Page 8: ...1 Introduction ...
Page 12: ...2 Before using the Fax function ...
Page 21: ...3 Control Panel Liquid Crystal Display ...
Page 29: ...4 Registering the basic information ...
Page 35: ...5 Installation of Fax Driver ...
Page 57: ...6 Sending G3 I FAX ...
Page 86: ...7 Receiving G3 I FAX ...
Page 96: ...8 Sending a PC FAX ...
Page 121: ...9 Convenient functions G3 I FAX PC FAX ...
Page 129: ...10 Description of reports and lists ...
Page 141: ...bizhub 42 36 10 13 10 6 Common lists 10 ...
Page 142: ...11 User Mode Settings ...
Page 148: ...12 PageScope Web Connection ...
Page 170: ...13 Troubleshooting for fax problems ...
Page 179: ...14 Appendix ...
Page 189: ...15 Index ...
Page 195: ...Copyright 2011 A3EW 9554FD 11 Printed in China 2011 11 http konicaminolta com ...


