


Reducing Images to Create Binding Margin (Reduce&Shift)
(continued)
9-45
2.
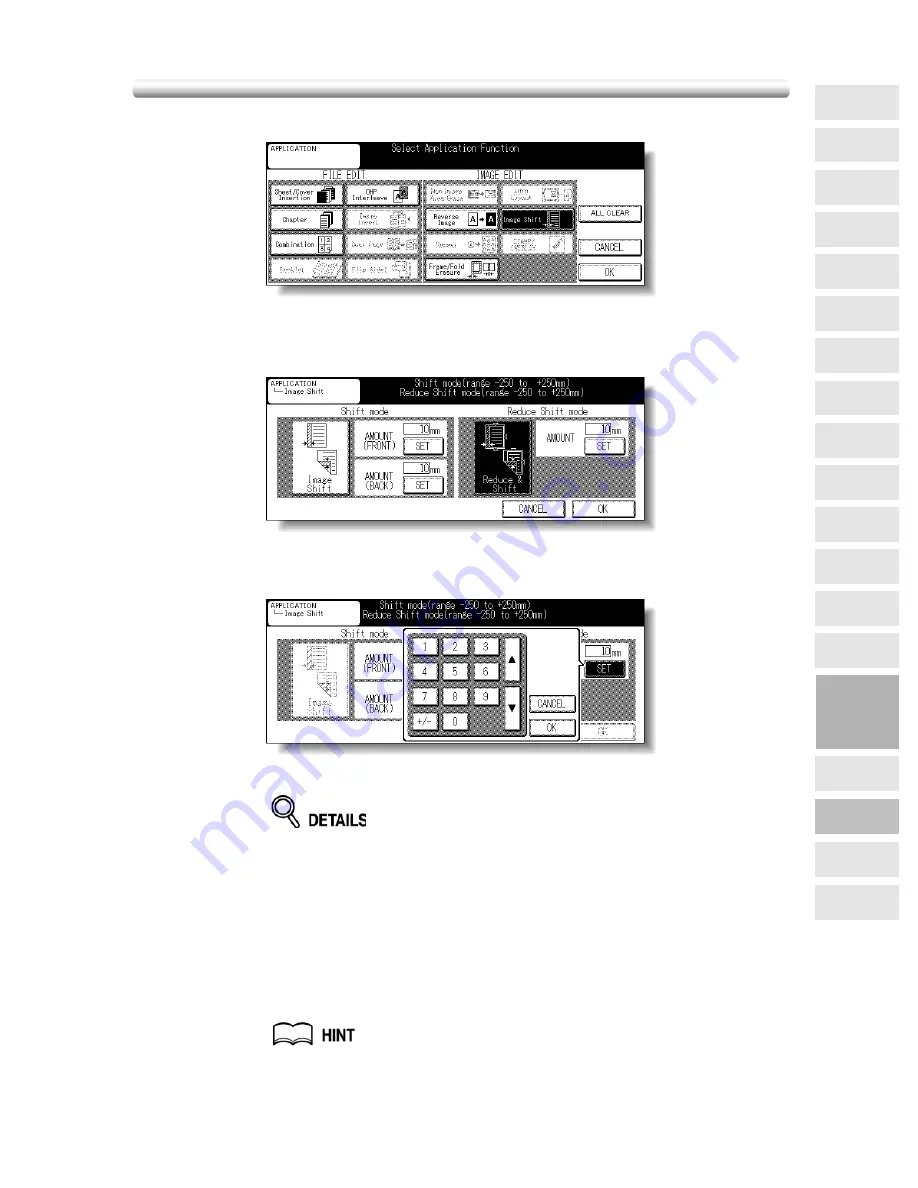
Touch
Image Shift
on the Application Selection Screen.
The Image Shift Setting Screen will be displayed.
3.
Touch
Reduce & Shift
, then specify the shift amount.
Touch
SET
to display the popup menu, then use the up/down arrow key or the numeric
keypads to enter the desired shift amount, from -250 to +250 mm in 1 mm increments.
Touch
OK
on the popup menu to restore the Image Shift Setting Screen.
The AMS will automatically determine the magnification ratio according to
the shi ft amount specified. The shift amount and magnification rati o
determined will be automatically applied to both the front and back pages.
4.
Touch
OK
.
The Application Selection Screen will be restored.
5.
Touch
OK
on the Application Selection Screen.
The Basic Screen will be restored.
6.
Enter the desired print quantity from the control panel keypad.
See p. 3-7 for details on setting print quantity.
9
Applications
Reverse
Image
Non-Image
Area Erase
Dual Page
Image Insert
Booklet
Combination
Chapter
Sheet/Cover
Insertion
Application
Selection Screen
Repeat
Flip Side 2
Frame/Fold
Erasure
AUTO
Layout
Image Shift
Reduce &
Shift
Stamp
Overlay
OHP
Interleave
Summary of Contents for 7145
Page 1: ...INSTRUCTION MANUAL Copier INSTRUCTION MANUAL Basic Advanced ...
Page 10: ......
Page 16: ......
Page 18: ......
Page 60: ......
Page 142: ......
Page 148: ......
Page 150: ......
Page 158: ......
Page 254: ......
Page 319: ...Index Index ...
Page 320: ......
Page 326: ......
Page 358: ......
Page 359: ...Printed in Germany Recycled paper is used for the inside pages of this book 2004 6 x ...


