I General User Manual
17
Never tighten the handlebar stem if the maximum
mark or stop mark is above the top of the shaft. If you
cannot find a mark, insert the handlebar stem into
the head tube to a depth of at least 6.5 cm. If you do
not do this, the handlebar stem could come loose or
break.
9.3.2 Adjusting the handlebar height with
A-head systems
With the A-head stems shown here, the handlebar height
must be adjusted by a professional bike workshop.
9.3.3 Aligning handlebars with A-head
systems in relation to the front wheel
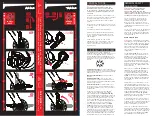
To align the handlebar with the front wheel, proceed as
follows:
›
Loosen the hexagon socket screws on the rear of
the handlebar stem by turning them anticlockwise
with an Allen key.
›
Turn the handlebar so that it is exactly at right
angles to the front wheel.
›
Tighten the hexagon socket screw by turning it
clockwise with an Allen key (see
).
9.3.4 Adjusting the handlebar position by
turning the handlebar
Loosen the hexagon socket screws on the front of the
stem. Turn the handlebar until you find the position that
is comfortable for you. Make sure that the handlebar is
always exactly in the centre of the stem. Now retighten the
hexagon socket screws by turning them clockwise. If the
tightening torque is stamped on the stem, use this value,
and if not, use the tightening torques in
➠
Once you have adjusted the handlebar, you will also need
to adjust the brake levers and gear-shift handles. Loosen
the hexagon socket screws on the handle grips. Sit on
the saddle and put your finger on the lever. Turn the le-
ver until your hand and lower arm are in a straight line.
Retighten the screws in the handle grips by turning them
clockwise. (For tightening torques see
➠
).
Summary of Contents for Bosch Cruise
Page 2: ...I General User Manual English Derby Cycle Werke GmbH 2013 ...
Page 68: ...I General User Manual 67 ...
Page 70: ...II User Manual Fast Pedelec English Derby Cycle Werke GmbH 2013 ...
Page 75: ...6 II User Manual Fast Pedelec ...
Page 98: ...III User Manual Pedelec with centre motor English Derby Cycle Werke GmbH 2013 ...
Page 105: ...8 III User Manual Pedelec with centre motor ...
Page 126: ...IV User Manual Pedelec with front motor English Derby Cycle Werke GmbH 2013 ...
Page 148: ...IV User Manual Pedelec with front motor 23 ...
Page 150: ...V User Manual Pedelec Impulse English Derby Cycle Werke GmbH 2013 ...
Page 157: ...8 V User Manual Impulse Pedelec ...
Page 183: ...VI User Manual Impulse Ergo Pedelec English Derby Cycle Werke GmbH 2013 ...
Page 219: ...VII User Manual Groove Pedelec English Derby Cycle Werke GmbH 2013 ...
Page 237: ...VIII User Manual Pedelec Xion English Derby Cycle Werke GmbH 2013 ...
Page 240: ...4 VIII User Manual Pedelec Xion ...
Page 244: ...8 VIII User Manual Pedelec Xion ...


