background image

7

CONNECTION PORT SETTINgS

7-55

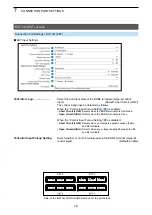
Microphone (MIC) screen

Connection Port Settings > Microphone (MIC)


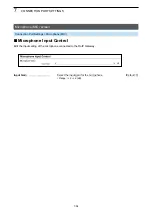
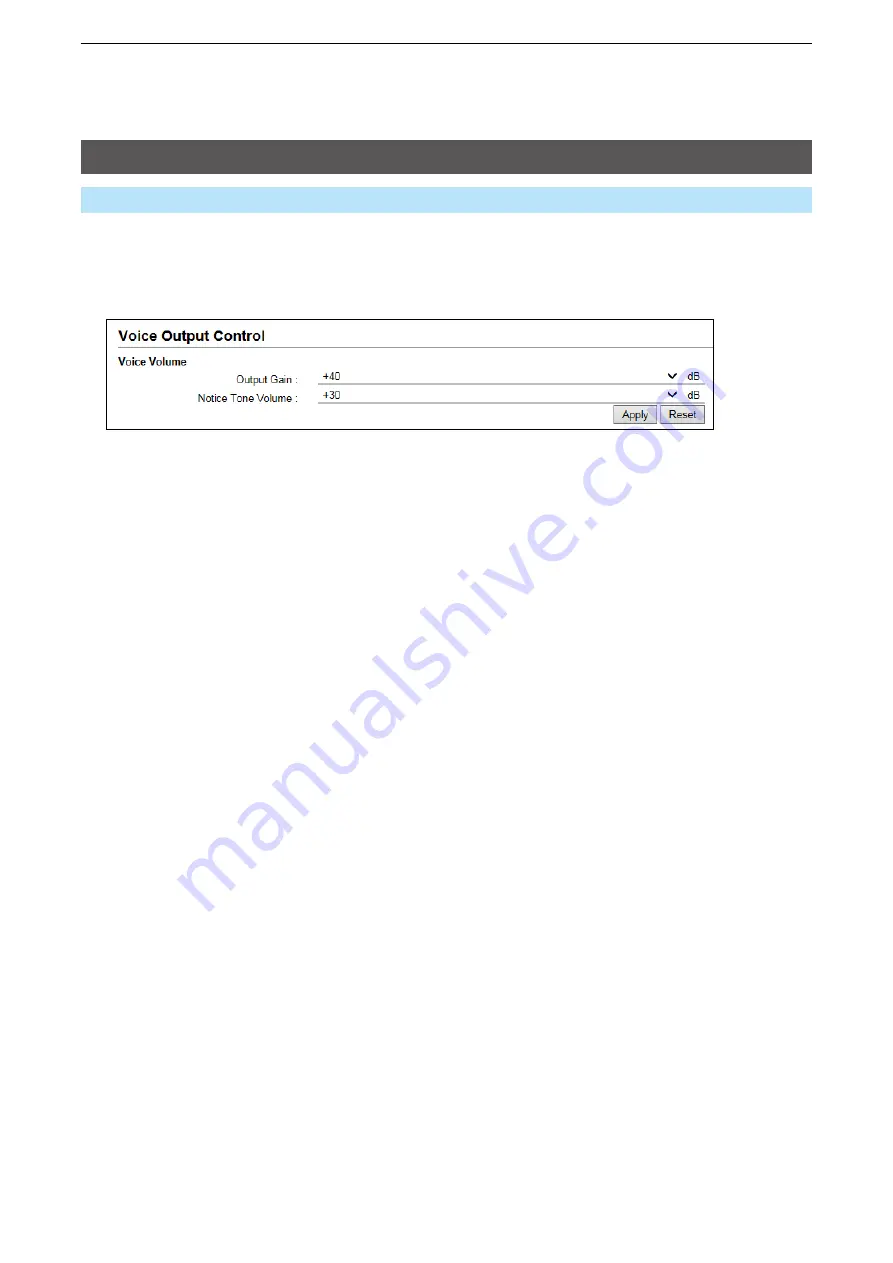
Voice Output Control

Edit the voice output control settings of the microphone connected to the RoIP gateway.

3

4

1
2

Output Gain        


Select the output gain for the microphone. 

(Default: +40)

 • Range: 0 ~ +63 (dB)

Notice Tone Volume     


Adjust the Notice Tone volume. 

(Default: +30)

 • Range: 0 ~ +63 (dB)

<Apply>          


Click to apply the settings.

<Reset>          


Click to reset the settings.


L

You cannot reset after clicking <Apply>.

Summary of Contents for VE-PG4

Page 1: ...NFORMAITON 9 EXPERT SETTINGS 3 NETWORK SETTINGS 10 IP LINE SETTINGS 14 PBX ADVANCED SETTINGS 4 ROUTER SETTINGS 11 PBX 15 MANAGEMENT 5 BRIDGE CONNECTION SETTINGS 12 PBX TRANSCEIVER CALL SETTINGS 6 TRAN...

Page 2: ...trademarks of Microsoft Corporation in the United States and or other countries All other products or brands are registered trademarks or trademarks of their respective holders Icom is not responsible...

Page 3: ...and precautions Installation guide PDF type Instructions for the system requirements the system setup basics maintenance and the specifications It can be downloaded from the Icom website Operating gu...

Page 4: ...1 1 Section TOP 1 TOP screen 1 2 M MSystem Status 1 2 M MMAC Address 1 2 M MWAN Status 1 3 M MLTE Status 1 3...

Page 5: ...sion of each IP100H that is registered to the RoIP server Transceiver Controller Transceiver Settings Transceiver Management MAC Address Displays the MAC Address LAN WAN TOP L L The MAC address is the...

Page 6: ...f range 3Connection Status Displays the status of the 4G 3G line connection Initializing Initialization failure Connecting Connected or Disconnected 4Last Access time to the Server Displays the last a...

Page 7: ...een 2 3 M MSYSLOG 2 3 Bridge Status screen 2 4 M MBridge Status 2 4 M MPort Connection Status 2 5 PBX Status screen 2 6 M MExtension Group List 2 6 M MList of Extensions 2 7 Call Log screen 2 8 M MCal...

Page 8: ...tus Displays the IP address and Lease Time assigned to the connected devices Information Network Status Information Network Status TIP The roIP Gateway s LaN ports are auto negotiation enabled and can...

Page 9: ...check mark to hide the entries L L The selection is not stored and will reset when you leave this screen 2Display Filter Enter a keyword for example dhcp and select Include or Exclude to narrow down t...

Page 10: ...screen Bridge Status Displays the bridge connection status list if a bridge destination network address is set See also section 5 in this manual for the Bridge Connection L L The Transceiver Controll...

Page 11: ...ection settings Connection Port Settings RoIP Gateway RoIP Gateway Connection Converter Bridge 1 20 displays the status of the Connection settings PBX Extension Converter Bridge Connection Voice Proto...

Page 12: ...isplays the Extension Numbers that do not belong to any Extension Group 2 Extension Group Number Displays the Extension Group Number and its Group Name 3Extensions Displays the Extension Numbers that...

Page 13: ...of the extension 4Dial in number Displays the dial in number if entered 5Automatic Acquisition Line Number Displays whether or not to automatically acquire a specific telephone line 6Connection from...

Page 14: ...ll Log Lists the log of the Bridge connection to the RoIP gateway and the telephone communication 1 Refresh Click to reload the list Up to the last 1000 logs are listed 2 Save Click to save a log to a...

Page 15: ...Extension Extension 4Version Displays the Firmware information for VoIP Expansion L L Displayed when a SIP phone is displayed to only the Port Type Setting 3 5IP Address Displays the IP Address used b...

Page 16: ...ernational Mobile Equipment Identifier 1Active SIM Slot Displays the SIM slot number in use 2ICCID Displays the ICCID IC Card IDentifier of the installed SIM card L L Displayed when information of Act...

Page 17: ...2RSSI Level Displays the approximate RSSI level High Middle Low or Out of range 3Connection Status Displays the status of the 4G 3G line connection Initializing Initialization failure Connecting Conn...

Page 18: ...r screen 3 4 M MDHCP Server 3 4 M MStatic DHCP 3 7 M MList of Static DHCP Settings 3 7 Static Routing Screen 3 8 M MRouting Table 3 8 M MStatic Routing 3 9 M MList of Static Routing Entries 3 9 Policy...

Page 19: ...he host name Host Name Enter a host name of up to 31 characters Default VE PG4 When the RoIP Gateway connects to Telnet SSH this host name is displayed L L The usable characters are a z A Z 0 9 and L...

Page 20: ...ording to your network environment Default 255 255 255 0 3Default Gateway If a default gateway device such as a router is connected to the LAN port enter the device s IP address 4Primary DNS Server En...

Page 21: ...art address 3Pool Size Entry the number of an IP address that can be automatically assigned Default 30 Up to 128 addresses can be automatically assigned by the DHCP server function Another 32 addresse...

Page 22: ...ified by your service provider If you have two DNS server addresses enter the primary address 10Secondary DNS Server Displayed only when the DNS Proxy 8 is disabled If you have two DNS server addresse...

Page 23: ...s MAC address must be entered on the Extension screen L L When using this system with static IP addresses see also Section 4 in the Installation guide 14TFTP Server Address Enter the IP address of th...

Page 24: ...See page 3 4 for details of the DHCP Server function L L Sets a different IP address from the IP address that the DHCP Server function automatically assigns L L Make sure that the addresses of the dev...

Page 25: ...mission Network Settings Static Routing 1Destination The network address of the route s destination network 2Subnet Mask The subnet mask of the route s destination network 3Gateway The route s gateway...

Page 26: ...the route s destination network 2Subnet Mask The subnet mask of the route s destination network 3Gateway Only when the Interface 4 is set to Set the gateway Set the route s gateway address 4Interface...

Page 27: ...sk of the source network address 3Gateway Only when the Interface 4 is set to Set the gateway Set the route s gateway address 4Interface The routing target interface from Set the gateway ppp0 WAN01 pp...

Page 28: ...MDMZ Host 4 13 M MPort Forwarding 4 14 M MList of Port Forwarding Entries 4 15 IP Filter screen 4 16 M MGeneral Settings 4 16 M MIP Filter 4 17 M MList of IP Filter Entries 4 22 Simple DNS screen 4 2...

Page 29: ...The WAN connection status is displayed Router Settings WAN WAN screen 1Connection Status Nothing is displayed 2Connection Type The WAN connection type is displayed 3IP Address Nothing is displayed 4P...

Page 30: ...tatus The connection status to the Internet line is displayed as Unplugged Connecting or Connected 2Connection Type The WAN connection type is displayed 3IP Address The RoIP Gateway s IP address is di...

Page 31: ...on Status The connection status to the Internet line is displayed as Unplugged or Connected 2Connection Type The WAN connection type is displayed 3IP Address The RoIP Gateway s IP address is displayed...

Page 32: ...ot select while connecting the line Connect Disconnect Click to manually connect or disconnect the selected WAN L L Disconnect is displayed when the line is connected L L If Connecting is not displaye...

Page 33: ...specified by your service provider Default LAN Port LAN Port Switching the LAN port to connect to other devices DHCP Client The WAN IP address is automatically obtained by a DHCP server Static IP The...

Page 34: ...31 characters 2Primary DNS Server Enter the DNS server address specified by your service provider If you have two DNS server addresses enter the primary address 3Secondary DNS Server If you have two D...

Page 35: ...nter the WAN Subnet Mask 4Default Gateway Enter the WAN Default Gateway 5Primary DNS Server Enter the DNS server address specified by your service provider If you have two DNS server addresses enter t...

Page 36: ...n password The entered characters are displayed as asterisk or black circle 5Reconnect Mode Select the PPPoE connection method Default Always ON Manual The PPPoE line can be manually connected by clic...

Page 37: ...e primary address 8Secondary DNS Server If you have two DNS server addresses enter the secondary DNS server address 9Authentication Protocol Enter the authentication protocol specified by your service...

Page 38: ...Connection Type is set to PPPoE 10MSS Limit Enter the MSS Limit if specified by your service provider Default 1322 Range 536 1452 byte 11 Apply Click to apply the entries 12 Reset Click to reset the...

Page 39: ...N List of Connection Settings When Connection Type is set to PPPoE Lists the connection destinations registered in Connecting Settings Router Settings WAN Connection Settings Delete Click to delete an...

Page 40: ...Host IP Address Enter the DMZ Host IP address The DMZ Host function DeMilitarized Zone transfers an unknown IP frame from the WAN Internet to the specified IP address on the LAN But you need to pay at...

Page 41: ...mber select the port by the mnemonic DNS Finger FTP Gopher NEWS POP3 SMTP Telnet Web or Whois 2LAN IP Address Enter the private IP address 3LAN Port Select Custom if you select the LAN port by its num...

Page 42: ...gs NAT List of Port Forwarding Entries Lists the Port Forwarding Entries 1 Edit Click to edit the entry L L The registered entries are displayed in Port Forwarding 2 Delete Click to delete the entry L...

Page 43: ...to changing the IP filter 1Block Action Select the operation when blocking the packet Default Drop Drop Dropping the packet without any response Reject Sending the denied packet 2Syslogging Unmatched...

Page 44: ...ntries cannot be selected The filter function checks the packets in the selected order according to the filter setting in list of IP Filter Entries 2Entry Select Enable to apply the filter setting Def...

Page 45: ...IP address are filtered blocked or passed Mask range 1 32 6Destination IP Address Enter the destination IP address and mask to filter All the packets sent to the entered IP address are filtered block...

Page 46: ...filter between 0 and 255 L L When the type is not specified all header types are filtered Code Enter the type of ICMP code to filter between 0 and 255 L L When the type is not specified all code types...

Page 47: ...Whois are selectable L L When Any is selected all of the port number types are filtered 9Destination Port Select the destination port or enter the TCP UDP destination port number Default Any There ar...

Page 48: ...ed the packet is filtered regardless of the TCP flags 11SYSLOG Select Enable to output the SYSLOG Default Disable L L The log information is displayed on the SYSLOG screen Information SYSLOG L L Proce...

Page 49: ...edit the entry L L The entry contents are loaded to the IP Filter Setting 2 Delete Click to delete the entry L L You cannot restore after clicking Delete About the default IP filter packets No 59 64 T...

Page 50: ...ost and click Add When the combination is registered the RoIP Gateway can respond to both DNS forward lookup and DNS reverse lookup L L Up to 32 combinations can be registered L L This setting is effe...

Page 51: ...vate network VPN connection using the IPsec protocol 1IPsec Set the IPsec function Default Disable When Enable is set a VPN connection using the IPsec tunnel can be used 2 Apply Click to apply the ent...

Page 52: ...client is set in the Connection Type setting Router Settings WAN Connection Type ppp0 WAN01 ppp7 WAN08 Select this interface when PPPoE WAN01 WAN08 is set in the Connection Type setting Router Setting...

Page 53: ...yyyy zzzz 1 Up to 64 characters 2 Up to 63 characters for each part 8Local ID Set the ID to identify the local device Select the IP type from IP Address KEYID FQDN or USER FQDN Default IP Address IP...

Page 54: ...s disable IPsec is Disabled The RoIP Gateway s IPsec function is disabled 4Remote Address The IP address set as the connection destination or the host name is displayed is displayed when this item is...

Page 55: ...on 5 11 M MBridge Connection Entry List For Custom Bridge Connection 5 12 M MAMBE 2 Vocoder Assignment 5 13 SelCall in Bridge Connection screen 5 15 M MSave or Write the Rule Settings for SelCall in B...

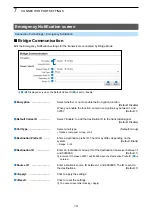
Page 56: ...ction Source Select the port for the bridge connection 2Bridge connection Destination Select the destination port for the bridge connection L L Only the ports that can be connected to the source port...

Page 57: ...led The RoIP Gateway connects to the destination device according to the List of Rule Settings for SelCall in Bridge Connection Bridge Connection Setttings SelCall in Bridge Connection List of Rule Se...

Page 58: ...tion Address or its domain name of up to 63 characters When the Transmission mode is Multicast Enter the same multicast address as the setting in the Bridge Connection Destination The settable range 2...

Page 59: ...T4 23114 Digital Transceiver 2 D TRX2 23002 Emergency Notification 23116 Digital Transceiver 3 D TRX3 23004 Microphone MIC 23150 Digital Transceiver 4 D TRX4 23006 RoIP Gateway1 24300 EXT Input 1 EXT1...

Page 60: ...phone MIC 22510 Digital Transceiver 4 D TRX4 22510 RoIP Gateway1 22530 EXT Input 1 EXT1 EXT I O 1 EXT1 22510 RoIP Gateway2 22530 EXT Output 1 EXT1 22510 RoIP Gateway3 22530 EXT Input 2 EXT2 EXT I O 2...

Page 61: ...ort settings in the Unicast mode Options Default Options Default Digital Transceiver 1 D TRX1 23000 EXT Output 4 EXT4 23114 Digital Transceiver 2 D TRX2 23002 Emergency Notification 23116 Digital Tran...

Page 62: ...one MIC 22510 Digital Transceiver 4 D TRX4 22510 RoIP Gateway1 22530 EXT Input 1 EXT1 EXT I O 1 EXT1 22510 RoIP Gateway2 22530 EXT Output 1 EXT1 22510 RoIP Gateway3 22530 EXT Input 2 EXT2 EXT I O 2 EX...

Page 63: ...TTL Time To Live until the voice packet reaches the communication destination The TTL value decreases every time it passes through a router the voice packets transmission expires when the TTL value r...

Page 64: ...nection Entry List For Combination screen L L When Custom Bridge Connection is selected in the Bridge Connection Destination the entries are displayed in Bridge Connection Entry List For Custom Bridge...

Page 65: ...nation entries of the bridge connection See the Bridge Connection Entry List For Custom Bridge Connection below when the Bridge Connection Destination is set to Custom Bridge Connection 1 Delete Click...

Page 66: ...connect the set devices After they are successfully connected the button changes to Deactivate L L When this button is grayed out you also need to enter the AMBE 2 Vocoder Assignment settings 3 Edit...

Page 67: ...nverter bridge s port name is clicked 2Route Setting Screen The screen setting the route of the destination is displayed When the entry is set as a combination by the bridge connection Bridge Connecti...

Page 68: ...VE PG4 set this item to Bridge Protocol 5AMBE 2 Vocoder Assignment Settable only when the Voice Protocol 4 is set to AMBE 2 Select an AMBE 2 Vocoder from Not Assigned Internal or CT 24 Default for Di...

Page 69: ...d SelCall rule settings from a CSV format file Click Browse and select the setting file bridge_route csv from the displayed list and then click Open Confirm the correct file is selected and then click...

Page 70: ...tion ID Enter the ID of the SelCall destination ID range Depending on the system mode Destination SelCall in Bridge Connection 6Address Enter the RoIP Gateway s IP address which is connected to the tr...

Page 71: ...for SelCall in Bridge Connection 1 Edit Click to edit the entry L L The registered contents are displayed on the Rule Settings for SelCall in Bridge Connection screen 2 Delete Click to delete the entr...

Page 72: ...Entry List 6 14 Transceiver Management screen 6 15 M MTransceiver Management 6 15 Transceiver Registration screen 6 17 M MTransceiver Settings 6 17 M MTransceiver Setting Entry List 6 19 M MTRX Batch...

Page 73: ...68 M MMessage Group 6 68 M MMessage Group Detail 6 68 M MSave or Write the Message Setting 6 69 M MMessage List 6 71 Status screen 6 72 M MStatus Settings 6 72 Profile screen 6 73 M MProfile List 6 73...

Page 74: ...rs can be set up Default Sub When several Controllers are linked and use All call or Group call between the controllers set a controller as shown below Sub One Master Controller can be set up Master U...

Page 75: ...ime is set in Receive Buffer Size 2 Dynamic The buffer time changes depending on the audio fluctuation 2Receive Buffer Size Select the buffer time to keep the audio from breaking up Default 40 Range 2...

Page 76: ...tween 1 lowest and 3 bits Priority level or 4 and 7 highest bits Type of Service based on the RFC1349 The 1 bit remaining is not used and is fixed as 0 Diffserv Sends the VoIP packets to the TOS field...

Page 77: ...highest Default 7 Media RTP Service Type Set the TOS service type code to between 0 and 15 Default 0 Media RTP DSCP Set the DSCP Differentiated Services Code Point code to between 0 and 63 Default 56...

Page 78: ...belong to the RoIP Gateway are activated in one tenant fleet Transceiver Controller Tenant Fleet Settings Tenant Fleet Settings screen 1Tenant Fleet Number Select the tenant fleet number that is used...

Page 79: ...Server Settings RoIP Server RoIP Server screen 1Call type Priority High to low Select the priority level of the call types Default Telephone All Individual Group L L The setting value are shown below...

Page 80: ...up to 31 characters 3Destination Address Enter the destination device s IP address or domain name of up to 63 characters 4Destination Port Number Enter the destination controller s service port numbe...

Page 81: ...splay a list of the destination addresses and destination port numbers registered to the RoIP Gateway 1 Edit Click to edit the entry in Link Setting 2 Delete Click to delete the selected entry L L Aft...

Page 82: ...PG4 1No Select the number that is registered to the Area call Default 1 L L Up to 20 calls can be registered 2Name Enter the area name of up to 31 characters 3BSSID Enter the 12 digit BSSID of the wi...

Page 83: ...tart address is entered a search starts L L If BSSID is already registered in the Area Entry List it is not displayed L L When the IP Advanced Radio System setting of an access point that is set to En...

Page 84: ...number is selected depending on the name that is registered with the same Tenant Fleet Number in IP Advanced Radio System of an access point as shown below When the area number s name is already regis...

Page 85: ...the list of the registered Area Setting or Access Point Search 1 2 3 1 Edit Click to edit the setting in Area Setting 2 Delete Click to delete the selected entry L L After clicking Delete the entry c...

Page 86: ...ds the reboot command to an IP100H from the Transceiver Management menu the following status are displayed Receiving reboot command Reboot command reception success Reboot command reception failed Rea...

Page 87: ...activation status check of when the IP100H or IP100FS reboots are renewed 8Version Displays the version of the IP100Hs or IP100FSs that are registered to the RoIP Gateway L L When Registration Status...

Page 88: ...5Password Enter a password to access to the RoIP Gateway Default iptrx L L Up to 12 characters lower or upper letters numbers and symbols can be used 6Transceiver Port Number Enter the port number UD...

Page 89: ...wn below Default TRX No 1 30000 TRX No 2 30002 TRX No 3 30004 TRX No 4 30006 TRX No 50 30098 Setting range Even numbers between 2 and 65534 Some numbers may not be usable Do not set a port number that...

Page 90: ...in the list 2 Delete Click to delete the selected entry L L After clicking Delete the entry cannot be recalled 3 Apply Click to apply the entries L L The entries that are edited in Transceiver Settin...

Page 91: ...nation IDs Click Add to register consecutive Destination IDs collectively in the box L L If a Destination ID is already registered Overwrite the following entry is displayed 2Refer to Select the defau...

Page 92: ...er 3BackLight Select the IP100H backlight function Default Auto OFF The backlight does not light ON The backlight lights continuously Auto The backlight lights when an operation is performed and goes...

Page 93: ...t with an optional microphone or using the VOX function as well 6PTT Call at Stand by Select whether or not the IP100H displays the Destination ID Call type in the standby mode Default Enable Disable...

Page 94: ...as shown below even if you push the key on the IP100H L L If you set the Call Type to Individual or Group enter the 4 digit destination ID in the Destination ID Default All L L Even if Disable is sel...

Page 95: ...ct an All call using the key Enable L L When User ID List 7 is set to Enable set Add All Call to ID List and Startup Talkgroup 9Default Talkgroup Select a Talkgroup if you want to set the IP100H to jo...

Page 96: ...action when the IP100H receives a Call or message to Notification Beep Vibration or Notification Beep Vibration Default Notification Beep Notification Beep When the IP100H receives a Call or message t...

Page 97: ...set to 0 the notification beep is turned OFF L L Depending on the Common Settings the IP100H sounds a beep when the IP100H is transmitting or connecting to the RoIP Gateway 13Communication Method Sel...

Page 98: ...rea Call or using an IP100FS Individual Call High Enable Includes using an IP100FS Group Call High Enable Includes the Area Call or using an IP100FS All Call Normal Disable Includes the Area Call Indi...

Page 99: ...is activated All Call IP100H makes an All Call with the Area Call function IP100FS calls the All Call with the Area Call function The wireless access points that the IP100H is included in with the Are...

Page 100: ...the Messages screen in the Common Settings menu L L Select the message number 1 to 10 in Default Message that is registered on the Message screen All Call IP100H transmits a message Message selection...

Page 101: ...uses of 32 characters or less can be entered on the Status screen in the Common Settings menu L L The status that the IP100H sends can be displayed on the Transceiver Management screen in the Transcei...

Page 102: ...audio of all calls that call the IP100H L L The IP100H displays the called station that has the highest priority in the mixed audio See page 6 26 for details of the Priority level VE PG4 Mixing of Lo...

Page 103: ...ination is specified as the external Mic transmission When the external microphone s PTT switch is held down or its VOX function is active the IP100H calls the preset destination Example Group call is...

Page 104: ...No Function to the IP100H s Option key Default No Function L L When this setting is set to No function nothing changes by pushing the Option key on the IP100H in the standby mode Message Pushing the O...

Page 105: ...ey on the IP100H selects a specified Call type and destination ID or phone number Select the Individual Group All or Telephone Call type L L When Individual or Group is selected enter the 4 digit Indi...

Page 106: ...he phone call with an IP phone L L You can assign another function if you select Enable on Clear Down during Telephone Call 21 19 20 21 22 Push Option key When the Option key is pushed before a phone...

Page 107: ...e Option key for 1 second to turn the Mute function ON or OFF L L You can turn OFF the Mute function by pushing PTT However selecting Enable in the Clear Down during Telephone Call 21 terminates the p...

Page 108: ...ver is held down L L You can set the period of time to send the Emergency call and sound the alarm in Emer SW ON Timer 35 L L When Enable is selected in Emer SW OFF 36 you can set the period of time t...

Page 109: ...L The IP100H can terminate the phone call when a telephone calls the IP100H individually or when the IP100H calls a telephone 22Target Availability Check Select whether or not the IP100H displays a c...

Page 110: ...lume level cannot be changed 24Gain Adjust the microphone sensitivity Default 0 dB Range 12 low 12 high dB in 3 dB steps L L When the noise level around the IP100H is high set to low sensitivity and s...

Page 111: ...cable The VOX function starts transmission when you speak into the microphone without needing to push PTT then automatically returns to reception when you stop speaking Be sure to turn OFF the IP100H...

Page 112: ...r you stop speaking 29Voice Delay Adjust the Voice Delay time to prevent clipping of the first few syllables after you begin speaking Default 200 Range 0 500 milliseconds in 5 millisecond steps 30Voic...

Page 113: ...Emergency function ON or OFF is set in the Emer SW ON Timer 35 or in the Emer SW OFF Timer 36 34Assign Emergency to Log Key long press Select whether or not to use the key to send an Emergency call De...

Page 114: ...fault 32 38Call type Select the call type of Emergency call from Individual Group All or Telephone Default All If you select Individual or Group enter the 4 digit Destination ID If you select Telephon...

Page 115: ...n Beep Vibration to activate when an Emergency call is received 42Lone Worker If the Lone Worker function is activated the Emergency function is automatically turned ON after the set period of time ha...

Page 116: ...e timer is reset 45PTT Delay Enter the period of time for the delay time to transmit by pushing PTT while Lone Worker On Timer and Lone Worker Reminder Timer are activated Default Enable 10 Range 1 25...

Page 117: ...he buffer type to control any interrupted sound Default Dynamic Static The buffer time is set Receive Buffer Size Set the buffer time to between 20 and 500 milliseconds to keep the audio from breaking...

Page 118: ...bit VoIP packets to the TOS field in the IP header using the TOS format Sets to between 1 lowest and 3 bits Priority level or 4 and 7 highest bits Type of Service based on the RFC1349 The 1 bit remai...

Page 119: ...L L The item is not displayed when TOS Type 47 is set to Not used Media RTP Priority Level Set the TOS priority level to between 0 lowest and 7 highest Default 7 Media RTP Service Type Set the TOS se...

Page 120: ...ecurity Reduce electrical interference among Wireless LAN transceivers Control the communication speed in an environment where some access points are installed in a comparatively small area External A...

Page 121: ...s Transceiver Settings 50IP Address Settings Static IP Selects the Static IP address if it is specified according to your network environment L L Enter the default gateway address if your network conn...

Page 122: ...54Automatic Firmware Updating at Power ON Select whether or not the IP100H will use the Automatic Update function Default Enable with Automatic Reboot Disable Disables the automatic firmware updating...

Page 123: ...SLOG host is sent to another host that is set in the SYSLOG Host IP Address 56 Default M DEBUG M INFO M NOTICE L L Enter a check mark to send the log entries 58Read Write Password Enter a password of...

Page 124: ...ot copied Transceiver Setting List Display the list of the registered IP100Hs L L When verifying the contents or editing the settings select the individual number in the Unit ID 2 3 1 1Check Box Enter...

Page 125: ...100Hs Transceiver Controller Common Settings Wireless LAN Wireless LAN screen 1No Select a group number between 1 and 20 to assign to the IP100Hs Up to 20 groups can be registered Default 1 2Name Ente...

Page 126: ...t the IP100H transmit power level to High Middle or Low Default High L L When High is set the transmission distance of the IP100H is maximum Or when setting to a lower level the distance will be reduc...

Page 127: ...ower and upper case letters L Informatio L Up to 10 SSIDs can be registered The SSID is used to separate the wireless network groups You cannot connect to different SSID groups If two or more wireless...

Page 128: ...tication methods About authentication methods Open System Shared Key When accessing a wireless access point Open System and Shared Key are automatically recognized If the Encryption key matches the ke...

Page 129: ...encrypted L L This option can be selected when Authentication 8 is set to Open System or Open System Shared Key WEP RC4 It is an encryption type that can communicate when the encryption keys match L L...

Page 130: ...o 9 and letters A to F Or enter ASCII characters The key length is same as the displayed digits 10 or 26 using hexadecimal numbers or half of the displayed digits 5 or 13 characters using ASCII charac...

Page 131: ...er Controller Common Settings Wireless LAN Wireless LAN 11 Apply Click to apply the entries L L The entries are displayed in List of Wireless LAN Entries 12 Reset Click to reset the settings L L You c...

Page 132: ...LAN Entries Display the list of the wireless LAN settings 1 2 3 1 Edit Click to edit the entries in Wireless LAN 2 Delete Click to delete the selected entry L L After clicking Delete the entry cannot...

Page 133: ...r Controller Common Settings ID List Transceiver Controller Common Settings ID List ID List Common Setting Number Select the group number between 1 and 50 and then enter IDs that the IP100Hs will use...

Page 134: ...ile to load Select the target file on screen and click Open The selected file is displayed in Load Settings from File Click Write after selecting the target file Then the selected file is loaded to ID...

Page 135: ...characters C Call Type indi Individual group Group tel Telephone D Destination ID Individual Group Up to 4 characters E Destination ID Telephone Up to 31 digits using numbers and symbols F Talkgroup...

Page 136: ...e name is also displayed 1Add Type Select Enter Individually or Select From List in the Add Type When Select From List is selected the Destination IDs that are registered on the Transceiver Registrati...

Page 137: ...alkgroup ID When Telephone is selected as Call Type 4 enter a target phone number of up to 31 digits using numbers and symbols 6 Apply Click to apply the entries L L The entries are displayed in ID Li...

Page 138: ...entries in ID List 2 Delete Click to delete the selected entry L L After clicking Delete the entry cannot be recalled 3 Delete All Click to delete all the entries L L After clicking Delete All the en...

Page 139: ...Message Group Transceiver Controller Common Settings Messages Transceiver Controller Common Settings Messages Message Group Number Select a group number between 1 and 50 and then enter the messages th...

Page 140: ...ect the file to load Select the target file on screen and click Open The selected file is displayed in Load Settings from File Click Write after selecting the target file Then the selected file is loa...

Page 141: ...s of a CSV file for the message file Icom is not responsible for writing another message file except a saved message file or a message file that is edited as shown below Format of a CSV file for the m...

Page 142: ...oup that is selected in Message Group You can transmit fixed message of up to 32 characters L L You can enter up to 10 messages in each message group 1 2 When a name is registered in a group the name...

Page 143: ...roller Common Settings Status 1 2 3 1Check Box Click a Check Box to display a status name on the IP100H L L When the box is not checked the status name is not displayed on the IP100H even if you enter...

Page 144: ...Controller Common Settings Profile 1 3 2 4 1 Add Click to add an new profile 2 Edit Click to edit the entries in Profile 3 Delete Click to delete the selected entry L L After clicking Delete the entry...

Page 145: ...Profile List on the Profile screen 3Wireless LAN Select the wireless LAN setting that is commonly used by the IP100Hs in the group Default Transceiver s Setting Transceiver s Setting Uses the last wir...

Page 146: ...the IP100H receives an Individual call the RoIP Gateway can quickly reply No response as a Target availability check 8Registration Retry Interval If failed Enter a retry interval when the IP100H fails...

Page 147: ...Notice Tone will not sound 13Failure Select a notice tone for connection failure Default Enable L L When an Individual call Message call Status call or telephone call connection fails the Notice Tone...

Page 148: ...on Tone and the notification icon blinks P Bell When a specified call is received the IP100H sounds the Notification Tone The received audio is muted until you reply to the call L L After pushing PTT...

Page 149: ...rea Notice Tone Select whether or not the IP100H sounds the Out of service area Notice Tone Default Disable When Enable is selected the IP100H sounds the Notice Tone when it goes out the service area...

Page 150: ...ys the ID list History 21Caller ID Display for All and Group Calls Select whether or not the IP100H displays the Caller ID in the All call or Group call Default Disable Disable When the IP100H or IP10...

Page 151: ...tus indicator goes out 26TalkBack Timer Telephone Enter a time between 0 and 600 seconds that the IP100H will return to the standby mode after a received signal from a telephone disappears Default 15...

Page 152: ...me out timer The timer limits the IP100H s continuous transmission Default 180 Range 11 and 600 seconds L L When the period of time has passed transmitting automatically stops 30Penalty Time Set the T...

Page 153: ...s set transmitting does not stop even if the period of time that is set in the TOT Timer 29 has passed during a telephone call 33Use PBX Connection When a phone number from the IP100H is not registere...

Page 154: ...Profile Batch Setting 1Range Sets a range of collective Profiles Click Add to register consecutive Profiles collectively L L If a Profile is already registered Overwrite the entry is displayed 2Refer...

Page 155: ...Settings System dPMR Mode 2 7 15 M MDTMF Dialing 7 16 EXT I O EXT screen 7 17 M MEXT I O Port Mode 7 17 M MEXT I O 7 18 M MTransceiver Model 7 19 M MTransceiver Connection Transceiver Model General Se...

Page 156: ...Connection Port Settings 7 2 RoIP Gateway screen 7 56 M MRoIP Gateway 7 56 M MRoIP Gateway Connection 7 57 M MRoIP Gateway Communication 7 59 M MRoIP Gateway Control 7 60 M MBridge Communication 7 61...

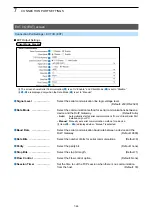
Page 157: ...Digital Transceiver D TRX Digital Transceiver D TRX screen Port Selection Select a Digital Transceiver port to edit the settings Default Digital Transceiver 1 D TRX1 Digital Transceiver Connection Sel...

Page 158: ...al Transceiver D TRX Digital Transceiver System Select a digital transceiver system that you want to connect the RoIP gateway to System Select a digital transceiver system and then click Apply to appl...

Page 159: ...22 Default Digital Transceiver 4 D TRX4 41223 Range 1 65535 3Source Port Number Enter the Local Port number that is set in the UC FR5000 Do not duplicate the other port number Default Default Digital...

Page 160: ...nter a Talkgroup ID Default 1 Range 1 2000 12Encryption Select whether or not to enable the Encryption function Default Disable When you enable the function enter an encryption key between 1 and 32767...

Page 161: ...nsceiver Default Enable When the function is enabled select the TalkBack time Default 5 Range 1 10 seconds 2RX All Call Select whether or not to permit all Talkgroups to receive a call Default Disable...

Page 162: ...nection Port Settings Digital Transceiver D TRX Bridge Communication System NXDN Trunking Set Talkback Time for calling digital transceivers from the digital transceiver connected to the RoIP Gateway...

Page 163: ...41203 Range 1024 65535 3UDP Port Number Data Port Enter the Data Receive Port number that is set in the UC FR5000 Do not duplicate the other port number Default Digital Transceiver 1 D TRX1 41220 Digi...

Page 164: ...ble the Encryption function Default Disable When you enable the function enter an Encryption key between 1 and 32767 Default 1 11Connection Status Click to connect or disconnect the transceiver or to...

Page 165: ...lect whether or not to enable the TalkBack function Default Enable When the TalkBack function is ON Select the TalkBack Time Range 1 10 seconds Default 5 2Digital SQL Select whether or not to enable t...

Page 166: ...sceiver 2 D TRX2 41201 Digital Transceiver 3 D TRX3 41202 Digital Transceiver 4 D TRX4 41203 Range 1 65535 3UDP Port Number Data Port Enter the Data Receive Port number that is set in the UC FR5000 Do...

Page 167: ...9999999 7Talkgroup ID Start Enter a Talkgroup start ID Default 100000 Range 1 9999999 8Talkgroup ID Enter a Talkgroup ID Default 100000 Range 1 9999999 9RX CC Enter a CC for receiving Default 0 Range...

Page 168: ...shows when the Digital Frame Packet 5 and Scrambler 11 are set to enabled and Specify TX CC 10 is checked 11Scrambler Check to enable the Scrambler function Default Disable When checked enter a scramb...

Page 169: ...tal SQL Select whether or not to enable the Digital Squelch function Default Disable 3RX All Call Select whether or not to permit all Talkgroups to receive a call Default Disable 4Call Type Select a c...

Page 170: ...last digit has been input Default 5 Range 1 10 seconds 3OFF hook Detect Timer Select the period of time to detect the OFF hook control signal Default 400 Range 0 2000 milliseconds in 100 millisecond...

Page 171: ...the EXT ports Default for EXT I O 1 EXT1 Transceiver Default for EXT I O 2 EXT2 Transceiver Default for EXT I O 3 EXT3 EXT I O Unit Default for EXT I O 4 EXT4 EXT I O Unit 2EXT I O Port Mode When EXT...

Page 172: ...gs 7 18 EXT I O EXT screen Connection Port Settings EXT I O EXT EXT I O Select an External I O port on the RoIP Gateway to edit the settings EXT I O Port Select an External I O Port to edit the settin...

Page 173: ...Unit Connection Port Settings EXT I O EXT EXT I O EXT I O Port Transceiver Model Select a transceiver to connect the port selected in EXT I O Port Default IC F5060 F6060 L L Select General Setting if...

Page 174: ...e for a quiet environment A lower level makes the microphone less sensitive to the voice and is suitable for a noisy environment with a louder voice 2RX Volume Offset from the Transceiver Adjust the R...

Page 175: ...ction Signal Select the PTT type to detect the transceiver s power status ON OFF Default Use PTT Type Separate PTT The microphone line and PTT input line are separated Combined with Microphone Line Th...

Page 176: ...m the transceiver is not muted even if the power ON status is detected 11Use Pin A3 Bidirectional Select Enable to use one common line A3 terminal as the MIC input and AF output If your transceiver co...

Page 177: ...de EXT I O 1 4 Connected Unit Connection Port Settings EXT I O EXT EXT I O EXT I O Port Serial Communication device Example PC or Modem Client Mode Disable Destination Server side IP connection Client...

Page 178: ...4 Connected Unit Connection Port Settings EXT I O EXT EXT I O EXT I O Port 20 19 18 17 16 15 14 13 31 30 29 28 27 24 23 22 21 33 L 13 17 are displayed only when Serial Communication 12 is set to Enabl...

Page 179: ...t installed on your PC Manual Manually set serial communication method for a device Items 27 31 and 33 are displayed when Manual is selected 18Transceiver Control Select Enable to control the transcei...

Page 180: ...EXT4 50003 27Baud Rate Select the serial communication baud rate between a device and the RoIP Gateway Default 9600 28Data Bits Select the number of bits for serial communication Default 8 29Parity S...

Page 181: ...d 32767 Default 1 2TalkBack Select whether or not to enable the TalkBack function Default Enable When the function is enabled Select the TalkBack time Default 5 Range 1 10 seconds 3Call Type Select a...

Page 182: ...TT Always ON The RoIP Gateway always sends the PTT control signal to the transceiver to transmit No PTT Control The RoIP Gateway does not send the PTT control signal to the transceiver 3Receive Detect...

Page 183: ...9 6RX Volume Adjust the RoIP Gateway s audio output level of the audio signal that is received from the connected transceiver Default 0 Range 12 6 dB 7Additional Attack Time for Beep Sound Eliminatio...

Page 184: ...to use the DTMF Dialing function Default Disable 2Permissible Tone Gap Select the period of time to detect that the last digit has been input Default 5 Range 1 10 seconds 3OFF hook Detect Timer Select...

Page 185: ...Default 50 2Release Time Set the RX Delay time It is the delay time for the VOX switch to turn OFF after no audio signal is received through the network Default 500 L L When the PTT Control in Transce...

Page 186: ...d through the network Default 200 Range 5 2000 milliseconds in 5 millisecond steps 3Voice Delay Enter the period of time to store the audio Default 5 L L When the Receive Detection is set to VOX the d...

Page 187: ...Settings EXT I O EXT EXT I O Device Connection This item is displayed only when Connected Unit is set to EXT I O Unit and EXT I O Port Mode is set to Combined Connection Port Settings EXT I O EXT Conn...

Page 188: ...ween 1 and 32767 Default 1 2TalkBack Select whether or not to enable the TalkBack function Default Enable When the function is enabled Select the TalkBack time Default 5 Range 1 10 seconds 3Call Type...

Page 189: ...only when Connected Unit is set to EXT I O Unit and EXT I O Port Mode is set to Combined Connection Port Settings EXT I O EXT 1Echo Canceller Select whether or not to enable the Echo Canceller functi...

Page 190: ...a destination prefix ID The ID may differ depending on the system Default Blank Range 0 30 4Destination ID Enter the default ID for the EXT port between 1 and 9999999 Default 1 L Enter an ID between 0...

Page 191: ...nication L The RoIP gateway enters the Emergency mode when the option selected in the Input Control 8 of the EXT1 EXT4 ports are satisfied L In the Emergency mode all ongoing communication routes othe...

Page 192: ...in the Input Connection Port 7 Control Signal When the control signal is input sends the audio signal to the destination selected in the Input Connection Port 7 8Power for the Microphone Select Enabl...

Page 193: ...io input Default 0 Range 74 21 dB 11Input Gain Digital Set the digital signal input gain A3 A4 terminal Audio input Default 0 Range 12 6 dB A1 A4 A1 A4 B1 B4 B1 B4 C1 C4 C1 C4 A1 A4 A1 A4 B1 B4 B1 B4...

Page 194: ...has been detected for the period of time that is set in the ON Timer 13 The RoIP gateway recognizes the signal input and retains the type for the period of time that is set in the OFF Timer 14 13ON T...

Page 195: ...B3 B4 terminals are Open When the Control Input Pull up Setting 16 is disabled Short Circuit LOW Detects when no volatge is applied between the B3 and B4 terminals Open Circuit HIGH Detects when any...

Page 196: ...00 milliseconds in 5 millisecond steps 18Attack Time Set the TX Attack time It is the delay time before the VOX switch turns ON after an audio signal is received through the network Default 50 Range 5...

Page 197: ...r not to enable the Encryption function Default Disable When you enable the function enter an encryption key between 1 and 32767 Default 1 2Source ID Enter a station s source ID between 0001 and 9999...

Page 198: ...Relay Circuit select the port state Relay output terminal B1 B2 terminal is short or open circuit When the audio signal is output the control signal is also output Default Short 58V Electric Supply B2...

Page 199: ...number 19 8TCP Port Number Enter a port number between 1024 and 65535 Default EXT1 50000 EXT2 50001 EXT3 50002 EXT4 50003 9Communication Control Select the communication type Default Full Duplex L L...

Page 200: ...are displayed when Manual is selected 12Baud Rate Select the serial communication baud rate between a device and the RoIP Gateway Default 9600 13Data Bits Select the number of bits for serial communic...

Page 201: ...eway s port number between 1024 and 65535 Default EXT1 50000 EXT2 50001 EXT3 50002 EXT4 50003 20Connection Status Click to connect or disconnect a transceiver or to refresh the connection status L L T...

Page 202: ...O Port Mode setting Default Separate 0 5 seconds Combined 1 5 seconds Range 0 5 3 seconds L L Select Disable to output the audio right after the signal is received 25Fade out Set the period of time th...

Page 203: ...s Input Connection Port The From Other Ports is set to Priority or High Priority PBX Advanced Settings Prioritization EXT Output Port Prioritization From Other Ports 27Relay Control Displayed when Swi...

Page 204: ...Up Single Tone 1 or Single Tone 2 31End Tone Select the tone which sounds after the announcement Default Not used Options Not used 4 Tone Notice Down Single Tone 1 or Single Tone 2 32Announce Tone Vol...

Page 205: ...isable 3Call Type Select a call type Default Group Options Individual Group or All 4Destination Prefix ID Enter a destination prefix ID The ID may differ depending on the system Default Blank Range 0...

Page 206: ...ck function Default Enable When the function is enabled Select the TalkBack time Default 5 Range 1 10 seconds 3Call Type Select a call type Default Group Options Individual Group or All 4Destination P...

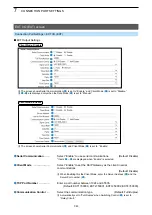
Page 207: ...onnected to the RoIP Gateway 3 1 2 1Communication Method Select the communication method for the microphone Default Full Duplex 2Echo Canceller Select whether or not to enable the Echo Canceller funct...

Page 208: ...icrophone MIC screen Connection Port Settings Microphone MIC Microphone Input Control Edit the input setting of the microphone connected to the RoIP Gateway Input Gain Select the input gain for the mi...

Page 209: ...ntrol settings of the microphone connected to the RoIP Gateway 3 4 1 2 1Output Gain Select the output gain for the microphone Default 40 Range 0 63 dB 2Notice Tone Volume Adjust the Notice Tone volume...

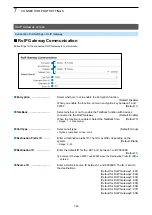
Page 210: ...tings 7 56 Connection Port Settings RoIP Gateway RoIP Gateway screen RoIP Gateway Set the Destination for the RoIP gateway connection RoIP Gateway Port Select a RoIP gateway port to edit the settings...

Page 211: ...ally set to 239 255 255 1 3Destination Port Number Enter the same port number that entered to the Source Port Number 4 of the RoIP Gateway that going to be connected Default for RoIP Gateway1 24400 De...

Page 212: ...In the Multicast mode all the default setting are 25210 5Voice Protocol Displays the Voice Protocol Selected in the Voice Protocol For Custom Bridge Connection Bridge Connection Settings Bridge Conne...

Page 213: ...t 5 Range 1 10 seconds 3Call Type Select a call type Default Group Options Individual Group or All 4Destination Prefix ID Enter a destination prefix ID The ID may differ depending on the system Defaul...

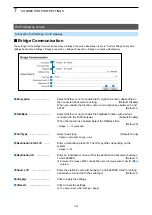
Page 214: ...n Port Settings RoIP Gateway RoIP Gateway Control Edit settings for the connected RoIP Gateway to communicate 1 Release Time Enter the period of time to detect the audio output stoppage to the RoIP Ga...

Page 215: ...function with devices connected to the RoIP Gateway Default Enable When the function is enabled Select the TalkBack time Default 5 Range 1 10 seconds 3Call Type Select a call type Default Group Option...

Page 216: ...nation Settings Group 8 9 M MDestination Settings Talkgroup 8 13 M MDestination Settings Individual 8 19 M MDestination Settings Telephone 8 21 M MList of Destination Setting Entries All Call 8 22 M M...

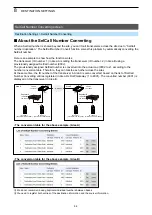
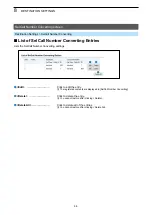
Page 217: ...RoIP Gateway Click Browse and select the SelCall Number Converting file Example idtbl_brg csv to load Verify that the selected file is displayed and then click Write L L The content of the file is loa...

Page 218: ...oss the sites At the same time the ID number of the transceiver in Area A is also converted based on the list of SelCall Number Converting entries registered in Area A s RoIP Gateway 1 to 8001 The con...

Page 219: ...nges to gray and you cannot change the setting 6Call Type Convert Destination Select the call type Default Individual Individual Call only one transceiver Group Call all transceivers that belong to th...

Page 220: ...L The registered contents are displayed in SelCall Number Converting 2 Delete Click to delete the entry L L You cannot restore after clicking Delete 3 Delete All Click to delete all of the entries L...

Page 221: ...implex or Full Duplex Default Full Duplex Simplex operation L L When Simplex is selected the called station cannot reply until the caller station stops transmitting This is an example of setting All a...

Page 222: ...all entries in the list L L When Sub is selected in the Additional Controller Settings setting Transceiver Controller RoIP Settings Additional Controller Settings specify the master controller as the...

Page 223: ...ed L L When clicking All you can select or cancel all at once L L When a speaker microphone is connected to the MIC port the audio input output of the EXT1 port is disconnected The Audio input output...

Page 224: ...ame of up to 31 characters 3Call Type Select Group for Group calls 4Destination ID Enter a 4 digit destination number Range 0001 9999 5Group Priority Select Normal or High to set the priority in the G...

Page 225: ...station cannot reply until the caller station stops transmitting Simplex operation When Simplex is selected the called station cannot reply until the caller station stops transmitting VE PG4 Wireless...

Page 226: ...Settings specify the master controller as the connection destination as shown below L L The other bases in Additional Controller 8 and IP Transceiver Controller Connection Port 9 can be connected to a...

Page 227: ...l at once L L When a speaker microphone is connected to the MIC port the audio input output of the EXT1 port is disconnected The Audio input output of the MIC port and the EXT1 port cannot be used at...

Page 228: ...er a destination name of up to 31 characters 3Call Type Select Talkgroup for Talkgroup calls 4Destination ID Enter a 4 digit destination number Range 0001 9999 L L This number must also be registered...

Page 229: ...only belong to 1 Multiplex Talkgroup Example When Talkgroup1002 Normal and Talkgroup1003 Normal belong to Talkgroup1001 Multiplex Talkgroup1001 can call to Talkgroup1001 Talkgroup1002 and Talkgroup10...

Page 230: ...fault Enable 8Callee ID for IP100FS Select the IP100FS to be called when Enable is selected in Talkgroup Call for IP100FS 7 Default All L L When Appointment is selected you can register up to 5 IP100F...

Page 231: ...elected in the Additional Controller Settings setting Transceiver Controller RoIP Settings Additional Controller Settings specify the master controller as the connection destination as shown below L L...

Page 232: ...ode setting Connection Port Settings EXT I O EXT EXT I O Port Mode EXT Input and EXT Output are displayed L L By clicking All you can select or cancel all at once L L When a speaker microphone is conn...

Page 233: ...e Talkgroup Type The entries are displayed in List of Destination Setting Entries Talkgroup Call When Multiplex Talkgroup is selected in the Talkgroup Type The entries are displayed in List of Destina...

Page 234: ...e RoIP Gateway s transceiver port L The displayed contents are changed according to the Call Type This is an example of setting Individual as the Call Type 3 1No Select the number to register the dest...

Page 235: ...egistered additional Controllers are displayed Displayed when an IP Transceiver Controller is connected When Connected Unit is set to EXT I o Unit and EXT I o Port Mode is set to Separate in the EXT I...

Page 236: ...e destination station Up to 1990 destinations can be registered 2Name Enter a destination name of up to 31 characters 3Call Type Select Telephone for Telephone calls L L This Call Type includes the tr...

Page 237: ...etting entries for Group Calls Destination Settings Destination Settings 1Check Box Click to add a check mark to delete the entry L L By clicking All you can select or cancel all the entries 2 Edit Cl...

Page 238: ...x Click to add a check mark to delete the entry L L By clicking All you can select or cancel all the entries 2 Edit Click to edit the entry 3 Delete Click to delete the entry L L You cannot restore af...

Page 239: ...1Check Box Click to add a check mark to delete the entry L L By clicking All you can select or cancel all the entries 2 Edit Click to edit the entry 3 Delete Click to delete the entry L L You cannot...

Page 240: ...mark to delete the entry L L By clicking All you can select or cancel all the entries 2 Edit Click to edit the entry 3 Delete Click to delete the entry L L You cannot restore after clicking Delete 4 D...

Page 241: ...Click to add a check mark to delete the entry L L By clicking All you can select or cancel all the entries 2 Edit Click to edit the entry 3 Delete Click to delete the entry L L You cannot restore afte...

Page 242: ...ered settings to other destinations 1Call Type Select the Call Type from Individual Group or Talkgroup 2Destination ID Enter the range of Destination ID number Add By clicking Add after Refer to 3 is...

Page 243: ...M MPING Test 9 4 M MSIP Server Registration 9 5 IP Transceiver Status Filtering screen 9 6 M MIP Transceiver Status Filtering 9 6 M MFiltering List 9 7 M MFiltering List Batch Setting 9 8 Connection...

Page 244: ...on Port Settings EXT I O EXT Connected Unit Connection Port Settings EXT I O EXT EXT I O Port Mode L L Either of the EXT1 port or the MIC port is usable at the same time When a microphone is connected...

Page 245: ...below Information SYSLOG SYSLOG Default Disable 2Control Output Displayed only when Monitoring 1 is set to Enable Select whether or not to short the B1 B2 terminal to output an error detect signal Def...

Page 246: ...splayed on the SYSLOG screen Information SYSLOG SYSLOG Default Disable 2Control Output Select whether or not to short the B1 B2 terminal to output an error detect signal Default Disable L L Confirm th...

Page 247: ...the SYSLOG screen Information SYSLOG SYSLOG Default Disable L L The VoIP indicator works regardless of this setting 2Control Output Displayed only when Monitoring 1 is set to Enable Select whether or...

Page 248: ...g 1IP Transceiver Status Filtering Select whether or not to use the Filtering function Default Disable 2Filtering Policy Select whether allow or deny outputting the transceiver information listed on t...

Page 249: ...ng Filtering List Add up to 200 Unit IDs for the IP transceivers to be filtered 1 Apply Click to apply the settings 2 Reset Click to reset the settings L L You cannot reset after clicking Apply 3 Dele...

Page 250: ...creen Expert Settings IP Transceiver Status Filtering Filtering List Batch Setting Range Enter the range of the unit IDs that you want to add to the Filtering List and then click Add to add transceive...

Page 251: ...fering Type Select the jitter buffer used to reduce speech break up due to packet fluctuations Default Dynamic Static Buffers receive voice data for a set period of time in the Receive Buffer Size 2 D...

Page 252: ...S format applies RFC1349 The first 3 bits Shows the priority Set into Media RTP Priority Level 4 with a decimal number The next 4 bits Shows the service type Set into Media RTP Service Type 4 with a d...

Page 253: ...etails for the TOS or Diffserv format options Priority Level Set the value of the priority level for TOS Default 7 Range 0 7 in decimal Service Type Set the value of the service type for TOS Default 0...

Page 254: ...the set period of time in Silence Period to End Recording after the communication has been terminated The second communication that begins while recording will be continuously recorded within the same...

Page 255: ...rget Select whether or not to set wireless LAN transceivers as recording targets When enabling this option select a target wireless LAN transceiver in Unit ID Default Disable L L When the target trans...

Page 256: ...ored Default 1 25000 2 25002 3 25004 4 25006 7Source Port Number Enter the number of the source port that is connected to the destination to be monitored Default 1 25000 2 25002 3 25004 4 25006 8Voice...

Page 257: ...ecording List of Recording Box Entries Displays the recording box entries The example in above shows 1 Recording the communication of the Unit ID 0101 2 Transmitting the communication audio of the Uni...

Page 258: ...ies 10 3 M MSIP Server Batch Setting 10 4 Peer to Peer screen 10 5 M MPeer to Peer Common Setting 10 5 M MPeer to Peer 10 6 M MList of Peer to Peer Entries 10 7 VoIP Phonebook screen 10 8 M MSave or W...

Page 259: ...server address or host name of up to 63 characters 4SIP Service Domain Enter a service domain name of up to 63 characters 5User ID Enter an authentication user ID of up to 63 characters Use the IP ph...

Page 260: ...ber to the destination Default Notify L L Even if this option is set to Not notified the IP phone number may be notified according to the telephone or line environment 5 Reload Click to reload the scr...

Page 261: ...r settings at the same time 2Add Number Enter the number of SIP servers you want to add to SIP Service Domains 4 3SIP Server Address Enter the details on SIP server L L Refer to the SIP Server Setting...

Page 262: ...from the WAN Default Inhibit L L When you select Allow Your SIP URI has to be registered to the SIP URI item on the VoIP Phonebook screen at the caller s SIP server IP Line Settings VoIP Phonebook Vo...

Page 263: ...e About the SIP username part Enter an alphabet or number in the SIP username L L Must include at least one alphabet About the Host name domain name part L L When the VE PG4 IP address is registered i...

Page 264: ...d or edited Peer to Peer settings 1Index Displays the index assigned for the entry 2SIP URI Displays the SIP URI 3 Edit Click to edit the entry 4 Delete Click to delete the entry L L You cannot restor...

Page 265: ...file Example voiptbl csv to load Verify that the selected file is displayed and then click Write L L The contents of the file is overwritten to List of VoIP Phonebook Entries L L When the Setting fil...

Page 266: ...oIP phonebook settings may not load properly into the RoIP gateway Column Title Description A Index 1 1000 Do not duplicate the number B Name Up to 30 characters C Phone Number tel and up to 31 digits...

Page 267: ...ne Number Enter the phone number L L When communicating in Peer to Peer enter the numbers and symbol L L Do not use numbers for the emergency calls in your area otherwise you cannot make an emergency...

Page 268: ...onebook Entries Displays the list of VoIP phone numbers entered in VoIP phonebook entry 1 Edit Click to edit the entry 2 Delete Click to delete the entry L L You cannot restore after clicking Delete 3...

Page 269: ...Number 11 6 M MTransceiver Call Prefix 11 7 M MExternal Call Routing Number 11 7 Extension screen 11 8 M MExtension 11 8 M MList of Extension Entries 11 11 M MExtension Batch Setting 11 12 M MExtensi...

Page 270: ...e 1 99 seconds 3Hold Recall Time Set the period of time until Notification tone rings when no one picks up a held call Default 120 Range 0 600 seconds L L When 0 has been set you can not receive the N...

Page 271: ...ck up call from a particular group by pushing the number set in this setting and the Pickup Group No See the Section 13 3Direct Pickup The number to pick up a call from a particular extension Default...

Page 272: ...ton Assignment setting See Section 13 To pick up an inbound call from the KX series with another telephone Dial the number in this setting for example 92 and the Button number 01 24 of the inbound or...

Page 273: ...and the destination extension number you want to forward a call The alarm PiPi PiPi sounds L L To cancel forwarding dial 95 The alarm Pi Pi Pi Pi sounds 7Call Forward Busy The number to forward when...

Page 274: ...swering Set the tone signal to receive the telephone call on a transceiver Default L L Only when this option is set to a 1 digit number a transceiver can answer a telephone call by holding this key fo...

Page 275: ...prefix and then dial the Group number of the transceiver L L To make an all call dial the All Call prefix External Call Routing Number The routing number to acquire a specific outline telephone numbe...

Page 276: ...0 12 13 Port Type SIP Phone Automatic Detection Port Type Converter Bridge 1 11 12 13 1Port Type Set the type of connected device port Default SIP Phone Automatic Detection 2Index Set the index of the...

Page 277: ...s on the setting in the Calling Number Notice setting IP Line settings IP Line List of SIP Server Entries Calling Number Notice Notify Notifies the Extension Number to the destination 7IP Line Set an...

Page 278: ...10MAC Address Enter the MAC Address of the Panasonic KX series SIP phone The MAC Address is settable only when the Port Type 1 is set to other than SIP Phone Standard SIP Phone WLAN Transceiver Contro...

Page 279: ...lete or copy the setting Click All to check or uncheck all the items in the list 2 Advanced Click to display the Extension Detail sub window 3 Edit Click to edit the settings in the Extension Settings...

Page 280: ...d to add the entries 3Copy Settings Select the setting options you want to copy and then click Copy to copy the settings Copying the settings 1 Set the source extension details in the Extension above...

Page 281: ...Forward 2Call Forward Number Set the destination phone number of up to 31 digits Default Blank L L The KX series telephone automatically forwards calls to the set destinations 3Call Forward Settings S...

Page 282: ...when the extension is busy Default Don t Forward 7Call Forward Number Set the destination phone number of up to 31 digits Default Blank 8Call Forward Settings Select whether or not to forward inbound...

Page 283: ...roup Name Enter the Extension Group name of up to 31 characters 4Ringing Sequence Select the action when a call is incoming Simultaneous In Simultaneous ringing sequence when the primary receiver cann...

Page 284: ...3rd Ringing by setting the 2nd Startup Time 6 and 3rd Startup Time 62nd Startup Time Set the period of time until the secondary ring starts when the 1st Ringing extensions do not answer Default Not us...

Page 285: ...31 characters 4Ringing Sequence Select the action when a call is incoming Simultaneous In simultaneous ringing sequence when the primary receiver cannot respond for a certain period of time you can ch...

Page 286: ...ion Group Entries Displays the list of Extension Group entries 1 2 3 1 Edit Click to edit an entry 2 Delete Click to delete an entry L L You cannot restore after clicking Delete 3 Delete All Click to...

Page 287: ...This setting is only for the KX series SIP phones Set a Ringtone pattern for each phone number Default for IP Line Outside Tone A for Peer to Peer Inside Tone A Outside Tone A C Ringtone pattern for...

Page 288: ...12 2 M MSave or Write the Callee ID to Phone Number Setting 12 2 M MCallee ID to Phone Number 12 3 M MList of Callee ID to Phone Number Entries 12 4 Outbound Call Restriction screen 12 5 M MOutbound C...

Page 289: ...ttings from a CSV format file Click Browse and select the setting file call_tbl csv from the displayed list and then click Open Confirm the correct file is selected and then click Write to load the se...

Page 290: ...type of call Call the destinations that matches both of Prefix ID 4 and Destination ID 5 settings Individual Call only a specified radio Group Call all radios that belong to a specified group All Call...

Page 291: ...lee ID to Phone Number List of Callee ID to Phone Number Entries List of the Callee ID entries 1 Edit Click to edit an entry 2 Delete Click to delete an entry L L You cannot restore after clicking Del...

Page 292: ...alls by the client transceivers 1Restriction Type Select the type of restriction on the transceivers in the List of Target ID Entries See the next page Default Deny Deny Inhibits the listed transceive...

Page 293: ...system mode 4 Add Click to add the entry L L The registered contents are displayed on the List of Target ID Entries screen 5 Reset Click to reset the entries L L You cannot restore after clicking Rese...

Page 294: ...16 Telephone KX HDV Series screen 13 20 M MTelephone Maintenance 13 20 M MTelephone Group 13 22 M MDial Tone Common Setting 13 23 M MBusy Tone Common Setting 13 24 M MReorder Tone Common Setting 13 2...

Page 295: ...Control Setting 13 56 M MCall Initiation Setting 13 57 M MNotice Tone on the Telephone 13 58 M MRelease Timer 13 59 Converter Bridge screen 13 60 M MConverter Bridge 13 60 M MConnection 13 61 M MComm...

Page 296: ...ck All to select all the entries L L The extensions where Status 4 is Not Connected cannot be selected 2Extension Number Displays the extension number 3Port Type Displays the port type of the Extensio...

Page 297: ...KX series telephone 7 Reboot Selected Click to reboot the selected with check marks KX series telephones 8 Reboot All Click to reboot all the KX series telephones whose Status 4 is Connected in the l...

Page 298: ...ettings for the KX UT Series in the selected Group that are connected to the RoIP gateway such as the flexible button assignments PBX Extension Telephone KX UT Series Telephone Individual Settings KX...

Page 299: ...ne Default 0 Range 24 minimum 6 maximum dB 3Repeat Set whether or not to repeat the set tone pattern Default Continuous Sound Disable Sounds the set pattern in Timing 4 only once Enable Continuously r...

Page 300: ...Default 0 Range 24 minimum 6 maximum dB 3Repeat Set whether or not to repeat the set tone pattern Default Enable Disable Sounds the set pattern in Timing 4 only once Enable Continuously repeats the s...

Page 301: ...efault 0 Range 24 minimum 6 maximum dB 3Repeat Set whether or not to repeat the set tone pattern Default Enable Disable Sounds the set pattern in Timing 4 only once Enable Continuously repeats the set...

Page 302: ...Default 0 Range 24 minimum 6 maximum dB 3Repeat Set whether or not to repeat the set tone pattern Default Enable Disable Sounds the set pattern in Timing 4 only once Enable Continuously repeats the se...

Page 303: ...larm Default 0 Range 24 minimum 6 maximum dB 3Repeat Set whether or not to repeat the set tone pattern Default Enable Disable Sounds the set pattern in Timing 4 only once Enable Continuously repeats t...

Page 304: ...ime in the ON settings and mutes for the set period of time in the OFF settings The default values of Ringtone Patterns Pattern ON OFF ON OFF ON OFF ON OFF Pattern 1 2000 4000 Pattern 2 800 400 800 40...

Page 305: ...g on the Inbound Call screen PBX Inbound Call L LInformation The incoming call group depends on the notified number of incoming calls The calls from the phone numbers that are entered into extensions...

Page 306: ...up Pickup Target Set the incoming call type that you can pick up that arrives at an extension in the same Group Default External Call Extension Options External Call Extension External Call Only or Ex...

Page 307: ...When setting to Refuse the busy tone will be returned to an incoming extension call 3Accept External Calls without Button Assignment Set whether or not to accept an inbound call to a DN key button whe...

Page 308: ...common phonebook and up to 100 entries to the Group phonebook Default Enable 7Common Phonebook Sharing Displayed only when Phonebook Sharing 6 is enabled Set whether or not to download the Common Pho...

Page 309: ...ssigned to the DN button When a call arrives on the DN button pressing the button answers the call Be sure to assign 2 or more DN keys The indicator status Quickly blinks green An external or an exten...

Page 310: ...d External line IP line status When a call arrives on the External Call Status button pressing the button answers the call The indicator status Blinks red An External Call is incoming or held Lights r...

Page 311: ...Always Default 94 and the extension number of the forwarding destination PBX Special Number Telephone Special Number Call Forward Always Call Fwd No Answer Forwards an incoming call to the specified e...

Page 312: ...stination Push the button to start or stop forwarding The indicator status Lights red Forwards calls Not lit Does not forward calls L L You can also start or stop forwarding by dialing the special num...

Page 313: ...s Click All to select all the entries L L The extensions where Status 4 is Not Connected cannot be selected 2Extension Number Displays the extension number 3Port Type Displays the port type of the tel...

Page 314: ...he KX series telephone 7 Reboot Selected Click to reboot the selected with check marks KX series telephones 8 Reboot All Click to reboot all the KX series telephones whose Status 4 is Connected in the...

Page 315: ...ect the setting mode and then click Edit The setting screen for the selected Group is displayed Common Setting Common settings for the KX HDV Series that are connected to the RoIP gateway such as the...

Page 316: ...tone Default 0 Range 24 minimum 6 maximum dB 3Repeat Set whether or not to repeat the set tone pattern Default Continuous Sound Disable Sounds the set pattern in Timing 4 only once Enable Continuousl...

Page 317: ...one Default 0 Range 24 minimum 6 maximum dB 3Repeat Set whether or not to repeat the set tone pattern Default Enable Disable Sounds the set pattern in Timing 4 only once Enable Continuously repeats th...

Page 318: ...Default 0 Range 24 minimum 6 maximum dB 3Repeat Set whether or not to repeat the set tone pattern Default Enable Disable Sounds the set pattern in Timing 4 only once Enable Continuously repeats the s...

Page 319: ...ne Default 0 Range 24 minimum 6 maximum dB 3Repeat Set whether or not to repeat the set tone pattern Default Enable Disable Sounds the set pattern in Timing 4 only once Enable Continuously repeats the...

Page 320: ...ets the Hold alarm tone that sounds to alert you a second call has been held for certain period of time 1Frequency 1 2 Set the tone frequencies of the Hold alarm Default Frequency 1 425 Frequency 2 0...

Page 321: ...for the set period of time in the ON settings and mutes for the set period of time in the OFF settings The default values of Ringtone Patterns Pattern ON OFF ON OFF ON OFF ON OFF Pattern 1 2000 4000 P...

Page 322: ...ting on the Inbound Call screen PBX Inbound Call L LInformation The incoming call group depends on the notified number of incoming calls The calls from the phone numbers that are entered into extensio...

Page 323: ...e incoming call type that you can pick up that arrives at an extension in the same Group Default External Call Extension Options Extension Only External Call Only or External Call Extension 4Directed...

Page 324: ...ng to Refuse the busy tone will be returned to an incoming extension call 3Accept External Calls without Button Assignment Set whether or not to accept an inbound call to a DN key or Not Used button w...

Page 325: ...ies telephone You can download up to 300 entries to the common phonebook and up to 100 entries to the Group phonebook Default Enable L L If disabling this setting the phonbook is not downloaded even i...

Page 326: ...n a key function to each Flexible button Default DN Key One Touch Used as an alias to a favorite number You can assign a frequently used telephone number a special number prefix and so on The entered...

Page 327: ...signed to the order of the DN key button number L L The number of sharable lines are the total number of DN keys Also it depends on the setting on the External Call Limiting screen PBX Advanced Settin...

Page 328: ...r Call Forward Always Default 94 and the extension number of the forwarding destination PBX Special Number Telephone Special Number Call Forward Always Call Fwd No Answer Forwards an incoming call to...

Page 329: ...busy on another call Enter the extension number with a special number if required of the forwarding destination Push the button to start or stop forwarding The indicator status Lights red Forwards ca...

Page 330: ...destination answers push OK or hang up to transfer a call Blind Transfer Holds and immediately forwards a call to the specified extension Enter the extension number of the destination and hang up the...

Page 331: ...extensions where Status 4 is Not Connected cannot be selected 2Extension Number Displays the extension number 3Port Type Displays the port type of the telephone 4Status Displays the connection status...

Page 332: ...7 8 9 10 6 Reboot Click to reboot the KX series telephone 7 Reboot Selected Click to reboot the selected with check marks KX series telephones 8 Reboot All Click to reboot all the KX series telephones...

Page 333: ...screen PBX Extension Expand Unit KX HDV230 Expand Unit 1 5 Telephone Group Edits the Group setting of the entered extension telephone Select Group Setting Select a Group from Group 1 to Group 30 that...

Page 334: ...a button function to each flexible button The Assignable functions One Touch DN Key Directory Number External Call Status Call Fwd Always Call Fwd No Answer Call Fwd Busy Transfer Blind Transfer Conf...

Page 335: ...you want to edit its phonebook L L The entries in the selected phonebook are displayed in the List of Phonebook Entries below on the screen See page 13 47 L L The number of entries are displayed below...

Page 336: ...ing backup file on the Settings Backup Restore includes the phonebook data If the setting file is loaded on the Settings Backup Restore screen Management Settings Backup Restore Settings Restore the p...

Page 337: ...honebook Do not duplicate the number B Name Up to 30 characters C Phone Number tel and up to 22 digits or prefix D Reserved Do not edit or delete this column E Reserved Do not edit or delete this colu...

Page 338: ...f required of the destination L L You cannot enter an alias number of up to 22 digits with a special number or a prefix 5Speed Dial Number Enter an alias number of up to 7 digits The Speed Dial Number...

Page 339: ...k Phonebook Entry 6Display Type Select Phone Number or Speed Dial Number to display a phonebook on the telephone Default Phone Number 7 Apply Click to apply the entries 8 Reset Click to reset the sett...

Page 340: ...List of Phonebook Entries Lists the phonebook entries 1 Edit Click to edit an entry 2 Delete Click to delete an entry L L You cannot restore after clicking Delete 3 Delete All Click to delete all the...

Page 341: ...troller Telephone Connection screen Transceiver Controller Telephone Connection Settings for communication between an IP transceiver and a SIP phone Extension Number Displays the extension number of t...

Page 342: ...hone and a transceiver that belongs to a group set in the RoIP gateway 1Call Type Set the call type to send from a SIP phone to a transceiver that belongs to the RoIP gateway Default Group options Ind...

Page 343: ...er while a call is incoming Default Disable 2Target Availability Check Select whether or not to check the availability of a destination transceiver when a SIP phone makes a call to it If this setting...

Page 344: ...ce Tones 5Calling The notice Tone to send to a transceiver while calling a target SIP phone Default notice Tone 2 6Connection Success The notice Tone to send to a transceiver alerting that the target...

Page 345: ...smit mode DTMF When a tone signal is received from a SIP phone the target transceiver enters the transmit mode Constant Transmission during Call As soon as the communication is established the target...

Page 346: ...ters the transmit mode DTMF When a tone signal is received from a SIP phone the digital transceiver enters the transmit mode Constant Transmission during Call As soon as the communication is establish...

Page 347: ...etects only the signal VOX or RTP received from the EXT I O unit 17Individual Call to a Microphone Set the signal type for Individual Calls to a speaker microphone Default VOX VOX When a voice signal...

Page 348: ...make the destination device to stop transmitting L L If you enter the same value in both the PTT ON Tone and PTT OFF Tone you can toggle the destination device status by dialing this number 20Method S...

Page 349: ...ts to transmit 2Release Time Select the RX delay time Default 500 Range 5 2000 milliseconds in 5 millisecond steps This is the delay time for the VOX to turn OFF after no audio signal is received thro...

Page 350: ...Default 1000 Range 5 2000 milliseconds in 5 millisecond steps 2Release Time Select the RX delay time in 5 millisecond step It is the delay time for the VOX switch to turn OFF after no audio signal is...

Page 351: ...e to notify a SIP phone that a call has arrived on the transceiver controller and the SIP phone is ready to transmit Default Notice Tone 1 Not used Does not send a Notice Tone Notice Tone 1 3 Sends th...

Page 352: ...hout a response from the SIP phone the call is canceled Default 15 Range 0 OFF or 5 60 seconds 2No Voice Release Timer Enter the period of time to stop transmitting When the set time has passed with n...

Page 353: ...ension whose settings you want to edit settings in the Connection item below PBX Extension Converter Bridge Converter Bridge screen Extension Number Displays the extension number of the Converter Brid...

Page 354: ...efault 239 255 255 1 3Destination Port Number Set the same port number as the Source Port Number 4 setting of the VE PG4 that works as the Converter Bridge connection Destination Range An even number...

Page 355: ...Bridge 9 22510 Converter Bridge 19 22510 Converter Bridge 10 22510 Converter Bridge 20 22510 4Source Port Number Set the same port number as the setting in the Converter Bridge connection destination...

Page 356: ...onverter Bridge 9 22510 Converter Bridge 19 22510 Converter Bridge 10 22510 Converter Bridge 20 22510 5Voice Protocol Displays the assigned Voice Protocol in the AMBE 2 Vocoder Assignment setting Brid...

Page 357: ...ansmitting until the screen returns to the standby mode Default 5 Range 1 10 seconds 3Call Type Set the call type to send from a SIP phone to a transceiver that belongs to the Converter Bridge connect...

Page 358: ...otocol setting on the Converter Bridge is set to Bridge Protocol or Protocol for Transceiver and SIP Phone connection in the AMBE 2 Vocoder Assignment Bridge Connection Settings Bridge Connection AMBE...

Page 359: ...Not used 7Calling The Notice Tone to send to a caller transceiver alerting that the target SIP phone answered the call Default Notice Tone 2 8Connection Success The Notice Tone to send to a caller tr...

Page 360: ...ce Release Timer detects only the signal VOX or RTP received from the Converter Bridge connection destination L L When Constant Transmission during Call is selected the No Voice Release Timer detects...

Page 361: ...ion device status by dialing this number 15Method Set the transmitting trigger to make a call from a bridge to the IP telephone system Default RTP VOX Starts dialing when the VOX detects voice data in...

Page 362: ...input Default 5 Range 1 10 seconds L L Applied only when a 1 digit number is set to the OFF hook settings in the Special Number screen 3OFF hook Detect Timer Set the period of time to detect the ON h...

Page 363: ...smit 2Release Time Select the RX delay time Default 500 Range 5 2000 milliseconds in 5 millisecond steps This is the delay time for the VOX to turn OFF after no audio signal is received through the ne...

Page 364: ...lt 1000 Range 5 2000 milliseconds in 5 millisecond steps 2Release Time Select the RX delay time in 5 millisecond step It is the delay time for the VOX switch to turn OFF after no audio signal is recei...

Page 365: ...t a call has arrived on the transceiver controller and the SIP phone is ready to transmit Default Notice Tone 1 Not used Does not send a Notice Tone Notice Tone 1 3 Sends the selected Notice Tone 2PTT...

Page 366: ...seconds 2No Voice Release Timer Enter the period of time to stop transmitting When the set time has passed with no audio signal transmitting is stopped Default 15 Range 0 OFF or 5 600 seconds 3Forced...

Page 367: ...ing Settings 14 19 M MOutbound Call Restriction Rule Settings 14 20 M MList of Outbound Call Restriction Rule Settings 14 21 Outside Line Regulation screen 14 22 M MOutside Line Regulation 14 22 Exter...

Page 368: ...telephone settings 2SIP 183 Support Enable this option if you want to use the 183 Session Progress Default Disable The 183 Session Progress response indicates that information about the call state is...

Page 369: ...s it 5Caller ID Relay on Call Forwarding Set whether or not to relay the original caller number of a forwarded call by using the Blind Transfer function Default Relay Not relay Your number is shown at...

Page 370: ...ter buffer used to reduce speech break up due to packet fluctuations Default Dynamic Static Buffers receive voice data for a set period of time in the Receive Buffer Size 2 Dynamic Buffering time of t...

Page 371: ...S Type Diffserv 1 2 3 5 4 6 7 2Receive Buffer Size Displayed only when Buffering Type 1 is set to Static Set the period of time to buffer the received voice data Default 40 Range 20 1000 milliseconds...

Page 372: ...n TOS Outputs the VoIP packet to the TOS field 8 bit in the IP header in the TOS Type Of Service format L L TOS format applies RFC1349 The first 3 bits Shows the priority Set into Media RTP Priority L...

Page 373: ...7 3TOS Type Continued Diffserv Outputs the VoIP packet to the TOS field 8 bit in the IP header in the Diffserv Differentiated Service format L L The Diffserv format details The former 6 bits Shows the...

Page 374: ...g the Priority details for the TOS or Diffserv format options Priority Level Set the value of the priority level for TOS Default 7 Range 0 7 in decimal Service Type Set the value of the service type f...

Page 375: ...for VoIP packets that are output to the TOS field Priority Level Set the value of the priority level for TOS Default 6 Range 0 7 in decimal The larger number the higher priority Service Type Set the v...

Page 376: ...ettings VoIP Settings TOS Type Not Used 1 2 3 6 7 TOS Type TOS 1 2 3 5 4 6 7 TOS Type Diffserv 1 2 3 5 4 6 7 L L The screens above show when the Buffering Type 1 is set to Static 6 Apply Click to appl...

Page 377: ...her ports than the EXT IO 1 4 ports Default Normal Options Normal Priority or High Priority 2From Own Input Port Set the priority of Incoming calls from the devices those are connected to the EXT IO 1...

Page 378: ...rent call to catch the arrived call The priority of calls from other than the specified SIP phone depends on the Priority level 5 1Index Select a number Range 1 20 2Name Enter a caller s name of up to...

Page 379: ...call is terminated and a Ring Tone will ring to alert you a prior call is incoming When a call from the same priority as the current call the current request will stay connected L L An emergency call...

Page 380: ...s Prioritization List of Caller Prioritization Entries The list of the entries into the Caller Prioritization 1 Edit Click to edit an entry 2 Delete Click to delete an entry 3 Delete All Click to dele...

Page 381: ...ateway dials outbound using the Outbound IP Line 4 L L You can also set the prefix of the phone number in the External Call Routing Number PBX Special Number External Call Routing Number 3Outbound Pho...

Page 382: ...ring Plan List of Phone Number Routing Settings Displays the list of entries into the Phone Number Routing Settings 1 2 1 Edit Click to edit an entry 2 Delete Click to delete an entry 3 Delete All Cli...

Page 383: ...tting rule 1 2 3 1Outbound Phone Numbers the following rules are not applied Enter up to 5 special numbers When an external phone number that starts with either of these numbers is dialed the digits o...

Page 384: ...formatting operation Range 1 100 2Reformat Set whether or not to reformat the dialed number if a matched number is dialed Default Apply Apply Reformats the number according to the rule Exception Does...

Page 385: ...List of Outbound Phone Number Reformatting Settings The list of entered rules into Outbound Phone Number Reformatting Settings 1 2 3 1 Edit Click to edit an entry 2 Delete Click to delete an entry 3 D...

Page 386: ...s all the groups 1 16 Applies individual groups Click Add to add the entered rule to the List of Extension Group Entries 2Restricted Phone Numbers Enter external phone numbers of up to 15 digits to re...

Page 387: ...lan List of Outbound Call Restriction Rule Settings The list of entered rules into Outbound Call Restriction Rule Settings 1 2 3 1 Edit Click to edit an entry 2 Delete Click to delete an entry 3 Delet...

Page 388: ...elected rule that is set in Outbound Call Restriction Rule Settings in addition to the Call Restriction setting in the Telephone Common Settings External Call Restriction Restricts outbound calls excl...

Page 389: ...more calls are inbound or outbound than the value of this setting they will be busy Default 50 Range 1 50 2Maximum Number of Simultaneous calls on the Priority Outside Lines Set the maximum number of...

Page 390: ...Call Limitation Sets the maximum number of calls you can simultaneously make on the phone line Default No limit Range No limit or 1 50 4Prioritization Select the Prioritization of the line Priority O...

Page 391: ...ctive 3Accept Multiple SIP Clients Enables to use the multiple gateway connections Default Disable 4SIP Client Identifier Select how to identify the SIP Client Default SIP URI Options SIP URI or Displ...

Page 392: ...tension screen PBX Advanced Settings IP Authenticated Extension List of IP Authenticated Extension The list of entered IP Authenticated Extension Select an Extension Number in the IP Authenticated Ext...

Page 393: ...g Caller Number Reformatting screen 1 2 3 1Reformatting Set whether or not to reformat for each Caller Number Default Disabled L L The Extension rule is applied for incoming call from extensions that...

Page 394: ...hone Number Enter the number of up to 15 digits Default Blank When the entered number matches at the begining of the Caller Number the reformatting rule is applied 4Delete Digits Enter a number of dig...

Page 395: ...ller Number Reformatting List of Caller Number Reformatting Settings The list of entered Caller Number Reformatting Settings 1 2 3 1 Edit Click to edit an entry 2 Delete Click to delete an entry 3 Del...

Page 396: ...ID Allocation Set the DID you use for External lines Default Don t Select Range Don t Select or DID 1 10 L L When selecting a DID the IP line number phone number that is entered in the SIP Server Entr...

Page 397: ...e client transceiver Call Default Destination Makes a call to the Default Call Destination Number 5 5Default Call Destination Number Displayed only when Action 4 is set to Call Default Destination Set...

Page 398: ...PBX Advanced Settings 14 32 DID screen PBX Advanced Settings DID List of DID settings Displays the DID list L L When a DID is set the IP line setting in Inbound Call is changed to DID PBX Inbound Cal...

Page 399: ...2 SYSLOG screen 15 13 M MSYSLOG 15 13 SNMP screen 15 14 M MSNMP 15 14 Network Test screen 15 15 M MPing Test 15 15 M MTraceroute Test 15 16 Management LTE Module screen 15 17 M MManagement LTE Network...

Page 400: ...acters are displayed as an asterisk or a dot 4New Password Confirm Enter the new password again 5 Apply Click to apply the entries 6 Reset Click to reset the settings L L You cannot reset after clicki...

Page 401: ...B flash drive access option Default M Firmware Update M Settings Backup Restore Firmware Update p 15 22 Settings Backup Restore p 15 19 3USB Authentication Key Enter a USB Authentication Key of up to...

Page 402: ...continue as shown below If you have inserted a flash drive in which an authentication key is already saved An authentication key already exists on the USB flash drive If you want to overwrite the key...

Page 403: ...Enter the HTTP Port number Default 80 Range 80 or 1024 65535 Some of the RoIP Gateway s ports cannot access HTTP L L Enter a different port number from HTTPS Telnet or SSH 3HTTPS Select whether to all...

Page 404: ...ault the RoIP Gateway can not be accessed from a Telnet client because the Telnet setting is set to Disable Management Management Tools Telnet SSH Telnet See page 15 7 After entering VE PG4 enter the...

Page 405: ...ogram L L This product supports only the SSH protocol Version 2 L L Prepare an SSH client to use SSH 4 SSH Authentication Method Select the SSH Authentication Method to access the RoIP Gateway when yo...

Page 406: ...red Stop Does not check 2Confirmation State Click Start to start checking PWR blinks red While checking the Start button changes to the Stop button This function automatically stops in 2 minutes but y...

Page 407: ...Time Date and Time screen 1 2 3 1Current Time Displays the current time 2Manually Set Time Displays the time when you opened this screen L L Refresh the browser screen to refresh the time 3 Set Click...

Page 408: ...e 1Time Zone Select the appropriate Time Zone Default UTC 2Use Daylight Savings Time Select Disable if not necessary Default Enable L L If Enable is selected the RoIP Gateway automatically adjusts the...

Page 409: ...this address the address set in the NTP Server 2 3 item is used 3NTP Server 2 Enter the second time management server s IP address Default 210 173 160 57 4Status Displays the status whether or not to...

Page 410: ...n Default Enable When you select Enable the RoIP devices function as an NTP server and set the internal clock time of the RoIP Gateway L L This function can be used only for Icom RoIP devices which ca...

Page 411: ...2INFO Select Enable to display the INFO messages in Host IP Address 4 Default Enable 3NOTICE Select Enable to display the NOTICE messages in Host IP Address 4 Default Enable 4Host IP Address Enter the...

Page 412: ...manage the setting information in the SNMP management tool Default Enable 2Community Name GET Enter the Community name to get the SNMP community string Up to 31 characters Default public 3System Locat...

Page 413: ...acket Size Select the size of the packet s data Default 64 Options 32 64 128 256 512 1024 1448 1500 2048 bytes 4Timeout Select the Ping response time Default 1000 Note If there is no response within t...

Page 414: ...e Default 3 Note If there is no response within the selected time a time out error is returned Options 1 3 5 seconds 4DNS Lookup Select Enable to convert the node s device s IP address into the host n...

Page 415: ...rk is able to connect L L The RoIP Gateway works as the same way as the Auto setting if it could not connect to the last accessed LTE Network Operator PLMN User select You can select the network from...

Page 416: ...15 Management 15 18 Reboot Click Reboot to reboot the RoIP Gateway Management Reboot Reboot screen...

Page 417: ...the saved file into the RoIP Gateway Settings Restore Load the setting file Extension sav into the RoIP Gateway Note Loading takes a few minutes Management Settings Backup Restore 1 2 1Load Settings F...

Page 418: ...15 20 Settings Backup Restore screen List of Settings Displays the changed settings Note The list is cleared when the RoIP Gateway is initialized Management Settings Backup Restore screen This is onl...

Page 419: ...factory defaults L L After the RoIP Gateway is initialized the IP address is returned to the default 192 168 0 1 L L If the network part of the PC IP address is different from that of the RoIP Gateway...

Page 420: ...agement Firmware Update Firmware Update screen NOTE NEVER turn OFF the power until the update has been completed Otherwise the RoIP Gateway may be damaged While updating all connections are disconnect...

Page 421: ...e button is displayed When there is no firmware update Firmware already up to date is displayed When an error message is displayed check the network connection so that you can access the update manage...

Page 422: ...e 2 Apply Click to apply the entries 3 Reset Click to reset the settings L L You cannot reset after clicking Apply Manual Update The firmware can be updated using the saved firmware 1Select the update...

Page 423: ...1 1 32 Kamiminami Hirano ku Osaka 547 0003 Japan A7487 4EX 1 2019 Icom Inc May 2019...

Reviews: