


146
Changing Your Workstation’s Hardware Configuration
Installing Second Level Cache Boards
Installing Second Level Cache Boards
Before installing second level cache boards, perform the procedure in
Removing the Main Tray Assembly on page 111.
Follow these steps to install second level cache boards into your worksta-
tion.
1
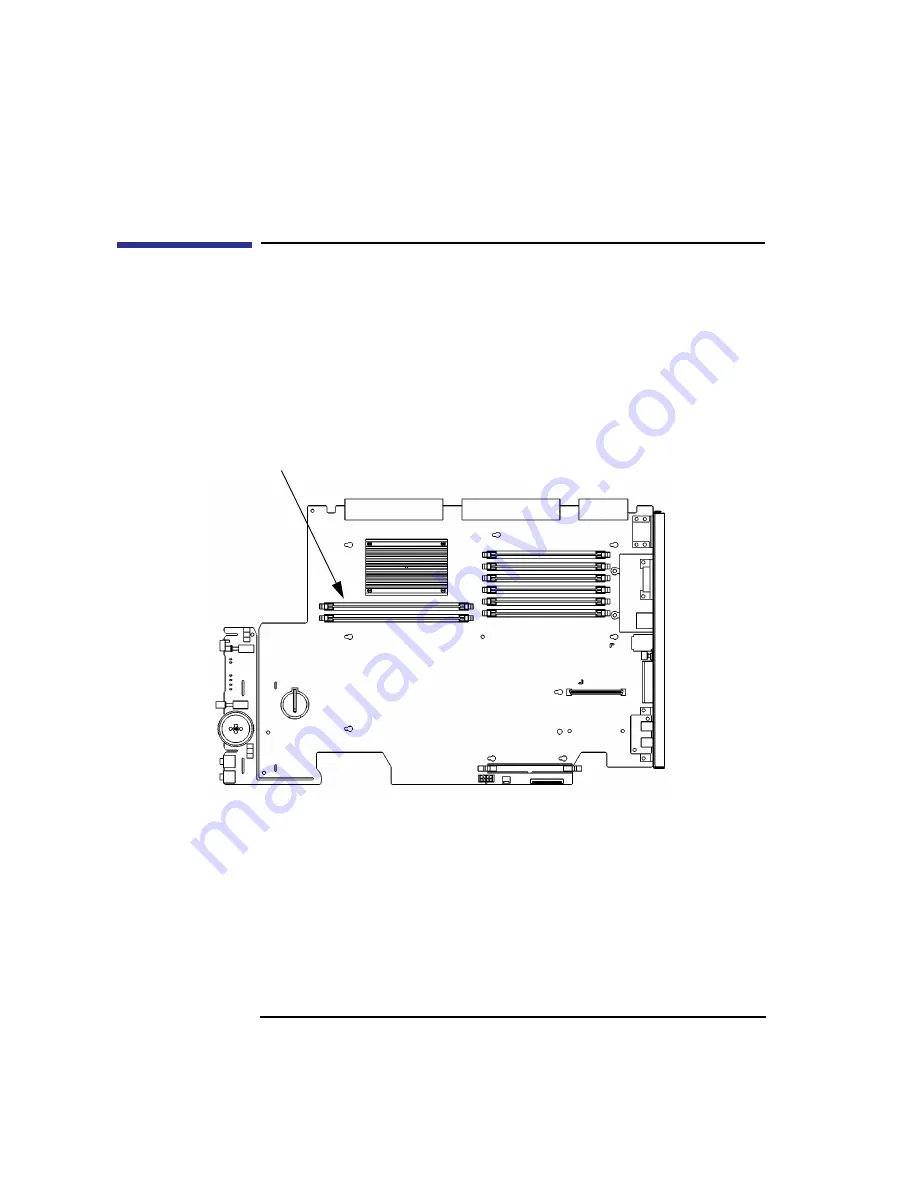
Locate the cache board connectors on the CPU board, as shown in Figure 50.
Figure 50
Cache Boards Location
Cache Board Connectors
Summary of Contents for B132L+
Page 15: ...1 Preface ...
Page 20: ...6 ...
Page 21: ...7 1 System Overview ...
Page 40: ...26 System Overview Networking Overview ...
Page 41: ...27 2 Using Your CD ROM Drive ...
Page 60: ...46 Using Your CD ROM Drive Troubleshooting ...
Page 61: ...47 3 Using Your Digital Data Storage DDS Tape Drive ...
Page 77: ...63 4 Using Your 3 5 Inch Floppy Disk Drive ...
Page 89: ...75 5 Solving Problems ...
Page 105: ...91 A Safety and Regulatory Statements ...
Page 107: ...93 Safety and Regulatory Statements Declaration of Conformity 1 Declaration of Conformity 1 ...
Page 108: ...94 Safety and Regulatory Statements Declaration of Conformity 2 Declaration of Conformity 2 ...
Page 111: ...97 Safety and Regulatory Statements Emissions Regulations VCCI Class 2 ITE ...
Page 117: ...103 Safety and Regulatory Statements Warnings and Cautions Warnings and Cautions ...
Page 118: ...104 Safety and Regulatory Statements Warnings and Cautions ...
Page 119: ...105 B Changing Your Workstation s Hardware Configuration ...
Page 184: ...170 Changing Your Workstation s Hardware Configuration Changing Your Monitor Type ...
Page 185: ...171 C SCSI Connections ...
Page 206: ...192 SCSI Connections Connecting to the SCSI Ports ...
Page 207: ...193 D The Boot Console Interface ...
Page 240: ...226 The Boot Console Interface Displaying PIM Information ...
Page 252: ...238 Glossary ...