


111
Changing Your Workstation’s Hardware Configuration
Removing the Main Tray Assembly
Removing the Main Tray Assembly
Perform the following steps to remove the Main Tray Assembly:
1
Shutdown and prepare the workstation as described in Preparing Your Worksta-
tion earlier in this appendix.
2
Disconnect all cables and connectors from the front and rear connectors of the
system unit.
3
Attach a static-grounding wrist strap to bare metal on the back panel of the system
unit.
4
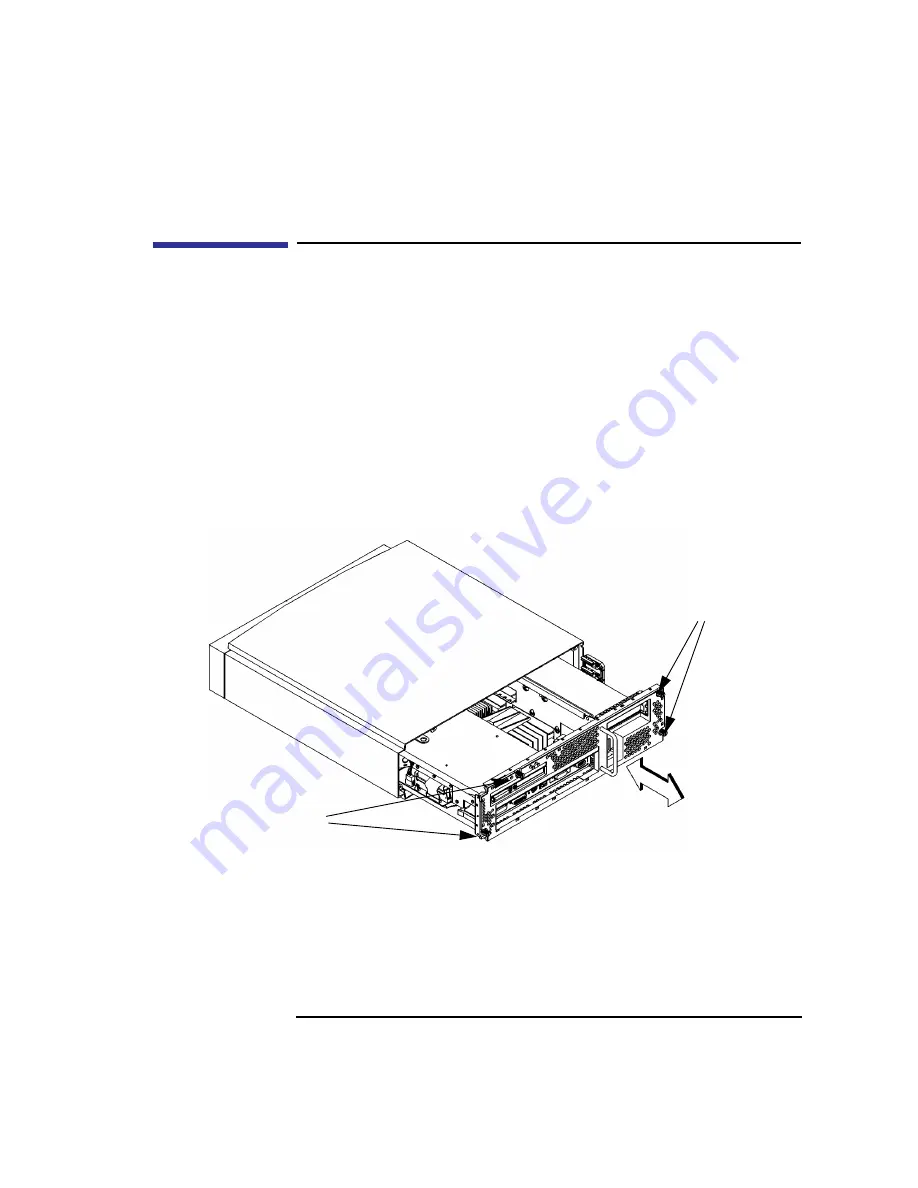
Remove the four thumbscrews on the rear of the system unit, as shown in Figure
21.
Figure 21
Removing Main Tray Assembly
5
Place one hand on the top of the system unit and push, while pulling the handle
on the rear panel with your other hand. See Figure 21.
6
Slide the main tray assembly out of the chassis.
Thumbscrews
Thumbscrews
Summary of Contents for B132L+
Page 15: ...1 Preface ...
Page 20: ...6 ...
Page 21: ...7 1 System Overview ...
Page 40: ...26 System Overview Networking Overview ...
Page 41: ...27 2 Using Your CD ROM Drive ...
Page 60: ...46 Using Your CD ROM Drive Troubleshooting ...
Page 61: ...47 3 Using Your Digital Data Storage DDS Tape Drive ...
Page 77: ...63 4 Using Your 3 5 Inch Floppy Disk Drive ...
Page 89: ...75 5 Solving Problems ...
Page 105: ...91 A Safety and Regulatory Statements ...
Page 107: ...93 Safety and Regulatory Statements Declaration of Conformity 1 Declaration of Conformity 1 ...
Page 108: ...94 Safety and Regulatory Statements Declaration of Conformity 2 Declaration of Conformity 2 ...
Page 111: ...97 Safety and Regulatory Statements Emissions Regulations VCCI Class 2 ITE ...
Page 117: ...103 Safety and Regulatory Statements Warnings and Cautions Warnings and Cautions ...
Page 118: ...104 Safety and Regulatory Statements Warnings and Cautions ...
Page 119: ...105 B Changing Your Workstation s Hardware Configuration ...
Page 184: ...170 Changing Your Workstation s Hardware Configuration Changing Your Monitor Type ...
Page 185: ...171 C SCSI Connections ...
Page 206: ...192 SCSI Connections Connecting to the SCSI Ports ...
Page 207: ...193 D The Boot Console Interface ...
Page 240: ...226 The Boot Console Interface Displaying PIM Information ...
Page 252: ...238 Glossary ...