


143
Changing Your Workstation’s Hardware Configuration
Installing Additional memory
3
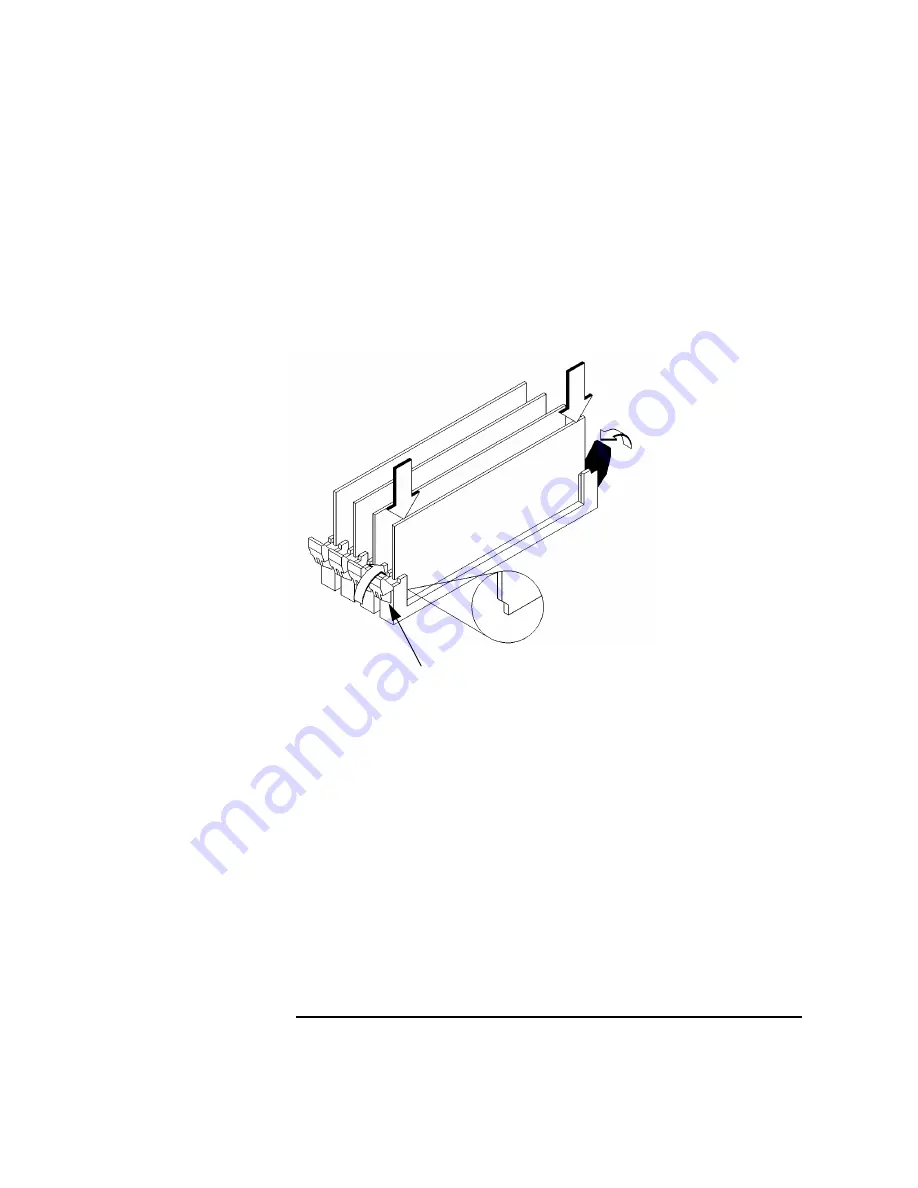
Close the ejector tabs on each side of the memory connector to lessen the force
required to seat the memory module, as shown in Figure 47.
4
Line up the memory module with the guides making sure that the notched end of
the memory module is toward the white ejector tab (front of the main tray), as
shown in Figure 47.
Figure 47
Installing Memory Modules
5
Press firmly and evenly on the memory module to ensure that it is fully seated.
6
Install the memory retainer.
7
To verify that this installation was successful, follow the steps in Appendix D,
“The Boot Console Interface,” on displaying memory information. If you have
only replaced a faulty memory module, you must issue the pdt clear command in
the service menu of the Boot Console Interface. Answer yes (y) to the prompt
“
Continue? (Y/N) >
.”
White Ejector Tab
Summary of Contents for B132L+
Page 15: ...1 Preface ...
Page 20: ...6 ...
Page 21: ...7 1 System Overview ...
Page 40: ...26 System Overview Networking Overview ...
Page 41: ...27 2 Using Your CD ROM Drive ...
Page 60: ...46 Using Your CD ROM Drive Troubleshooting ...
Page 61: ...47 3 Using Your Digital Data Storage DDS Tape Drive ...
Page 77: ...63 4 Using Your 3 5 Inch Floppy Disk Drive ...
Page 89: ...75 5 Solving Problems ...
Page 105: ...91 A Safety and Regulatory Statements ...
Page 107: ...93 Safety and Regulatory Statements Declaration of Conformity 1 Declaration of Conformity 1 ...
Page 108: ...94 Safety and Regulatory Statements Declaration of Conformity 2 Declaration of Conformity 2 ...
Page 111: ...97 Safety and Regulatory Statements Emissions Regulations VCCI Class 2 ITE ...
Page 117: ...103 Safety and Regulatory Statements Warnings and Cautions Warnings and Cautions ...
Page 118: ...104 Safety and Regulatory Statements Warnings and Cautions ...
Page 119: ...105 B Changing Your Workstation s Hardware Configuration ...
Page 184: ...170 Changing Your Workstation s Hardware Configuration Changing Your Monitor Type ...
Page 185: ...171 C SCSI Connections ...
Page 206: ...192 SCSI Connections Connecting to the SCSI Ports ...
Page 207: ...193 D The Boot Console Interface ...
Page 240: ...226 The Boot Console Interface Displaying PIM Information ...
Page 252: ...238 Glossary ...