


5 – Web Browser Interface Configuration & Operation
HD Link Installation & Operation Manual
Version 2, April 2010
Harris Corporation
5-25
Intraplex Products
1.
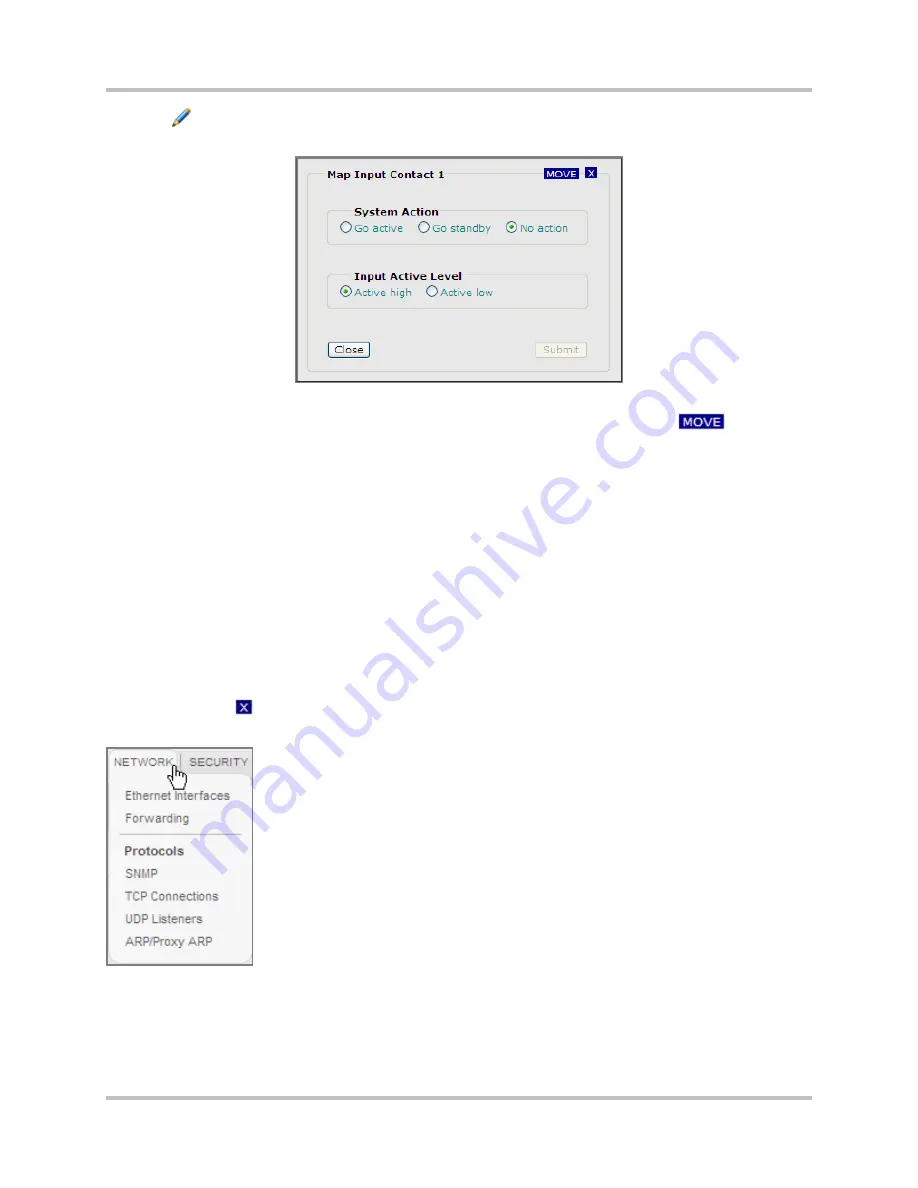
Click
on the row of the contact to be edited. The
Map Input Contact
dialog box appears
(Figure 5-18).
Figure 5-18. Contacts: Map Input Contact Dialog Box
2.
To change the location of the dialog box on your monitor screen, click and hold
and drag
the dialog box as desired.
3.
Click a
System Action
option:
•
Go active
– Transmitter: The system turns on its power amplifier. Receiver: The system
removes the mute on its audio.
•
Go standby
– Transmitter: The system turns off its power amplifier. Receiver: The system
mutes its audio.
•
No action
– The system does nothing when the contact is asserted.
4.
Click an
Input Active Level
for the level of active input:
•
Active high
– The system interprets the contact to be asserted when the voltage level on the
contact is high.
•
Active low
– The system interprets the contact to be asserted when the voltage level on the
contact is low.
5.
Click
Submit
to apply changes.
6.
Click
Close
or
to exit the dialog box.
5.3.7
Network Configurations
There are six
Network
configuration menu commands:
●
Ethernet Interfaces
: View and/or change Ethernet and IP configurations
for the HD and LAN interfaces and put these interfaces in or out of service.
●
Forwarding
: View forwarding routes, add a route, and/or delete the
present route.
●
SNMP
: View and/or configure SNMP parameters.
●
TCP Connections
: View TCP connection details.
●
UDP Listeners
: View a list of UDP listeners.
●
ARP/Proxy ARP
: View and/or clear the ARP table and view/add IP
addresses to the proxy ARP table.