


174
14.5 Configuring a Cloud Storage
The cloud storage facilitates you to upload and download the recorded files at any time and at any
place, which can highly enhance the efficiency.
Steps:
1.
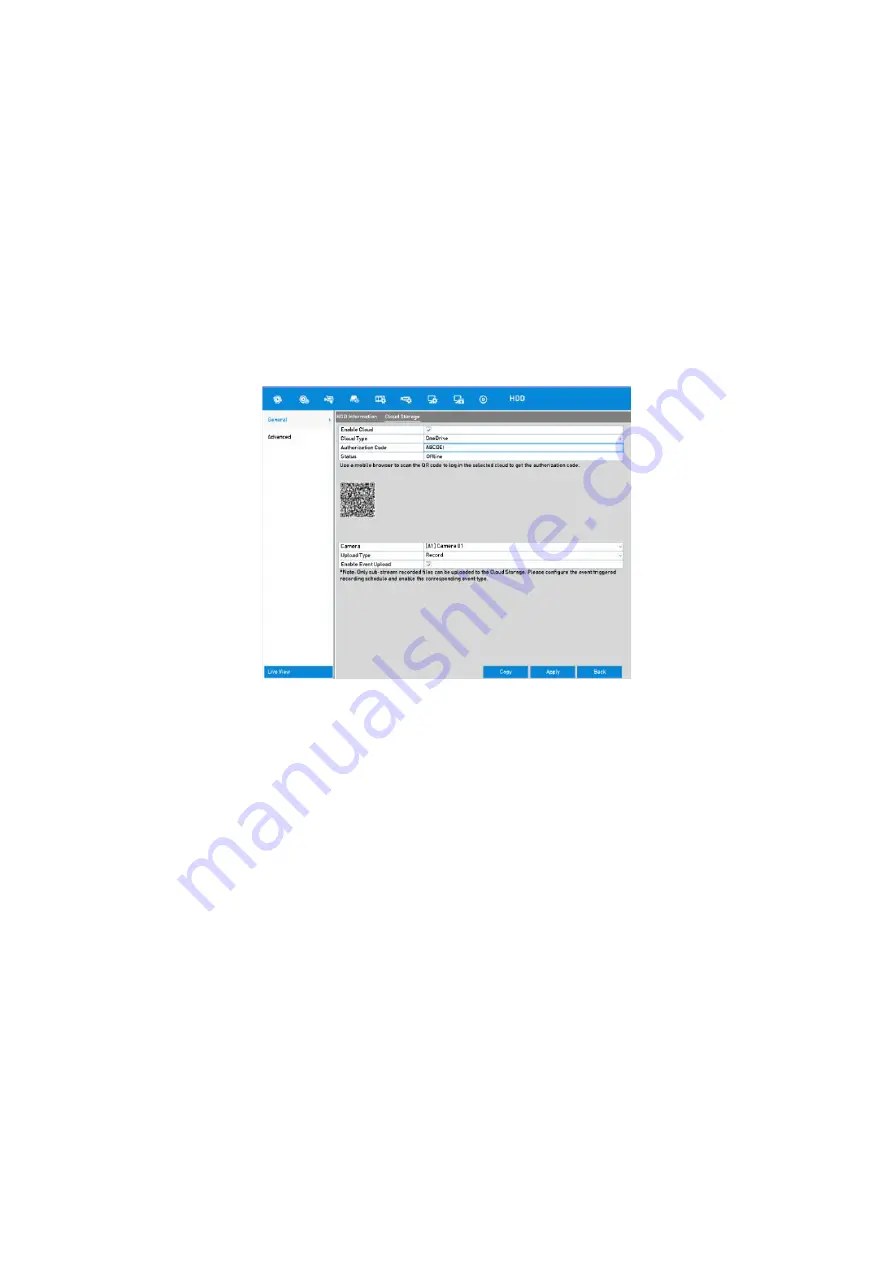
Go to
Menu > HDD > General > Cloud Storage
.
2.
Check the <Enable Cloud> checkbox to enable the feature.
3.
Select the <Cloud Type> from the drop-down list to <One Drive>, <Google Drive> or <Drop
Box>.
Cloud Storage Interface
4.
According to the prompts, you are required to use a mobile browser to scan the QR code to
log in to the selected cloud to get the authentication code. Then copy the authentication code
to the
<Authentication Code> text filed.
5.
Click
<Apply> and then go back to the main menu.
6.
Enter the <Cloud Storage> interface again about 20 seconds later. When the <Status> shows
<Online>, it indicates that the registration was successful.
7.
Configure the recording schedule.
Go back to enter the
<
Record> interface, choose a certain camera from the <Camera>
drop-down list and check the <Enable Schedule> checkbox to enable the schedule recording.
For details on the recording schedule, refer to
5.2 Configuring the Recording
and Capture
Schedule.


