Programming Examples
for Fixed-Wing Models
50
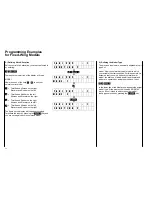
11.) Adjusting Servo Throw
Normally one should choose the size of the control
horn and servo arms so they provide approximately
the required control surface throw. In this context you
should remember: the relative size of the arm of a
servo and the lever of a control horn determines the
magnitude of the throw of the control surface. All
control linkages introduce a certain amount of play,
which can not be completely eliminated even when
using top quality servos and working with ultimate
precision, with the slop increasing with time.
Everything should be done to reduce slop as much as
possible. Here are some basic rules.
1. Keep control horns as large as possible as this
helps minimise slop.
2. Slop will be greater the more acute or obtuse the
angle formed by the linkage and control horn. Slop
will be smallest when the linkage and horn for a right
angle (90°).
3. Servo slop will make itself felt more the smaller the
angular range the servo operates over.
When applying these fundamental rules the
conclusion must be drawn that full servo throw should
be used for the controls of a model, using the largest
possible control horns, and that the required control
throw should be achieved by adjusting the servo arm.
In practical operation, however, smaller and larger
deviations from these ideal conditions have to be
accepted, such as the selection of smaller control
horns for visual reasons, the control surface linkages
will have to be concealed in the gaps between
surfaces, or the accommodation of large servo arms
is not possible in the fuselage.
Fur such cases the PROFI-ULTRASOFT-Module
provides the ability to adjust servo throw, with all the
servos and each direction of operation being
separately adjustable. To make this point perfectly
clear: this possibility should be utilised only after you
have mechanically optimised the linkages as far as
possible in every case. At first glance, taking the
easiest and simplest way of linking the control
surfaces and performing adjustments via the
transmitter options may appear to be a good solution,
but in that case a lot of obtainable control precision
will be lost. This, of course, is not limited to the control
surfaces, but also applies to the throttle as well. Here
again the linkage should be attached to the outermost
hole of the carburettor lever and a servo arm chosen
which will open the carburettor fully when the throttle
stick is in the full throttle position, and will close the
carburettor fully with the stick and trim fully pulled
back. It is important that the servo is not mechanically
restricted in it’s motion. If this can not be achieved
mechanically the adjustments may then be optimised
using the throw adjust (code 12). To achieve this,
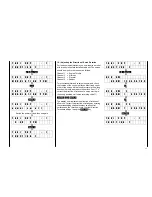
input:
1
2
ENTER
The select the control channel to be used for throw
adjustments:
1
= Throttle
2
= Ailerons
3
= Elevator
4
= Rudder
Let us assume you wish to adjust servo throw for the
throttle operation, press in this
1
case.
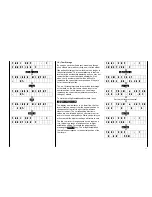
The display now indicates normal servo throw
(100%). Shift the throttle stick to the full throttle
position and adjust the carburettor with the aid of the
INC
and
DEC
keys so it will be fully open, but is not
hitting the mechanical stops. The display now shows
the servo throw in % of normal servo throw.
Move the throttle to the idle position and set the trim
slider for throttle all the way back against it’s stop,
where the carburettor will be as closed as possible.
The display now shows 100% again, since for this
side of the servo throw (viewed from the centre) the
normal value is still effective.
Throw is now adjusted using the
INC
and
DEC
keys so the carburettor is fully closed without hitting
the mechanical stop. It is possible that an idle stop
screw on the carburettor will have to be adjusted to
permit the carburettor to fully close. You should now
be able to adjust the RPM of the engine with the idle
trim, and also stop the engine with the trim fully back.
In the same manner you’ll be able to adjust the throw
of the control surfaces, if necessary asymmetrically,
for example if the elevator at “full up” deflection blocks
the rudder, and downward deflection must not be
reduced. Call the elevator position and adjust
deflection using the
INC
and
DEC
keys so that the
rudder remains freely movable. Remember to take
changes in elevator trim into account to ensure that
fowling does not occur. Terminate the input by
pressing the
ENTER
key.
Summary of Contents for mc-18
Page 1: ...1...
Page 10: ...Block Diagram NORMAL 10...
Page 11: ...Block Diagram NORMAL DIFF 11...
Page 12: ...Block Diagram DELTA DIFF 12...
Page 13: ...Block Diagram UNIFLY DIFF 13...
Page 14: ...Block Diagram Quadro Flap 14...
Page 15: ...Block Diagram F3B 3 wing servos 15...

