GE Multilin
F60 Feeder Protection System
5-49
5 SETTINGS
5.2 PRODUCT SETUP
5
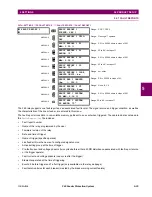
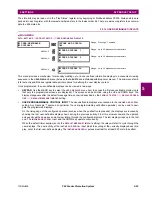
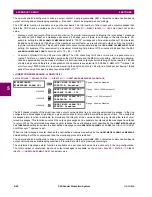
It can also be programmed to reset automatically through the
PUSHBTN 1 AUTORST
and
PUSHBTN 1 AUTORST DELAY
set-
tings. These settings enable the autoreset timer and specify the associated time delay. The autoreset timer can be
used in select-before-operate (SBO) breaker control applications, where the command type (close/open) or breaker
location (feeder number) must be selected prior to command execution. The selection must reset automatically if con-
trol is not executed within a specified time period.
•
Self-reset mode
: In self-reset mode, a pushbutton will remain active for the time it is pressed (the
pulse duration
) plus
the dropout time specified in the
PUSHBTN 1 DROP-OUT TIME
setting. If the pushbutton is activated via FlexLogic™, the
pulse duration is specified by the
PUSHBTN 1 DROP-OUT TIME
only. The time the operand remains assigned to the
PUSH-
BTN 1 SET
setting has no effect on the pulse duration.
The pushbutton is reset (deactivated) in self-reset mode when the dropout delay specified in the
PUSHBTN 1 DROP-OUT
TIME
setting expires.
The pulse duration of the remote set, remote reset, or local pushbutton must be at least 50 ms to operate the push-
button. This allows the user-programmable pushbuttons to properly operate during power cycling events and vari-
ous system disturbances that may cause transient assertion of the operating signals.
The local and remote operation of each user-programmable pushbutton can be inhibited through the
PUSHBTN 1 LOCAL
and
PUSHBTN 1 REMOTE
settings, respectively. If local locking is applied, the pushbutton will ignore set and reset commands
executed through the front panel pushbuttons. If remote locking is applied, the pushbutton will ignore set and reset com-
mands executed through FlexLogic™ operands.
The locking functions are not applied to the autorestart feature. In this case, the inhibit function can be used in SBO control
operations to prevent the pushbutton function from being activated and ensuring “one-at-a-time” select operation.
The locking functions can also be used to prevent the accidental pressing of the front panel pushbuttons. The separate
inhibit of the local and remote operation simplifies the implementation of local/remote control supervision.
Pushbutton states can be logged by the event recorder and displayed as target messages. In latched mode, user-defined
messages can also be associated with each pushbutton and displayed when the pushbutton is on or changing to off.
•
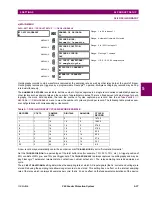
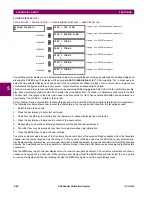
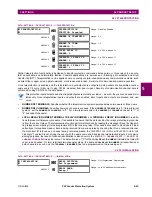
PUSHBUTTON 1 FUNCTION
: This setting selects the characteristic of the pushbutton. If set to “Disabled”, the push-
button is not active and the corresponding FlexLogic™ operands (both “On” and “Off”) are de-asserted. If set to “Self-
Reset”, the control logic is activated by the pulse (longer than 100 ms) issued when the pushbutton is being physically
pressed or virtually pressed via a FlexLogic™ operand assigned to the
PUSHBTN 1 SET
setting.
When in “Self-Reset” mode and activated locally, the pushbutton control logic asserts the “On” corresponding Flex-
Logic™ operand as long as the pushbutton is being physically pressed, and after being released the deactivation of
the operand is delayed by the drop out timer. The “Off” operand is asserted when the pushbutton element is deacti-
vated. If the pushbutton is activated remotely, the control logic of the pushbutton asserts the corresponding “On” Flex-
Logic™ operand only for the time period specified by the
PUSHBTN 1 DROP-OUT TIME
setting.
If set to “Latched”, the control logic alternates the state of the corresponding FlexLogic™ operand between “On” and
“Off” on each button press or by virtually activating the pushbutton (assigning set and reset operands). When in the
“Latched” mode, the states of the FlexLogic™ operands are stored in a non-volatile memory. Should the power supply
be lost, the correct state of the pushbutton is retained upon subsequent power up of the relay.
•
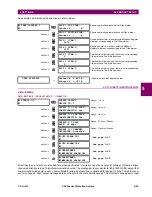
PUSHBTN 1 ID TEXT:
This setting specifies the top 20-character line of the user-programmable message and is
intended to provide ID information of the pushbutton. Refer to the
User-definable displays
section for instructions on
how to enter alphanumeric characters from the keypad.
•
PUSHBTN 1 ON TEXT:
This setting specifies the bottom 20-character line of the user-programmable message and is
displayed when the pushbutton is in the “on” position. Refer to the
User-definable displays
section for instructions on
entering alphanumeric characters from the keypad.
•
PUSHBTN 1 OFF TEXT:
This setting specifies the bottom 20-character line of the user-programmable message and is
displayed when the pushbutton is activated from the on to the off position and the
PUSHBUTTON 1 FUNCTION
is
“Latched”. This message is not displayed when the
PUSHBUTTON 1 FUNCTION
is “Self-reset” as the pushbutton operand
status is implied to be “Off” upon its release. The length of the “Off” message is configured with the
PRODUCT SETUP
ÖØ
DISPLAY PROPERTIES
Ö
FLASH MESSAGE TIME
setting.
•
PUSHBTN 1 HOLD
: This setting specifies the time required for a pushbutton to be pressed before it is deemed active.
This timer is reset upon release of the pushbutton. Note that any pushbutton operation will require the pushbutton to be
pressed a minimum of 50 ms. This minimum time is required prior to activating the pushbutton hold timer.
NOTE
Summary of Contents for F60 UR Series
Page 2: ......
Page 4: ......
Page 30: ...1 20 F60 Feeder Protection System GE Multilin 1 5 USING THE RELAY 1 GETTING STARTED 1 ...
Page 48: ...2 18 F60 Feeder Protection System GE Multilin 2 2 SPECIFICATIONS 2 PRODUCT DESCRIPTION 2 ...
Page 126: ...4 30 F60 Feeder Protection System GE Multilin 4 2 FACEPLATE INTERFACE 4 HUMAN INTERFACES 4 ...
Page 354: ...5 228 F60 Feeder Protection System GE Multilin 5 9 TESTING 5 SETTINGS 5 ...
Page 382: ...6 28 F60 Feeder Protection System GE Multilin 6 5 PRODUCT INFORMATION 6 ACTUAL VALUES 6 ...
Page 398: ...8 8 F60 Feeder Protection System GE Multilin 8 2 FAULT LOCATOR 8 THEORY OF OPERATION 8 ...
Page 414: ...A 14 F60 Feeder Protection System GE Multilin A 1 PARAMETER LIST APPENDIXA A ...
Page 492: ...B 78 F60 Feeder Protection System GE Multilin B 4 MEMORY MAPPING APPENDIXB B ...
Page 530: ...D 10 F60 Feeder Protection System GE Multilin D 1 IEC 60870 5 104 APPENDIXD D ...
Page 542: ...E 12 F60 Feeder Protection System GE Multilin E 2 DNP POINT LISTS APPENDIXE E ...
Page 558: ...x F60 Feeder Protection System GE Multilin INDEX ...

