▶
If applicable, unlock the server, see
"Unlocking the server" on page 49
▶
Pull the green locking bar (1) and fold out the accessible drive bay cover.
▶
Remove the accessible drive bay cover (2).
CAUTION
▶
Do not pull too hard to avoid damage to the locking mechanism.
When operating with tape drives:
If the system is programmed to eject the media automatically, the
accessible drives must not be obstructed.
The accessible drive bay cover is replaced and the server locked in the reverse
order.
4.7.5
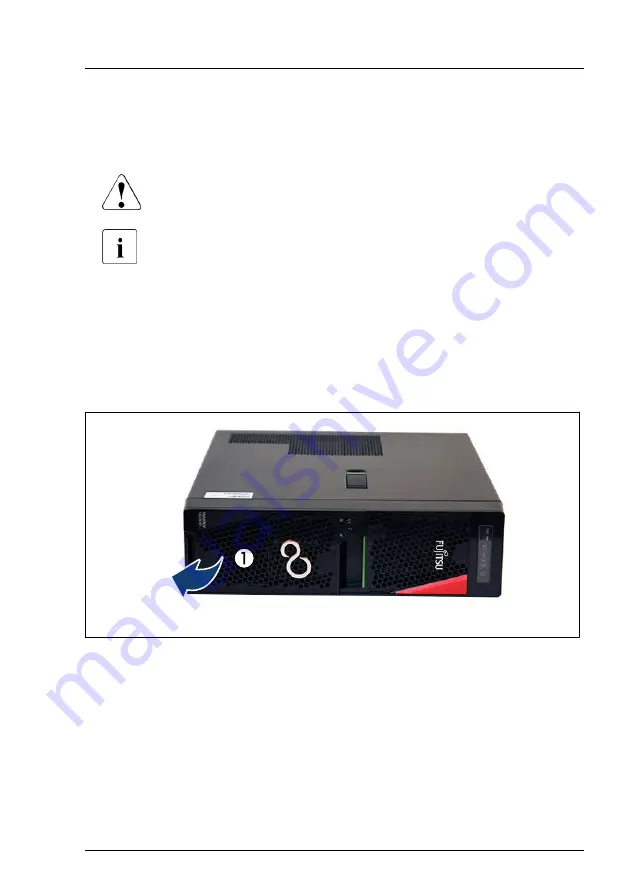
Removing the HDD bay cover
Figure 9: Removing the HDD bay cover
▶
If applicable, unlock the server, see
"Unlocking the server" on page 49
▶
Fold out the HDD bay cover.
▶
Remove the HDD bay cover (1).
The HDD bay cover is replaced and the server locked in the reverse order.
Basic hardware procedures
TX1320 M5
Upgrade and Maintenance Manual
53
Summary of Contents for PRIMERGY TX1320 M5
Page 70: ...Basic hardware procedures 70 Upgrade and Maintenance Manual TX1320 M5 ...
Page 132: ...Power supply unit PSU 132 Upgrade and Maintenance Manual TX1320 M5 ...
Page 180: ...Fans 180 Upgrade and Maintenance Manual TX1320 M5 ...
Page 266: ...Accessible drives 266 Upgrade and Maintenance Manual TX1320 M5 ...
Page 272: ...Front panel 272 Upgrade and Maintenance Manual TX1320 M5 ...
Page 280: ...Front USB connector 280 Upgrade and Maintenance Manual TX1320 M5 ...
Page 298: ...Dust cover 298 Upgrade and Maintenance Manual TX1320 M5 ...
Page 346: ...System board and components 346 Upgrade and Maintenance Manual TX1320 M5 ...
Page 402: ...List of all used screws for PRIMERGY Servers Assembled in Germany and Japan February 2019 ...


