


Scan to PC
359
Scan
5
Scan to PC
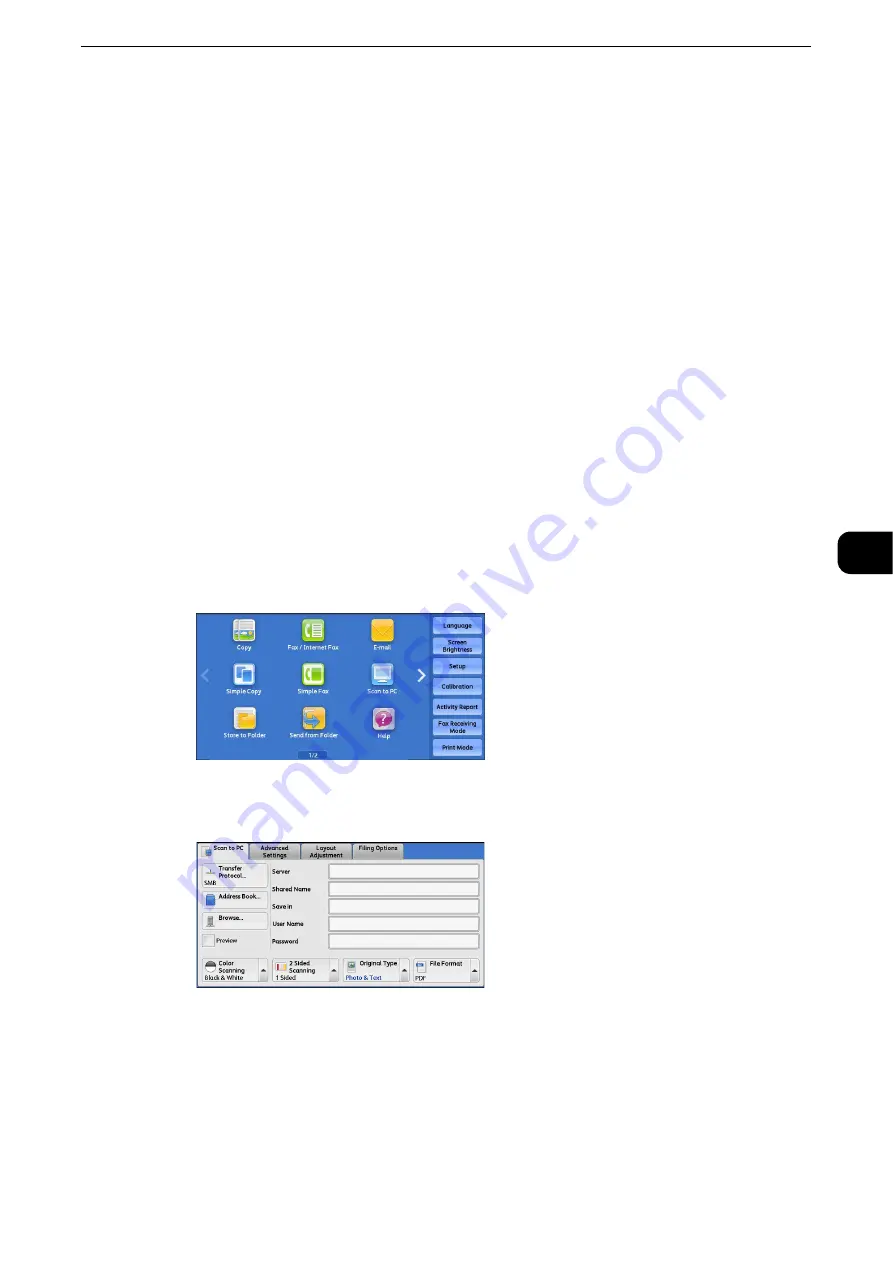
This section describes the procedure to select features on the [Scan to PC] screen. The Scan
to PC service allows you to scan documents and send the scanned data to a network
computer via the FTP or SMB protocol. The following describes features available on the
[Scan to PC] tab.
Note
z
Before scanning, you must create a shared folder on your computer to save scanned data in. Furthermore, if
you use the FTP protocol, you must set the FTP service. For information on the computer settings, refer to the
documentation provided with your operating system or the official website of the respective company. For
information on supported operating systems, refer to "Appendix" > "Specifications" in the Administrator
Guide.
z
Scan to My Folder feature in which the scanned document can be transferred to a different destination
according to an authenticated user when you select [Scan to PC] on the [Service Home] screen. The
authenticated user’s information such as the user name or storage location of the scanned document, is
automatically determined and displayed.
Reference
z
You can customize the layout of the features displayed on the [Scan to PC] screen. For more information, refer to "Tools" > "Scan
Service Settings" > "Screen Defaults" > "1st Tab - Features Allocation" in the Administrator Guide.
z
You can set [First Tab] or [Address Book] for the screen displayed when you select [Scan to PC] on the Service
Home screen. For more information, refer to "Tools" > "Scan Service Settings" > "Screen Defaults" > "Scan to
PC Screen Default" in the Administrator Guide.
1
Select [Scan to PC] on the Services Home screen.
2
Select a feature on the [Scan to PC] screen.
Note
z
Depending on the settings for [Scan to PC Screen Default] in the System Administration mode, the [Server
Address Book] screen is displayed. For more information, refer to "Tools" > "Scan Service Settings" > "Screen
Defaults" > "Scan to PC Screen Default" in the Administrator Guide.
z
Fields displayed on the screen vary depending on the protocol you have selected.
Transfer Protocol (Selecting a Transfer Protocol)
You can select a transfer protocol using the following procedure.
Summary of Contents for ApeosPort-VI C2271
Page 12: ...12...
Page 13: ...1 1Before Using the Machine...
Page 36: ...Before Using the Machine 36 Before Using the Machine 1...
Page 37: ...2 2Product Overview...
Page 54: ...Product Overview 54 Product Overview 2 3 Click OK...
Page 79: ...3 3Copy...
Page 185: ...4 4Fax...
Page 300: ...Fax 300 Fax 4...
Page 301: ...5 5Scan...
Page 413: ...6 6Send from Folder...
Page 434: ...Send from Folder 434 Send from Folder 6...
Page 435: ...7 7Job Flow Sheets...
Page 442: ...Job Flow Sheets 442 Job Flow Sheets 7...
Page 443: ...8 8Stored Programming...
Page 454: ...Stored Programming 454 Stored Programming 8...
Page 455: ...9 9Web Applications...
Page 458: ...Web Applications 458 Web Applications 9 Close Menu Hides the pop up menu...
Page 460: ...Web Applications 460 Web Applications 9...
Page 461: ...10 10Media Print Text and Photos...
Page 478: ...Media Print Text and Photos 478 Media Print Text and Photos 10...
Page 479: ...11 11Job Status...
Page 484: ...Job Status 484 Job Status 11 Print this Job Report Prints the Job Report...
Page 513: ...12 12Computer Operations...
Page 540: ...Computer Operations 540 Computer Operations 12...
Page 541: ...13 13Appendix...


