15
2 HARDWARE OVERVIEW
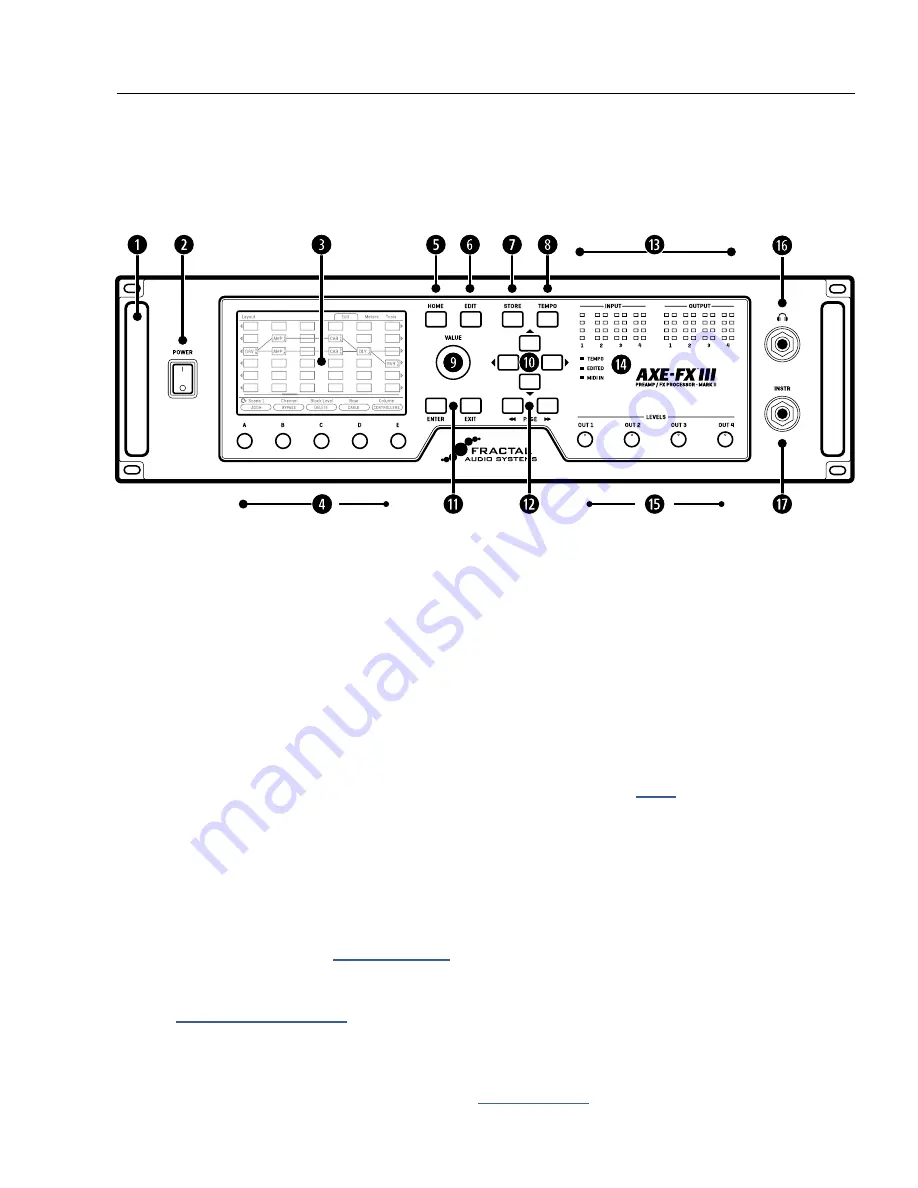
THE FRONT PANEL
q
Chassis — The Axe-Fx III is housed in a rugged 3U steel chassis with a sleek anodized aluminum front panel.
A pair of high-strength handles make the unit easy to manage.
w
Power Switch — The front panel power switch turns the Axe-Fx III on or off with pop suppression.
e
Color Display — A large 800×480 custom color display has 30x the resolution of previous models. The
display has excellent brightness and contrast for high readability even in difficult conditions.
A, B, C, D, and E knobs — Five endless rotary push-encoders perform different functions on different menu
pages. Most “Edit” menus show one or two rows of five knobs for easy 1:1 operation. On vertical menu
pages, knob functions are indicated on-screen by labels (“A” through “E”). Push functions are shown on-screen
as buttons. These knobs also have hidden “double tap” functions detailed on
HOME Button — This button shows the Home menu—a convenient starting point for loading or editing
presets, and accessing the tuner, controllers, metering, and global setup options. You can double-tap home
as a shortcut to open the layout grid.
EDIT Button — This button opens the Edit menu for a block selected on the Layout grid. You can also tap
EDIT
sequentially to step through all blocks in the current preset (top-to-bottom, left-to-right), or double-tap
to step in reverse order. See
for more on editing presets.
STORE Button — Enters the Store menu where you can save presets and enter names for presets or scenes.
.
TEMPO Button — Tap this button once to show the Tempo page of the Controllers menu, or tap 2+ times to
set a new tempo. The tempo can also be entered using a footswitch or MIDI. After setting the tempo, press
EXIT to go back to back to wherever you were. See
2 HARDWARE OVERVIEW


