background image

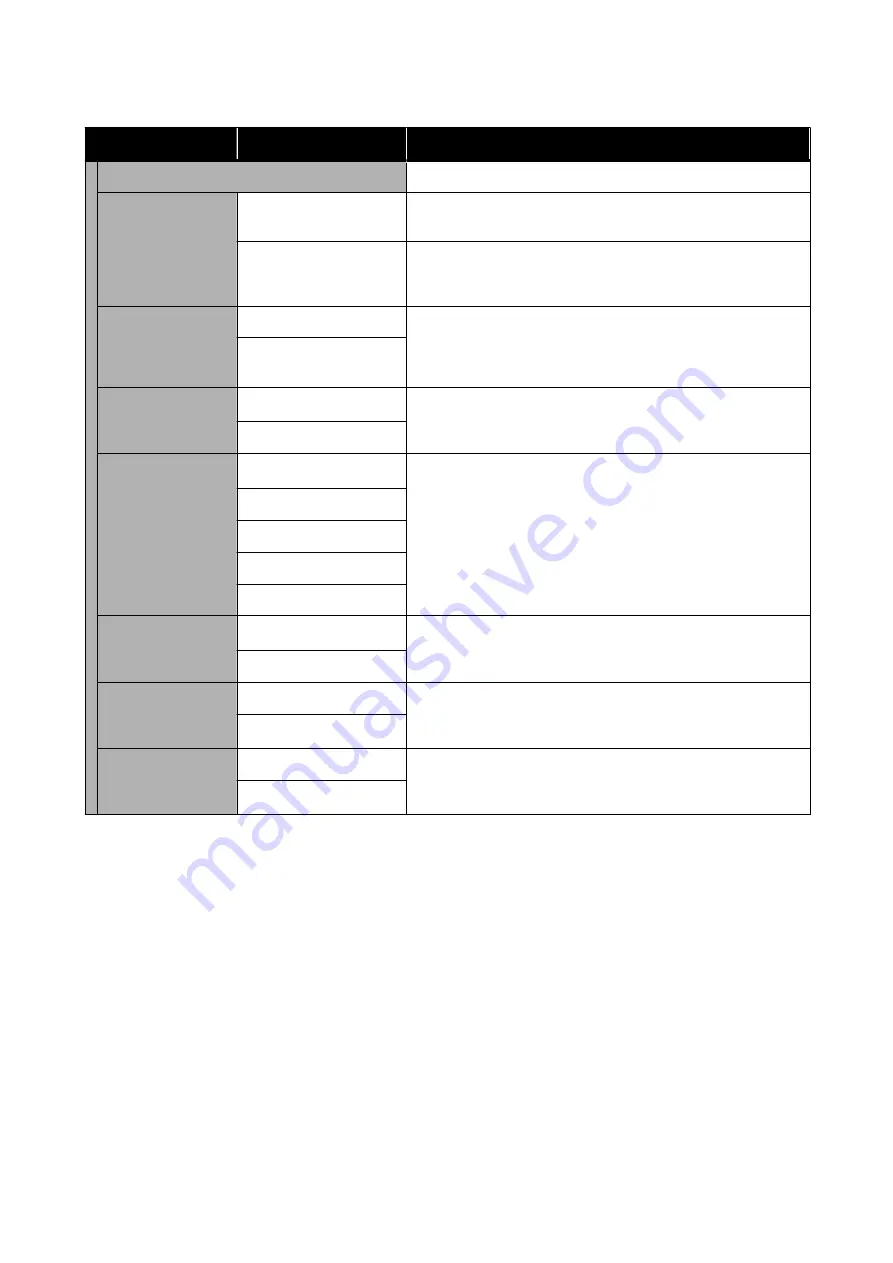
Settings item

Settings value

Explanation

Device Name

Set the name of the printer to use on the network.

TCP/IP

Auto

*

Automatically assign the printer IP address using DHCP
functionality in the router.

Manual

Select this to manually assign a fixed IP address, then input the IP
address, subnet mask, and other required information. For details,
see the 

Administrator's Guide

.

Proxy Server

Use

When using a proxy server to directly connect from the intranet to
the Internet so that the printer may directly access the Internet for
firmware updates or similar, select 

Use

, and set the server name and

port number.

Do Not Use

*

IPv6 Address

Enable

*

Select whether to enable or disable the IPv6 function.

Disable

Link Speed & Duplex

Auto

*

Normally, set this to 

Auto

.

10BASE-T Half Duplex

10BASE-T Full Duplex

100BASE-TX Half Duplex

100BASE-TX Full Duplex

Redirect HTTP to
HTTPS

Enable

*

Select whether to enable or disable the function to auto-redirect
HTTP to HTTPS.

Disable

Disable IPsec/IP Fil‐
tering

Enable

To enable IPsec/IP filtering functionality, use Web Config. For details,
see the 

Administrator's Guide

.

Disable

*

Disable IEEE802.1X

Enable

To enable IEEE802.1X functionality, use Web Config. For details, see
the 

Administrator's Guide

.

Disable

*

SC-T5400 Series/SC-T3400 Series/SC-T3400N Series     User's Guide

Using the Menu


136

Summary of Contents for SC-T3400 SERIES

Page 1: ...User s Guide CMP0155 00 EN ...

Page 2: ...aper Load Position 27 Loading and Removing the Roll Paper 28 Loading Roll Paper 28 Cutting the Roll Paper 31 Removing Roll Paper 33 Loading and Removing Cut Sheet 1 sheet 35 Loading Cut Sheet 1 sheet 35 Removing Cut Sheet 1 Sheet 36 Setting Loaded Paper 37 For Roll Paper 37 For Cut Sheet 1 sheet 38 Optimizing Paper Settings Media Adjust 41 Notes on Making Adjustments 41 Easy Adjustment 41 Paper Fe...

Page 3: ...eral Settings 120 Maintenance 138 Printer Status Print 139 Enlarged Copy menu 140 Memory Device menu 141 Replacing Consumables Handling of Used Consumables 144 Replacing Ink Cartridges 144 Replacing Maintenance Box 146 Replacing the Cutter 147 Problem Solver What to do When a Message is Displayed 149 When a Maintenance Call Printer Error Occurs 150 Troubleshooting 151 You cannot print because the ...

Page 4: ...pe 189 Help for Users in Australia 189 Help for Users in Singapore 190 Help for Users in Thailand 190 Help for Users in Vietnam 190 Help for Users in Indonesia 190 Help for Users in Hong Kong 191 Help for Users in Malaysia 191 Help for Users in India 191 Help for Users in the Philippines 192 SC T5400 Series SC T3400 Series SC T3400N Series User s Guide Contents 4 ...

Page 5: ...Reader or Preview Mac Setup Guide booklet Provides information on how to setup the printer after unpacking it from the box Make sure you read this manual to perform operations safely Operator s Guide booklet or PDF Provides selected information on how to use the printer and frequently used features of the printer General Information PDF Provides important safety instructions printer specifications...

Page 6: ...e search toolbar For Mac Select Find in the Edit menu to open the search toolbar F To enlarge the text in the display that is too small to see well click Click to reduce the size To specify a part of an illustration or screenshot to enlarge do the following For Windows Right click on the page in the PDF manual and select Marquee Zoom in the menu that is displayed The pointer changes to a magnifyin...

Page 7: ...nance Box U Replacing Maintenance Box on page 146 C Paper basket Output from the printer collects in this basket keeping the media clean and free of creases D Casters There are two casters on each leg The casters are normally kept locked once the printer is in place E Cartridge cover Open when replacing ink cartridges U Replacing Ink Cartridges on page 144 SC T5400 Series SC T3400 Series SC T3400N...

Page 8: ...r U Loading Roll Paper on page 28 H Alert lamp This lamp lights or flashes when an error occurs Lights or flashes An error occurred How the lamp lights or flashes varies with the type of error The control panel displays a description of the error Off No error I Cut sheet cover Open the cover when loading a cut sheet of paper U Loading Cut Sheet 1 sheet on page 35 SC T5400 Series SC T3400 Series SC...

Page 9: ...es while moving left and right to print D Attachments Attach them to the spindle for loading a 3 inch core roll of plain paper U Loading Roll Paper on page 28 E Spindle When loading roll paper into the printer insert this through the roll paper F Movable flange transparent This fixes the roll paper placed on the spindle Attach or detach it when placing or removing roll paper on from the spindle SC...

Page 10: ...loading a cut sheet of paper load the sheet while sliding its edge against the guide U Loading and Removing Cut Sheet 1 sheet on page 35 SC T5400 Series SC T3400 Series SC T3400N Series User s Guide Introduction 10 ...

Page 11: ...vents U Installation space on page 17 C AC inlet Connect the supplied power cable here D USB port Use when connecting to a computer using a USB cable E OPTION port Connect a scanner to perform enlarged copying U Making Enlarged Copies with an A3 or A4 Scanner on page 97 F LAN port Connects the LAN cable SC T5400 Series SC T3400 Series SC T3400N Series User s Guide Introduction 11 ...

Page 12: ...dicated by a lit or flashing light On Connected Flashing Receiving data H Status light green orange The color indicates the network transmission speed Off 10BASE T Orange 100BASE TX Green 1000BASE T SC T5400 Series SC T3400 Series SC T3400N Series User s Guide Introduction 12 ...

Page 13: ...erations U Operator s Guide booklet or PDF A Information display area Displays the printer s status error messages and so on B Roll paper information area When roll paper is loaded Displays information on the loaded roll paper When Manage Remaining Amount is set to On the approximate remaining amount remaining length is displayed Touching this area displays a menu to perform operations such as set...

Page 14: ...ess LAN Wi Fi is disabled Searching for SSID IP address not set or signal strength is 0 or poor Connected to a wireless LAN Wi Fi The number of lines indicates the signal strength The more lines there are the better the signal strength Wi Fi Direct simple AP connection is disabled Wi Fi Direct simple AP connection is enabled H Consumables status icon Estimates of the remaining amounts of ink cartr...

Page 15: ...take your drawings outdoors with you because they are printed using ink with excellent water resistance U Printing CAD Drawings on page 54 Posters and displays that are vivid and also allow for short term outdoor display Posters with vivid hues can be printed simply by selecting for example Poster Photo Perspective in Select Target of the supplied printer driver Short term outdoor display is even ...

Page 16: ...eck a detailed image in the preview screen before printing Support for wireless LAN connection This printer can be freely placed where desired without considering cable routing because it can connect with a computer via a wireless LAN to print Of course it also supports a wired LAN connection Furthermore even if your device is not connected to a LAN this printer also allows printing by directly co...

Page 17: ... documentation supplied with the paper Also when operating in dry areas air conditioned environment or under direct sunlight maintain the appropriate humidity Do not install the printer next to heat sources or directly in the path of air from a ventilator or air conditioner Failure to observe this precaution could result in the print head nozzles drying and clogging The print head may not be cappe...

Page 18: ...nter in an Environment of 10 C or Less on page 181 Notes on handling ink cartridges Note the following points when handling ink cartridges to maintain good print quality The ink cartridges packaged with your printer are partly used during initial setup In order to produce high quality printouts the print head in your printer will be fully charged with ink This one off process consumes a quantity o...

Page 19: ...e wavy or curled paper For roll paper cut off the wavy or curled parts and then load it again For cut sheets use new paper Do not wet the paper Do not throw away the paper packaging as you can use it for storing the paper Avoid locations that are subject to direct sunlight excessive heat or humidity Keep cut sheets in their original package after opening and keep them in a flat place Remove roll p...

Page 20: ...control panel or other operations performed When the printer enters sleep mode the control panel s screen turns off and the internal motors and other parts switch off to consume less power Sleep mode is exited if a print job is received or the screen of the control panel is touched The delay before the printer enters sleep mode can be selected from values between 1 and 210 minutes At default setti...

Page 21: ...ows you to update the firmware and already installed software of the printer U Updating Software or Installing Additional Software on page 25 LFP Print Plug In for Office Windows Only Plug in software for Microsoft Office applications Word Excel and PowerPoint Installing this plug in displays ribbon items in Office applications that give quick access to horizontal and vertical banner printing and ...

Page 22: ...ware disc Network EpsonNetConfig U Administrator s Guide Download software from the Internet and install Connect the computer to the Internet and install Built in Software in the Printer The following software comes preinstalled in the printer Start and use it from a Web browser via the network Software Name Function Web Config The network security settings can be configured from Web Config This s...

Page 23: ... IPv6 http IP address of printer Example IPv4 http 192 168 100 201 IPv6 http 2001 db8 1000 1 Closing Close the Web browser Function Summary This section introduces the main functions of Web Config See the Administrator s Guide for more details Main Functions Check the printer s status such as the remaining amount of ink Check and update the printer s firmware version Configure the printer s networ...

Page 24: ...Edge Dashboard Alternatively from Start click All apps or All Programs Epson Software Epson Edge Dashboard Mac From the desktop menu click the Epson Edge Dashboard icon and select Show Epson Edge Dashboard B The Epson Edge Dashboard screen appears See the Epson Edge Dashboard help for more details Closing Close the Web browser to close the Epson Edge Dashboard screen Since Epson Edge Dashboard is ...

Page 25: ...rd and then type the software name in the search box of the displayed window the software appears immediately The software can also be started by clicking the printer icon on the Taskbar of the desktop and then selecting Software Update Mac Select Go Applications Epson Software EPSON Software Updater C Select the software or manuals to be updated and then update them Follow the on screen instructi...

Page 26: ...SC XXXXX Printer Uninstall E Select the printer icon and then click OK F Follow the on screen instructions to continue When the delete confirmation message appears click Yes Restart the computer if you are reinstalling the printer driver Mac When reinstalling or upgrading the printer driver or other software follow the steps below to uninstall the target software first Printer Driver Use the Unins...

Page 27: ...ing it in the opposite way or use paper with no problem Unsupported paper Do not use paper that is wavy torn cut folded too thick too thin has a sticker affixed etc Doing so may cause paper jams or soiled prints See the following for paper supported by the printer U Epson Special Media Table on page 171 U Supported Commercially Available Paper on page 175 Paper Load Position Roll paper and cut she...

Page 28: ...ch core roll paper cImportant The printer only supports plain paper for 3 inch roll cores Epson cannot guarantee feed and print quality for 3 inch roll cores for other than plain paper Loading Roll Paper Note You can load the paper while viewing the loading procedure on the screen To view the procedure on the screen touch the Roll paper information area of the Home screen A Check that Load paper i...

Page 29: ...k flange remove the attachment from the spindle 3 inch roll core Attach the attachments to the both flanges Align the triangle marks on the flange with those on the attachment and push in until the tabs are secured E Place the roll paper on a flat surface and then insert the spindle With the black flange is on the right orient the roll paper so that the leading edge is as shown in the figure below...

Page 30: ... the paper slot Inserting it skewed will cause a skew error or paper jam Note If the leading edge of the roll paper is not horizontal or not cut cleanly it will be cut automatically after loading completes However it will not be cut if Auto Cut is set to Off K Close the roll paper cover and cut sheet cover L On the displayed screen set the paper type that matches the loaded paper and set remaining...

Page 31: ...ff in Advanced Roll Paper Option Auto Cut of the printer driver and then print Leave the auto cut setting of the printer on Note The auto cut setting of the printer driver has priority over that of the printer The auto cut setting of the printer driver is reset to the default setting of Normal Cut when the application closes To turn off auto cut for HP GL 2 mode printing enlarged copying or direct...

Page 32: ...ch paper cut the paper with scissors as described in the following procedure Do not use a cutter The printer may be damaged A Turn off the auto cut setting and then print To print cut lines turn off the auto cut setting of the printer When printing via the printer driver also turn off the setting of the printer driver Printer settings Roll paper information area Advanced Media Setting Auto Cut Off...

Page 33: ...paper may become wavy or curled due to damp which may cause paper feeding problems paper jams or soiled prints We recommend that you return the paper to its original package and store it flat and take it out of the package for use when printing A Touch the Roll paper information area Remove from the Home screen The paper is rewound and ejected When Manage Remaining Amount is set to On the barcode ...

Page 34: ...After rewinding the roll paper carefully store it in the original package F Attach the transparent flange to the spindle and return the spindle in the printer G Close the roll paper cover and cut sheet cover SC T5400 Series SC T3400 Series SC T3400N Series User s Guide Loading and Setting the Paper 34 ...

Page 35: ... sheet of paper with the print side facing up align its right edge with the guide on the right and move it downwards cImportant Insert all paper in portrait orientation Inserting paper in landscape orientation may cause a decline in print quality C Insert the leading edge of the paper straight into the paper slot until you hear a beep cImportant Insert the paper straight into the paper slot Insert...

Page 36: ...d sizes U For Cut Sheet 1 sheet on page 38 F For SC T5400 Series and SC T3400 Series check that the paper basket attached to the stand is open Removing Cut Sheet 1 Sheet To remove cut sheet that was loaded but not used eject using the procedure below A Touch Paper Setting Cut Sheet 1 sheet Remove from the Home screen This starts paper ejection operation B Hold the edges of the paper with your hand...

Page 37: ...nd settings adjusted the next time the roll paper is used improving efficiency when multiple rolls of paper are used How to Set A The currently set paper type is shown on the screen displayed after loading roll paper When changing Paper Type Proceed to step 2 When setting Paper Remaining without changing Paper Type Proceed to step 5 When not changing either of them Touch OK You can start printing ...

Page 38: ...emaining Alert Remaining amount value that will be the timing for displaying the remaining amount warning notification Note On the keypad screen for entering a numeric value enter numbers that include a number of the first decimal place For example if you want to enter 5 m touch 5 and 0 G Touch at the top left of the screen to return to the screen of step 5 and then touch OK You can start printing...

Page 39: ...recently selected three paper types are displayed in addition to Others C Select the paper type that matches the loaded paper Epson Special Media Select the same product name as the one shown on the package of the paper Commercially available non Epson paper Select from the following commercially available paper types Plain paper Coated Paper Generic Photo Paper Generic Tracing Paper Tracing Paper...

Page 40: ...ist and then enter the paper width and length On the keypad screen for entering a numeric value enter numbers that include a number of the first decimal place For example if you want to enter 5 m touch 5 and 0 E When the screen of step 1 is redisplayed touch OK You can start printing once Ready appears on the screen SC T5400 Series SC T3400 Series SC T3400N Series User s Guide Loading and Setting ...

Page 41: ...orrectly load the paper that actually requires adjustment and then select the paper type that matches the loaded paper If paper with visible curls wrinkles waves folds or bends is used correct adjustment may not be possible Remove curled wavy or folded sections by cutting them off Ensure that light from outside direct sunlight etc does not enter the interior of the printer If this occurs the print...

Page 42: ...adjustment results are saved as settings of the currently selected paper type Note A print head nozzle clogging check is performed automatically before adjustment pattern printing If nozzles are determined to be clogged cleaning starts and the adjustment patterns will be printed after cleaning finishes Refer to the following when the error message Auto Adjustment is unable to start because there i...

Page 43: ...o start because there is a problem with the paper or printing status appears or when the adjustment results are not satisfactory U The prints are not what you expected on page 154 SC T5400 Series SC T3400 Series SC T3400N Series User s Guide Loading and Setting the Paper 43 ...

Page 44: ...printer driver dialog will be displayed Note When printing a PDF file In the Print dialog box of Adobe Acrobat select the Actual size or Page Scaling None radial button and Choose paper source by PDF page size check box To enlarge or reduce the size configure the setting in the printer driver settings dialog box D Check Document Size on the Printer Settings tab of the printer driver The paper size...

Page 45: ... appears For Roll Paper Width Paper Size when cut sheet and Media Type the settings configured in the control panel of the printer are applied automatically Note If the paper is loaded or changed after opening the printer driver s dialog box the paper size and paper type settings configured on the printer will not be applied In this case click the Acquire Info button to apply the settings G Select...

Page 46: ... on the right side See the help for more details Note See the printer driver help for more details on setting items You can display the help in the following two ways Click Help at the bottom right of the screen Right click the item you want to check and then click Help This is not possible in the print preview screen Canceling Printing There are a few ways to stop printing operations depending on...

Page 47: ...quently Used Settings If you start the printer driver from the Control Panel change the settings to those you use frequently and then save the settings the printer driver s dialog box will be displayed with the saved settings from any application that it is displayed A Open View devices and printers or Devices and Printers Windows 10 8 1 8 7 Click in the following order Hardware and Sound or Hardw...

Page 48: ... The saved select settings can be recalled from Select Setting Note How to share Select Setting settings with multiple computers Select the settings you want to share click Export and then export the settings to a file Display the same screen of the printer driver on another computer click Import and then import the settings Rearranging display items The display items of Select Setting Media Type ...

Page 49: ... click Delete Group Drag and drop unnecessary items to Not Display Note When Delete Group is performed the group folder is deleted but the settings in the deleted group folder remain Delete them individually from List in the save location D Click Save SC T5400 Series SC T3400 Series SC T3400N Series User s Guide Printing with the Printer Driver from Your Computer 49 ...

Page 50: ...ed in the print dialog click the page settings option e g Page Setup in the File menu D Check that this printer is selected and then set the paper size Paper size settings set items including paper size borderless methods and paper source E Select Printer Settings from the list and set Output Size If Printer Settings is not displayed in the list the dedicated printer driver for this printer has no...

Page 51: ... check box is selected and then click Print If a preview is not necessary clear the check box and then click Print Note In the print preview you can check and change the print settings while viewing the image to be actually printed We recommend to check with the preview when printing on roll paper or large sized paper H Check the print settings in the print preview screen and if there is no proble...

Page 52: ...re are a few ways to stop printing operations depending on the situation When the computer has finished sending data to the printer you cannot cancel the print job from the computer Cancel on the printer Canceling from a Computer A Click the icon of this printer in the Dock B Select the job you want to cancel and then click Delete If the job has been sent to the printer print data is not displayed...

Page 53: ...er drivers installed on your computer The settings are saved to Presets You can then select the settings you saved from Presets Deleting from Presets A Click Show Presets in Presets of the Print dialog box B Select the setting you want to delete click Delete and then click OK SC T5400 Series SC T3400 Series SC T3400N Series User s Guide Printing with the Printer Driver from Your Computer 53 ...

Page 54: ...the HP GL 2 or HP RTL mode This method is best suited for printing CAD and GIS drawings such as maps and blueprints You can print from an application that supports HP GL 2 compatible with HP Designjet 750C and HP RTL See the following for more details U Printing Using the HP GL 2 or HP RTL Mode from a Computer on page 90 A Open the data to be printed and then click Plot B Select the printer in Pri...

Page 55: ...t Target list Windows Mac F Check other settings and then start printing Note If the output size is portrait and the height is smaller than the width of the roll paper the print image is printed rotated 90 to save paper This function is enabled if the Auto Rotate check box is selected in Roll Paper Option on the Advanced tab SC T5400 Series SC T3400 Series SC T3400N Series User s Guide Printing wi...

Page 56: ...mage size to fit the roll paper width Fit to Output Size Automatically enlarges or reduces the image size to fit the paper size Specify Size You can specify the enlargement or reduction ratio Use this method for a non standard paper size Note When printing from applications designed expressly for horizontal or vertical banners adjust printer driver settings as described in the application document...

Page 57: ...ck that this printer is selected in Printer and check the paper size Select a paper size that does not have Retain Scale or Roll Paper Banner If the size is different select the correct size from the pull down menu U Basic Operating Procedures Mac on page 50 Note In the case of an application without a page setup menu item you can set the paper size if you open the Print dialog box from the Print ...

Page 58: ... Settings tab of the printer driver Windows Display the Printer Settings tab of the printer driver from the application and check that the document size is the same as the setting of the application If it differs click Settings and specify the correct size in the Change Paper Size dialog box U Basic Operating Procedures Windows on page 44 Mac Open the page setup screen of the application and check...

Page 59: ...lect Fit to Output Size on the Printer Settings tab of the printer driver Windows Mac C Select the desired size from the Output Size pull down menu Windows Mac D Check other settings and then start printing SC T5400 Series SC T3400 Series SC T3400N Series User s Guide Printing with the Printer Driver from Your Computer 59 ...

Page 60: ...selected in Printer and check the paper size Select a paper size that does not have Retain Scale or Roll Paper Banner If the size is different select the correct size from the pull down menu U Basic Operating Procedures Mac on page 50 Note In the case of an application without a page setup menu item you can set the paper size if you open the Print dialog box from the Print menu item B Display the ...

Page 61: ...n be used Paper Width SC T5400 Series 89 to 914 mm SC T3400 Series SC T3400N Series 89 to 610 mm Paper Length 127 to 18000 mm The paper length can be longer when using an application that supports banner printing However the actual print size depends on the application the paper size loaded in the printer and the computer environment cImportant The smallest size supported by the printer is 89 mm w...

Page 62: ...om the list on the left To delete a saved paper size select the paper size name from the list on the left of the screen and then click Delete You can save up to 100 paper sizes C Click OK to close the User Defined Paper Size dialog box Also close the printer driver s dialog box Registration of the user defined size is now complete D Select the registered paper size in for example the page size set...

Page 63: ...e its name from the list on the left To duplicate a saved paper size select its name from the list on the left of the screen and click Duplicate To delete a saved paper size select its name from the list on the left of the screen and click The custom paper size setting differs depending on the operating system version See your operating system s documentation for details D Click OK to close the Cu...

Page 64: ...Print dialog box The registered paper size is displayed in Document Size on the Printer Settings tab U Basic Operating Procedures Mac on page 50 G Check other settings and then start printing SC T5400 Series SC T3400 Series SC T3400N Series User s Guide Printing with the Printer Driver from Your Computer 64 ...

Page 65: ...ch as Page Setup in the applications to set the size of the image data as follows Match the paper size and page setting for the print data If the application has margin settings set the margins to 0 mm Make the image data as large as the paper size Retain Size Create the print data larger than the paper size in the applications to produce borderless output The printer driver does not enlarge the i...

Page 66: ... the operation is the same as that for Double Cut When continuously printing multiple sheets the printer cuts 1 mm inside on the top edge of the first page and the bottom edge of the subsequent pages to avoid showing margins The top area may become slightly uneven depending on the image since the print operation stops while cutting the top edge of the roll paper The printed paper is approximately ...

Page 67: ...and 5 mm for right the image shifts 1 mm to the right Standard 3 mm for left and right Min 1 5mm for left and right Note Moving the slider towards Min decreases the image enlargement ratio Therefore some margins may appear at the edges of the paper depending on the paper and printing environment D When printing on roll paper select the Advanced tab and configure the Auto Cut setting in the Roll Pa...

Page 68: ...y the page settings dialog B If Auto Expand is selected for paper size select Advanced from the list and click Expansion You can only select Expansion if Auto Expand is selected in Paper Size The expansion values for each of the settings are as follows Max 3 mm for left and 5 mm for right the image shifts 1 mm to the right Standard 3 mm for left and right Min 1 5mm for left and right Note Moving t...

Page 69: ...Settings check box you can check which of the above color correction methods is used Standard of Select Target is the most suitable setting for the currently selected paper type Clicking the Settings button allows you to for example finely adjust the Gamma Brightness Contrast Saturation and color balance Use this option when the application in use does not have a color correction function Note The...

Page 70: ...x Select Color Management then select Printer Manages Colors in Color Handling and click Print B Display the Printer Settings tab of the printer driver and then clear the Simple Settings check box in the Print Quality area U Basic Operating Procedures Windows on page 44 C Select the print target If you want to select the color correction method yourself select Custom at the very bottom of the list...

Page 71: ...management setting to Printer Manages Colors Adobe Photoshop CS3 or later Adobe Photoshop Elements 6 or later Adobe Photoshop Lightroom 1 or later In other applications set No Color Management Note For information on supported platforms see the website for the application in question Settings example of Adobe Photoshop CC Open the Print dialog box Select Color Management then select Printer Manage...

Page 72: ... F When Custom is selected for the print target select the color and color correction method settings G If necessary click Settings and then adjust items such as the Gamma Brightness Contrast Saturation and color balance See the printer driver help for more details on each item H Check other settings and then start printing SC T5400 Series SC T3400 Series SC T3400N Series User s Guide Printing wit...

Page 73: ...are using You cannot match the colors on the printed results and display by color management between the input device and the printer To match both colors you need to perform color management between the input device and the display as well Color Management Print Settings You can perform color management printing using this printer s printer driver in the following two ways Choose the best method ...

Page 74: ...om the printer driver s settings screen U Color Management Printing by Driver ICM Windows Only on page 78 U Color Management Printing by Host ICM Windows on page 76 U Color Management Printing by ColorSync Mac on page 77 U Setting color management with the applications on page 74 Setting color management with the applications Print using applications with a color management function Make the color...

Page 75: ...indows XP Service Pack 2 or later and NET 3 0 Off No Color Adjustment is selected automatically For Mac Select Printer Settings from the list and clear the Simple Settings check box in the Print Quality area and select Off No Color Adjustment from the print target list D Check other settings and then start printing SC T5400 Series SC T3400 Series SC T3400N Series User s Guide Printing with the Pri...

Page 76: ...r and NET 3 0 or later Windows XP other than the above No Color Management In other applications set No Color Management Note For information on supported platforms see the website for the application in question Settings example of Adobe Photoshop CC Open the Print dialog box Select Color Management then select Printer Manages Colors in Color Handling and click Print When using an application wit...

Page 77: ...ding on the application color management printing by ColorSync may not be supported A Disable the color management functions in the application B Display the Print screen U Basic Operating Procedures Mac on page 50 C Select Color Matching from the list and then click ColorSync The printer profile corresponding to the currently selected paper type is specified automatically and displayed at the bot...

Page 78: ...CS3 or later Adobe Photoshop Elements 6 0 or later Adobe Photoshop Lightroom 1 or later OS Color Management Settings Windows 8 1 Windows 8 Windows 7 Windows Vista Printer Manages Colors Windows XP Service Pack 2 or later and NET 3 0 or later Windows XP other than the above No Color Management In other applications set No Color Management Note For information on supported platforms see the website ...

Page 79: ...lative Colorimetric Converts the data so that a set of color gamut and white point or color temperature coordinates in the original data match their corresponding print coordinates This feature is used for many types of color matching Absolute Colorimetric Assigns absolute color gamut coordinates to the original and print data and converts the data Therefore color tone adjustment is not performed ...

Page 80: ... page 61 Settings in Windows A Display the Layout tab of the printer driver and select the Page Layout check box Then select N up and click the Settings button U Basic Operating Procedures Windows on page 44 B Set Number of pages per sheet and Page Order in the Print Layout dialog box If the Print page frames check box is selected page frames are printed on each page C Check other settings and the...

Page 81: ...nting Windows only Two consecutive pages can be printed on a single sheet The second page is flipped 180 and printed adjacent to the first page allowing the paper to be folded to make a 2 sided document A Display the Layout tab of the printer driver and select the Page Layout check box Then select Folded Double Side and click the Settings button U Basic Operating Procedures Windows on page 44 SC T...

Page 82: ...rless Poster Print is selected the sheets can be joined without trimming the margins but because the portions outside the edges of the paper will be lost using borderless printing images at the joins may be imperfect A Display the Layout tab of the printer driver and select the Page Layout check box Then select Poster and click the Settings button U Basic Operating Procedures Windows on page 44 SC...

Page 83: ...o Cut the paper will be cut 1 or 2 mm inside the image resulting in imperfect joins where the images meet When with margins is selected Clear the Borderless Poster Print check box Note If Borderless Poster Print is not selected a Print Cutting Guides option will be displayed Overlapping Alignment Marks Prints guides for joining the paper with overlapping The finished size is smaller only for the o...

Page 84: ...ll be printed in black The following section describes how to join four printed pages together A Ready the two top sheets and trim the excess from the left sheet by cutting along the line joining the two join guides the centers of the X marks B Lay the upper left sheet on top of upper right sheet Lineup the X marks as shown in the illustration below and temporarily fasten them using an adhesive ta...

Page 85: ... steps 1 to 4 for the lower two sheets F Trim the bottom from the upper sheets by cutting along the line joining the two guides the lines above the X marks G Lay the upper sheet on top of the lower sheet Lineup the X marks as shown in the illustration below and temporarily fasten them using an adhesive tape on the back SC T5400 Series SC T3400 Series SC T3400N Series User s Guide Printing with the...

Page 86: ...joining the two cut guides the lines above the X marks I Join the upper and lower sheets together Use an adhesive tape to stick the backs of the sheets together SC T5400 Series SC T3400 Series SC T3400N Series User s Guide Printing with the Printer Driver from Your Computer 86 ...

Page 87: ...ws Only Documents created in different applications can be printed together in your choice of layout This allows you to improve print work efficiency and conserve paper Sample Multi Document Layout Sample Free Vertical Horizontal Layout SC T5400 Series SC T3400 Series SC T3400N Series User s Guide Printing with the Printer Driver from Your Computer 87 ...

Page 88: ...ger screen open repeat steps 1 to 3 until all the print data has been added to the layout The objects are added to the Layout Manager screen E Arrange the objects on the Layout Manager screen Objects can be moved or resized by dragging as well as rearranged or rotated using the tool buttons or the options in the Object menu The overall size and placement of the objects can be changed using the Pre...

Page 89: ...ing saved files A Right click the printer icon on the Windows taskbar and then click Layout Manager in the displayed menu The Layout Manager screen appears Note When the printer icon is not displayed on the Windows taskbar Open the Utility tab of the printer driver and click the Monitoring Preferences Select the Register the shortcut icon to the taskbar check box in the Monitoring Preferences dial...

Page 90: ...e and margins Universal Print Settings and HP GL 2 specific settings such as palette settings HP GL 2 Unique Settings Basic Print Settings A Touch Settings General Settings Printer Settings Universal Print Settings from the Home screen B Check Paper Source and change the setting if necessary The default setting is Roll Paper When HP GL 2 or HP RTL print data is sent an error occurs if paper is not...

Page 91: ...the setting from Auto to HP GL 2 When the computer and printer are connected via a network Select Settings General Settings Printer Settings Printing Language Network from the Home screen and then change the setting from Auto to HP GL 2 To print from the printer driver as usual after HP GL 2 or HP RTL finishes return the setting to Auto CAD Application Settings Set the output device as follows acc...

Page 92: ... Connect your router and the printer with a LAN cable See the following for the location of the printer s LAN port U Side right side on page 11 Switching to Wireless LAN The SSID network name and password of the access point to which the printer is to be connected are required Confirm them in advance The printer can be connected to a wireless LAN while the LAN cable is still connected Note If your...

Page 93: ...ing on the connection status U Home screen operations on page 13 B Touch Wi Fi Direct When Wi Fi Direct is already enabled the network SSID password number of connected devices etc are displayed Proceed to step 5 Note When any of the displayed network SSID device name etc is partially not visible because it is cut off at the right edge of the screen touch the corresponding item to display the enti...

Page 94: ...Printer Driver for This Printer on page 52 A Connect the smart device and printer via wireless LAN or Wi Fi Direct See the following for more details U Switching to Wireless LAN on page 92 U Directly Connection Wirelessly Wi Fi Direct on page 93 B Load the paper in the printer C Open the document or photo to be printed on your smart device D Tap the share icon to display the print option E Tap the...

Page 95: ...e Files other than JPEG or TIFF files are not displayed on the printer screen Any characters in the folder or file names that cannot be displayed by the printer will be displayed as E Select Black White or Color Using advanced settings such as enlarging or reducing size Proceed to step 6 Printing at actual size without advanced settings Proceed to step 7 F Touch the Advanced tab Enlarge reduce set...

Page 96: ...ts and then enter the number of prints in the keypad screen Note Use the Preview button to confirm the print image H Touch the Print button SC T5400 Series SC T3400 Series SC T3400N Series User s Guide Direct Printing of Files on USB Flash Memory 96 ...

Page 97: ...opying to cut sheet is not possible Connecting the Scanner A Ready both the printer and the scanner For information on setting up the scanner see the documentation supplied with the scanner B Turn the printer and scanner off C Connect the scanner to the printer using the USB cable supplied with the scanner cImportant Connect the scanner directly to the printer Enlarged copies are only available wh...

Page 98: ...anner manual and then clean the inside of the scanner Note If you touch Presets you can assign a name to frequently used copy settings and then register them to Presets The screen for entering a name can be switched as shown below with the button marked Also each touch of the following bottom left icon switches the input method as follows ABC Enters alphabet letters 123 Enters numbers and symbols ...

Page 99: ...pies are made from an original placed on the glass the original may be scanned once for each copy Wait until all the copies have been printed before opening the scanner cover Use the ADF to scan multi page documents If multiple copies are set for scanning multiple sheets continuously the copies will be printed on a page basis as shown below Example Order in which pages are output when the printer ...

Page 100: ...method Feed Cut Paper Backward Forward Cut Media Adjust Easy Adjustment Start Paper Feed Adjust Auto Start Manual Start Print length adjustment Start Print Head Alignment Auto Start Manual Start Advanced Media Setting Platen Gap 1 2 1 6 2 1 Displayed when in Paper Type Custom Paper is selected Top Bottom Margins Standard Top 3 mm Bottom 3 mm Top 15 mm Bottom 15 mm Top 35 mm Bottom 15 mm Paper Suct...

Page 101: ...Off Remaining Amount 5 0 to 150 0 m Remaining Alert 1 0 to 15 0 m Change Paper Type Paper Type Plain paper Display supported paper types Coated Paper Generic Premium Glossy Sheet Others Paper Width A Series Display supported paper widths Displayed if Paper Size Check is set to Off US ANSI US ARCH B Series ISO B Series JIS Others User Defined Display paper size input screen SC T5400 Series SC T3400...

Page 102: ...Paper is selected Paper Suction 4 to 3 Paper Size Check On Off Displayed when in Paper Type Custom Paper is selected Change Paper Type Paper Size Paper Type Plain paper Display supported paper types Coated Paper Generic Premium Glossy Sheet Others Paper Size A Series Display supported paper sizes US ANSI US ARCH B Series ISO B Series JIS Others User Defined Display paper size input screen SC T5400...

Page 103: ...play approximate remaining amounts as well as product number of consumables Message List Display list of messages communicating printer status Firmware Version Display firmware version Print Status Sheet Configuration Status Sheet Print SC T5400 Series SC T3400 Series SC T3400N Series User s Guide Using the Menu 103 ...

Page 104: ... Pattern2 Sleep Timer 1 to 210 minutes Power Off Timer Off 30minutes 1h 2h 4h 8h 12h Circuit Breaker Interlock Startup On Off Date Time Settings Date Time Date yyyy mm dd mm dd yyyy dd mm yyyy Time 12h 24h Time Difference 12 45 to 13 45 15 minute increments Language Display supported languages Operation Time Out On Off Keyboard QWERTY AZERTY QWERTZ Length Unit m ft in SC T5400 Series SC T3400 Seri...

Page 105: ...h On Off Back Tension 2 1 to 5 Custom Paper Setting Custom paper types 01 to 10 are displayed and touching any of these will display settings items Change Name Registered name input screen Change Reference Paper Plain paper Display supported paper types Matte Paper Photo Paper CAD Others Advanced Media Setting Platen Gap 1 2 1 6 2 1 Top Bottom Margins Standard Top 3 mm Bottom 3 mm Top 15 mm Bottom...

Page 106: ...y Standard Speed Fine Super Fine Draft Color Mode Color Black White Page Margins option Clip By Margins Oversize Page Margin 3 mm 5 mm Smoothing On Off Base Output Size Auto A Series Display supported paper sizes US ANSI US ARCH B Series ISO B Series JIS Others User Defined Display paper size input screen Resolution Standard 300dpi 600dpi 1200dpi Color Mode Common EPSON Standard sRGB Business Grap...

Page 107: ...tte A Palette B Print Color Palette Print Define Palette Palette A Display screen to set pen width and pen color Palette B Restore default HP GL 2 Unique Settings Yes No Memory Device Interface Memory Device Enable Disable Thick Paper Off On Self Check and Cleaning Off Once Twice Three times Bidirectional On Off PC Connection via USB Enable Disable USB I F Timeout Setting 0 sec or 5 to 300 sec SC ...

Page 108: ...tion and number of connected devices Change Password Disable Wi Fi Direct Delete Registered Device Wired LAN Setup Start Setup Displayed when connected to a wireless LAN Network Status Wired LAN Wi Fi Status Display current connection settings Wi Fi Direct Status Print Status Sheet Print Connection Check Start network connection check Advanced Device Name Display settings change screen TCP IP Prox...

Page 109: ...product number of consumables Maintenance Details of each item U Maintenance on page 138 Print Quality Adjustment Start Print Head Nozzle Check Start Head Cleaning Start Ink Cartridge s Replacement Display procedure Replace Maintenance Box Display procedure Replace Cutter Start Powerful Cleaning Start Discharging Charging Ink Start Language Display supported languages Printer Status Print Details ...

Page 110: ...age 140 Settings item Settings value Copies 1 to 99 Color Mode Black White Color Original Size A4 A5 A3 B5 B4 Letter 13 x 18 cm 5 x 7 in Reduce Enlarge Auto Fit Page On Off Custom Size A0 US E 34x44in JIS B1 A1 US D 22x34in JIS B2 US C 17x22in A2 User Defined Only SC T5400 Series is displayed Density 4 to 4 Quality Speed Fine SC T5400 Series SC T3400 Series SC T3400N Series User s Guide Using the ...

Page 111: ...Enlarge Auto Fit Page On Off Custom Size Actual Size A4 A3 Super A3 A2 Super A2 A1 Super A1 A0 Super A0 Letter Legal US B 11x17in US C 17x22in US D 22x34in US E 34x44in ARCH A 9x12in ARCH B 12x18in ARCH C 18x24in ARCH D 24x36in ARCH E1 30x42in ARCH E 36x48in ISO B4 ISO B3 ISO B2 ISO B1 ISO B0 JIS B5 JIS B4 JIS B3 JIS B2 JIS B1 JIS B1 Landscape JIS B0 JIS Super B0 24 x 30 in 30 x 40 in 36 x 44 in 3...

Page 112: ...ected paper type settings even if the power is turned off Default setting Settings item Settings value Explanation Remove Rewind the roll paper until it is ejected from inside the printer U Removing Roll Paper on page 33 Feed Cut Paper Backward Use Backward and Forward to move the paper to the desired position Touch Cut to cut the paper using the built in cutter U Cutting the Roll Paper on page 31...

Page 113: ...atic adjustment results U Paper Feed Adjust Manual Procedure on page 155 Run Print length adjustment if you want to precisely adjust the paper feed amount for printing drawings and other information U Lengths differ between the print results and print data on page 159 Manual Start Print length adjustment Start Print Head Alignment Auto Start Run this adjustment when ruled lines are duplicated lett...

Page 114: ...ead too much causing print quality to decline or preventing the paper feeding correctly In such cases you will need to lower the paper suction The lower the setting value the weaker the suction power Back Tension Auto If there is any wrinkling on the paper during printing set this to High or Extra High When this is set to Extra High the following setting is enabled Settings General Settings Printe...

Page 115: ...sed U Cutting the Roll Paper on page 31 Off Remove Skew On Select whether to enable On or disable Off paper skew reduction Off Manage Remaining Amount Setup On Select whether to display record On or not to display record Off the amount of remaining roll paper Set On to enable Remaining Amount and Remaining Alert U For Roll Paper on page 37 Off Remaining Amount 5 0 to 150 0 m 30 Entering the total ...

Page 116: ...es and then select a paper type U For Roll Paper on page 37 Coated Paper Generic Premium Glossy Sheet Others Paper Width A Series This is displayed if Advanced Media Setting Paper Size Check is set to Off Select the width of the loaded paper If the desired size is not in the options select User Defined and enter the paper width US ANSI US ARCH B Series ISO B Series JIS Others User Defined SC T5400...

Page 117: ...reaks horizontal banding or uneven colors appear in print results For details on Auto see the following U Paper Feed Adjust Auto on page 42 Run Manual if an error appears during automatic adjustment or you are not satisfied with the automatic adjustment results U Paper Feed Adjust Manual Procedure on page 155 Manual Start Print Head Alignment Auto Start Run this adjustment when ruled lines are dup...

Page 118: ...ct On or not detect Off the paper width when paper is loaded Try choosing Off if a paper setting error is displayed even though the paper is correctly loaded Note however that the printer may print outside the paper when Off is selected If it prints beyond the edges of the paper the inside of the printer becomes dirty with ink We generally recommend using the printer with this set to On The change...

Page 119: ...However ensure that a new ink cartridge of that color or a new Maintenance Box is readied in advance Furthermore the ink color codes beside the bars indicate the following Y Yellow M Magenta C Cyan K Black Message List Display a list of messages communicating printer status Select a message from the list to display detailed information Firmware Version Display the printer firmware version Print St...

Page 120: ... other items on the control panel screen and of the confirmation sound when inserting paper into the paper slot when loading paper Pattern2 Sleep Timer 1 to 210 minutes 15 The printer will enter sleep mode if no errors have occurred no print jobs have been received and no actions are performed on the control panel for an extended period of time This setting selects the amount of time until the pri...

Page 121: ...ish Dutch Polish Russian Korean Simplified Chinese Traditional Chinese Operation Time Out On Setting this to On will display a message and return to the Home screen if there is no operation within a certain amount of time while a screen other than the Home screen is displayed Off Keyboard QWERTY Select the key arrangement for the text input screen displayed when entering the name of Custom Paper o...

Page 122: ...regardless of the option selected for Auto Cut The setting selected with the printer driver takes priority when the printer driver is used Off Cut for Borderless Print Two Cuts Select whether to insert a margin and cut twice between pages Two Cuts or cut once between pages One Cut when printing multiple pages with borderless printing The setting selected with the printer driver takes priority when...

Page 123: ... Tension 2 1 to 5 2 When one of the following settings is set this setting is enabled Roll paper information area Advanced Media Setting Back Tension Extra High Settings General Settings Printer Settings Custom Paper Setting Advanced Media Setting Back Tension Extra High If wrinkles are formed in the paper during printing even when High is set in the above Back Tension menu select Extra High and t...

Page 124: ...phabet letters 123 Enters numbers and symbols To change the key layout of the full keyboard use Keyboard in the Basic Settings menu U General Settings Basic Settings on page 120 Change Reference Paper Plain paper You can select the media type that is the closest to the paper you are using Matte Paper Photo Paper CAD Others Advanced Media Setting Platen Gap 1 2 This is the Platen Gap distance betwe...

Page 125: ...e weaker the suction power Back Tension Auto If there is any wrinkling on the paper during printing select High or Extra High When this is set to Extra High the following setting is enabled Settings General Settings Printer Settings Paper Source Settings Roll Paper Setup Back Tension 2 Standard High Extra High Drying Time Drying Time per Pass 0 0 to 10 0 seconds 0 0 Select the time the print head ...

Page 126: ...ing the built in cutter as each page is printed on roll paper Set On to automatically cut the edge if it is not a horizontal cut when paper is loaded The setting selected with the printer driver takes priority when the printer driver is used U Cutting the Roll Paper on page 31 Off Remove Skew On Select whether to enable On or disable Off paper skew reduction Off Restore Default Restore the selecte...

Page 127: ...peed Fine Super Fine Draft Color Mode Color Specify whether to print in color or switch to black and white and then print Black White Page Margins option Clip By Margins Depending on the base output size setting adds the value selected for the page margin area of in the following illustration inside the hard clip area of the PS command of the data or the size selected for base output size area of ...

Page 128: ...S command of the data area of in the following illustration When set to a standard size or user defined size Adds the value selected for page margin area of in the following illustration outside the size selected for base output size area of in the following illustration With the actual output size the margin section becomes larger than the selected size the area of in the following illustration S...

Page 129: ...he Page Margins option When the data does not contain a PS command the smallest rectangle area of in the following illustration including the print object becomes the base output size A Series The compatible standard sizes for the selected Paper Source are displayed therefore select the Base Output Size The actual output size depends on the Page Margins option For a cut sheet this setting is avail...

Page 130: ...and other line drawings Off No Color Management Do not perform color correction HP GL 2 Unique Settings Print settings inherent to HP GL 2 or HP RTL modes Rotate 0 You can rotate the coordinates of the drawn data counterclockwise in units of 90 before printing Note that objects drawn by RTL are not rotated When both this setting and the RO command specify rotation rotation is performed using the c...

Page 131: ... MC command of the data On or move lines to be printed later to the front at intersections Off Off Color Mode HP GL 2 EPSON Standard sRGB Optimize the sRGB space and correct the color Business Graphics Perform color correction to sharpen your images based on the sRGB space GIS Perform color correction suitable for when printing GIS Geographic Information System topographical maps or similar Line D...

Page 132: ... Width 0 13 to 12 00 mm In Select Palette selecting Palette A will print in accordance with the settings defined here You can define a unique built in palette by specifying the pen width and color for the 16 types of logical pen Select the pen number and then define the pen width and pen color for each pen You can use Print Color Palette to print and check the colors corresponding to the color num...

Page 133: ...performed Once Twice Three times Bidirectional On Setting this to On will cause the print head to print while moving both left and right Setting this to Off will reduce the ruled line misalignment but printing will take more time Off PC Connection via USB Enable Setting this to Enable allows access from a USB connected computer Setting this to Disable does not allow access Disable USB I F Timeout ...

Page 134: ...be used for connection Input of SSID and password is not required After selecting this menu item touch and hold the push button on the access point until it flashes then again touch Start Setup on the printer screen to connect Others PIN Code Setup WPS If the access point to use supports WPS Wi Fi Protected Setup then this menu item can be used for connection Touch this to display the PIN code and...

Page 135: ...ction on an Android smart device to connect to the printer a screen upon which to select whether to approve or refuse this connection will be displayed on the printer If refuse is selected then subsequent connection with this device will not be possible To connect with devices for which connection has been refused open this menu and delete registered device information Wired LAN Setup Touch to cha...

Page 136: ... select Use and set the server name and port number Do Not Use IPv6 Address Enable Select whether to enable or disable the IPv6 function Disable Link Speed Duplex Auto Normally set this to Auto 10BASE T Half Duplex 10BASE T Full Duplex 100BASE TX Half Duplex 100BASE TX Full Duplex Redirect HTTP to HTTPS Enable Select whether to enable or disable the function to auto redirect HTTP to HTTPS Disable ...

Page 137: ... Setting On will result in the administrator password being requested when any of the following menu items are selected and unless the password is entered changing the setting or running the function will not be possible When selecting On first set the Admin Password Sleep Timer Power Off Timer Circuit Breaker Interlock Startup Date Time Settings Operation Time Out Printing Language Universal Prin...

Page 138: ...the paper source from the first screen U Optimizing Paper Settings Media Adjust on page 41 Print Head Nozzle Check Start Check for clogged nozzles by printing a check pattern U When you want to unclog the print head on page 156 Head Cleaning Start Perform if the printed check pattern has faint or missing areas U When you want to unclog the print head on page 156 Ink Cartridge s Replacement Display...

Page 139: ...s 10 C or lower Perform this action if you expect to be transporting storing the printer in an environment of 10 C or less Touch Start and follow the on screen instructions to discharge the ink When operations are complete the power turns off automatically U Handling if Transporting Leaving the Printer in an Environment of 10 C or Less on page 181 Printer Status Print Settings item Settings value ...

Page 140: ...e copy so that the short edge of the document fits the width of the roll paper currently loaded in the printer If the short edge of the document is wider than the roll paper this will be printed at actual size If the printer is unable to detect the width of the roll paper then an error will occur when copying is started Off Custom Size Actual Size A0 US E 34x44in JIS B1 A1 US D 22x34in JIS B2 US C...

Page 141: ...occur during printing Cut Sheet 1 sheet Color Mode Black White Select whether to print in color or black and white Color Advanced Quality Speed Select the print quality Standard will print with the quality mode appropriate for the paper type setting of the paper selected in Paper Source Fine Super Fine Page Margins option Clip By Margins Add margins areas of in the following illustration inside th...

Page 142: ... do not appear inside the output size However if a custom size is set a margin may appear on the right side depending on the data When printing multiple pages with borderless printing on roll paper you can select whether to insert a margin and cut twice between pages or cut once between pages in the following menu item Settings General Settings Printer Settings Paper Source Settings Roll Paper Set...

Page 143: ...r after setting this to On this setting is returned to Actual Size If the printer is unable to detect the width of the paper an error will occur when the Print button is touched Off Custom Size Actual Size A4 A3 Super A3 A2 Super A2 A1 Super A1 A0 Super A0 Letter Legal US B 11x17in US C 17x22in US D 22x34in US E 34x44in ARCH A 9x12in ARCH B 12x18in ARCH C 18x24in ARCH D 24x36in ARCH E1 30x42in ARC...

Page 144: ... installed again and used until the remaining amount falls below the minimum amount However if an ink cartridge with not much ink remaining is removed and reinstalled it may not be usable because some ink is consumed to ensure the reliability of the printer Supported ink cartridges U Options and Consumable Products on page 169 cImportant Epson recommends the use of genuine Epson ink cartridges Eps...

Page 145: ...Holding the new ink cartridge with the label facing toward you slide it all the way into the slot Match the color of the ink cartridge to the color of the label on the printer Repeat Steps 3 to 5 to replace the other ink cartridges cImportant Install ink cartridges into all slots You cannot print if any of the slots are empty F Close the cartridge cover cImportant We recommend that you remove and ...

Page 146: ...ng the procedure on the screen To see the guide from the Home screen touch Settings Maintenance Replace Maintenance Box When you open the Maintenance Box cover for SC T5400 Series you will find a Maintenance Box on both the left and right sides The replacement procedure is the same for both of them A Open the Maintenance Box cover B Pull out the Maintenance Box C Place the used Maintenance Box in ...

Page 147: ...f reach of children The cutter s blade could cause an injury Pay careful attention when replacing the cutter cImportant Dropping the cutter or knocking it against hard objects may chip the blade The protective sheet inserted in the new cutter is to protect the blade Do not remove it until you are instructed to do so A Remove any paper from the printer U Removing Roll Paper on page 33 U Removing Cu...

Page 148: ...cutter so that the pin on the printer matches up with the hole on the cutter Use a cross head screwdriver to tighten down the screw to hold the cutter in place cImportant Screw the cutter firmly otherwise the cut position may be slightly shifted or skewed F Touch OK The cutter returns to its original position and the protective sheet inserted in the cutter comes out Remove the protective sheet SC ...

Page 149: ...g You can continue printing until replacement is required The Maintenance Box does not have enough capacity to store ink discharged in print head cleaning therefore do not perform cleaning To perform cleaning replace the Maintenance Box with a new one The used Maintenance Box may be reinstalled after cleaning is completed U Replacing Maintenance Box on page 146 Command Error Check the printer driv...

Page 150: ...s replaced A service call occurs if you continue to use the printer Printer Error Printer error Turn the power off and on again For details see your documentation XXXXXX Turn off the printer disconnect the power cable from the outlet and from the AC inlet on the printer and then reconnect Turn on the printer again multiple times If the same error is displayed on the LCD panel contact your dealer o...

Page 151: ... check the option selected for Print to the following port s USB USBxxx x stands for the port number for the USB connection Network The correct IP address for the network connection If it is not indicated the printer driver is not installed correctly Delete and reinstall the printer driver U Uninstalling Software on page 26 The printer driver is not installed properly Mac o Is the printer added to...

Page 152: ...ngs Ask your system administrator or refer to the manual for your network system Printing from iPhone or iPad is not possible o Check printer settings Connect the iPhone or iPad to the same network SSID as the printer In Web Config enable AirPrint settings U How to Use Web Config on page 23 The printer has an error o View the message displayed in the control panel U What to do When a Message is Di...

Page 153: ...between the printer and computer is correct Go to the next section If the test page is not printed correctly check the items above again U You cannot print because the printer does not work on page 151 The Driver Version shown on the test page is the version number of the Windows internal driver This differs from the Epson printer driver version that you installed The print head moves but nothing ...

Page 154: ...settings are optimized for the paper loaded U Optimizing Paper Settings Media Adjust on page 41 If Auto Adjustment is unable to start because there is a problem with the paper or printing status is displayed If not satisfied with the results of adjustment oCheck the print results and take one of the following measures If streaks horizontal banding or uneven colors appear in print results Check the...

Page 155: ...he best one to choose enter the numeric value that comes between them For example if you are unsure whether to enter pattern 0 or 2 enter 1 D Select the adjustment pattern of 2 in the same way as for 1 E Touch OK Printing of the second set of adjustment patterns starts For cut sheet smaller than A2 size load the second sheet of paper cImportant When using roll paper with the auto cut turned off th...

Page 156: ... the adjustment patterns of 4 and then touch OK In the following example pattern 0 has the least streaks so you would enter 0 If there is no difference between two adjacent patterns and you are unsure which is the best one to choose enter the numeric value that comes between them For example if you are unsure whether to enter pattern 0 or 2 enter 1 When Print head alignment complete appears the pr...

Page 157: ... to the next step D Touch Start to start cleaning When cleaning is complete Print the pattern will be displayed Touch Yes to return to Step 2 Repeat Steps 2 to 4 and check if the problem has been resolved If the nozzles are still clogged after performing print head cleaning three times in a row then perform Powerful Cleaning Select Maintenance Powerful Cleaning to perform Powerful Cleaning U Maint...

Page 158: ...inter and then print o Are you using a genuine Epson ink cartridge This printer is developed for use with Epson ink cartridges If you use non Epson ink cartridges printouts may be faint or the color of the printed image may be changed because the remaining ink level is not correctly detected Be sure to use the correct ink cartridge o Are you using an old ink cartridge The print quality drops when ...

Page 159: ...o Is the roll paper margin set wide If margins narrower than the margins set in the roll paper Advanced Media Setting Top Bottom Margins menu are set in the application software then priority is given to the printer settings U Roll Paper menu on page 112 Lengths differ between the print results and print data If you want to print to roll paper with lengths exactly as specified in the print data su...

Page 160: ...om the Home screen touch Settings Printer Settings Thick Paper On U General Settings Printer Settings on page 122 When using commercially available roll paper registered as custom paper touch the Roll paper information area Advanced Media Setting Platen Gap and try changing the setting to a value that will widen the platen gap a higher value o Is the print head scuffing the edge of the paper If sm...

Page 161: ...everse side of the printed paper is soiled Carry out cleaning with the following procedure Clean the platen and outer edges of the pads for borderless printing U Cleaning the platen and outer edges of the pads for borderless printing on page 161 Soiling occurs on the back of the paper again right after cleaning Replace the pads for borderless printing U Replacing the pads for borderless printing o...

Page 162: ...er particles and dust around the outer edges with commercially available cotton swabs Replacing the pads for borderless printing Obtain the Borderless Replacement Pad Kit for this printer and then replace the pads for borderless printing U Options and Consumable Products on page 169 When replacing the pads for borderless printing replace only the ones at the places where soiling occurs on the pape...

Page 163: ...wipe off all ink that has accumulated at the following three places Bottom Sides Center groove F Bend a new pad for borderless printing as shown in the illustration cImportant Do not bend the new pads for borderless printing at other than the specified place SC T5400 Series SC T3400 Series SC T3400N Series User s Guide Problem Solver 163 ...

Page 164: ...portion of the pads for borderless printing is higher than the surrounding surface If any portion of the pads is higher than the surrounding surface it will rub against the print head and may result in printer failure Dispose of the used pads for borderless printing and cleaning sticks U Handling of Used Consumables on page 144 To store any unused new pads for borderless printing return them into ...

Page 165: ...ng for the correct paper loading positions U Loading Roll Paper on page 28 U Loading Cut Sheet 1 sheet on page 35 o Is the paper loaded in the correct direction Load cut sheets vertically If they are not loaded in the correct direction the paper may not be recognized and an error may occur U Loading Cut Sheet 1 sheet on page 35 o Is the paper wrinkled or creased Do not use old paper or paper with ...

Page 166: ...oes not collect in the paper basket Use your hands to lightly press the paper into the paper basket as it is ejected from the printer The paper folds after it has been cut automatically Select manual cutting and take the paper in both hands after it is cut The paper creases and does not collect well in the paper basket Resume printing after closing the paper basket Before the paper ejected from th...

Page 167: ... Before you reload the roll paper cut the edge straight horizontally Cut any wavy or creased sections If there are any wrinkles on the edge then paper may not be fed or it may jam Cut sheets jam To remove jammed paper follow the steps below A Open the front cover B When ejecting paper from the front grasp the paper with both hands and slowly pull it out towards you C Remove the jammed paper then c...

Page 168: ...ink of all colors will be consumed even if black and white mode is selected The paper is not cut cleanly o Replace the cutter If the paper is not cut cleanly replace the cutter U Replacing the Cutter on page 147 A light is visible inside the printer o This is not a failure The light is a light inside the printer The administrator password has been lost o Should you forget the administrator passwor...

Page 169: ...ered by Epson s warranties and under certain circumstances may cause erratic printer behavior Information about non genuine ink levels may not be displayed and use of non genuine ink is recorded for possible use in service support Printer model Ink color Product Number 350 ml 110 ml SC T5400 SC T3400 SC T3400N Black T41F5 T41R5 Cyan T41F2 T41R2 Magenta T41F3 T41R3 Yellow T41F4 T41R4 SC T5430 SC T3...

Page 170: ...he Cutter on page 147 Roll Feed Spindle 36 except for SC T5480 SC T3480N C12C933301 This is the same as the roll paper spindle supplied with the printer Select the width in accordance with a model you are using Roll Feed Spindle 36 for SC T5480 SC T3480N C12C933311 Roll Feed Spindle 24 except for SC T5480 SC T3480N C12C933281 Roll Feed Spindle 24 for SC T5480 SC T3480N C12C933291 Borderless Replac...

Page 171: ...ommended not available Auto media adjust Describes the availability of auto media adjustments Easy Adjustment Paper Feed Adjust Auto and Print Head Alignment Auto available available but may be less effective not available Note The paper names in the following table are displayed by the paper type settings in the menu of the printer driver or the printer Some parts of paper names may be omitted Ex...

Page 172: ...m 24 in 728 mm B1 1 914 mm 36 in 1 Enhanced Synthetic Paper 432 mm 17 in 610 mm 24 in 914 mm 36 in 1 Enhanced Adhesive Synthetic Paper 610 mm 24 in 914 mm 36 in 1 Enhanced Low Adhesive Synthetic Paper 610 mm 24 in 914 mm 36 in 1 Backlight Film Roll 610 mm 24 in 914 mm 36 in 1 1 Available only with SC T5400 Series Cut Sheet Not all paper types and sizes are available in all countries or regions SC ...

Page 173: ...Letter Legal A3 A3 SuperB A2 US C Archival Matte Paper A4 Letter A3 A3 SuperB A2 US C Photo paper Glossy A4 Letter A3 A3 SuperB US B Premium Glossy Photo Paper A4 Letter 11 x 14 in A3 A3 SuperB A2 US C SC T5400 Series SC T3400 Series SC T3400N Series User s Guide Appendix 173 ...

Page 174: ...ze Borderless Auto media adjust Premium Semigloss Photo Paper A4 Letter A3 A3 SuperB A2 US C Premium Luster Photo Paper A4 Letter A3 A2 US C SC T5400 Series SC T3400 Series SC T3400N Series User s Guide Appendix 174 ...

Page 175: ...ght film Roll core size 2 inches and 3 inches Only plain paper with a 3 inch core is supported Roll paper outer diameter 170 mm or less Paper width SC T5400 Series 254 to 914 mm 36 inches SC T3400 Series SC T3400N Series 254 to 610 mm 24 inches Paper thickness 0 08 to 0 3 mm Roll weight 12 kg or less Cut Sheet 1 Sheet Paper type Plain paper coated paper photo paper tracing paper matte film Paper w...

Page 176: ...hes A2 US C 432 mm 17 inches ISO B2 500 mm JIS B2 515 mm A1 594 mm A1 ARCH D 610 mm 24 inches 700 mm 27 5 inches JIS B1 728 mm A0 841 mm A0 ARCH E 914 mm 36 inches Only support by SC T5400 Series SC T5400 Series SC T3400 Series SC T3400N Series User s Guide Appendix 176 ...

Page 177: ...t Paper adjustment results will be saved as the newly added paper type settings Refer to the following menu for details on custom paper settings U General Settings Printer Settings on page 122 Select the paper type from the following Epson Special Media settings and perform Media Adjust Enhanced Adhesive Syn Enhanced Low Adh Syn Heavyweight Polyester Glossy Film2 Backlight Film Roll By performing ...

Page 178: ...aper depend on the settings values for Top Bottom Margins in the menu as shown in the table below Settings of Top Bottom Margins U Roll Paper menu on page 112 The default setting is Standard Settings of Top Bottom Margins Margin Values Standard A C 15 mm B D 3 mm Top 3 mm Bottom 3 mm A C 3 mm B D 3 mm Top 15 mm Bottom 15 mm A C 15 mm B D 3 mm Top 35 mm Bottom 15 mm A 35 mm C 15 mm B D 3 mm 3 mm A ...

Page 179: ...will not be printed Cut Sheet When printing borderless at the left and right the left and right margins will be 0 mm The gray area in the illustration below shows the printable area The arrow in the illustration indicates the direction that the paper is ejected 1 SC T5400 Series 2 SC T3400 Series SC T3400N Series 3 The top and bottom margins vary depending on the print quality setting Speed Fine e...

Page 180: ...ward or back while moving it Failure to observe this precaution could result in the printer falling over causing accidents cImportant The print head may fail if the environmental temperature becomes 10 C or lower Eject the ink prior to turning off the power if you expect to be moving or transporting the printer in an environment of 10 C or below See the following procedure for detailed instruction...

Page 181: ... When Transporting Before transporting the printer contact your dealer or Epson Support U Where To Get Help on page 188 Handling if Transporting Leaving the Printer in an Environment of 10 C or Less The print head may fail if the environmental temperature becomes 10 C or lower Discharge the ink following the procedures below if you expect the printer to encounter environments of 10 C or below cImp...

Page 182: ... 05 GHz or more Available memory space 1 GB or more Hard disk Available volume to install 32 GB or more Display resolution WXGA 1280 800 or better Connection method with the printer USB Ethernet or Wi Fi For details on the connection methods interface specifications see the following U Specifications Table on page 185 Mac Operating system Mac OS X v10 6 8 or later CPU Intel Core 2 Duo 3 05 GHz or ...

Page 183: ...rk interfaces U Specifications Table on page 185 Mac Browser Safari 1 Firefox 1 Chrome 1 Connection method with the printer 2 Ethernet or Wi Fi 1 Use the latest version 2 See the following for details on the network interfaces U Specifications Table on page 185 Smart device Operating system iOS 1 Android OS 1 Browser Safari 1 Default browser Connection method with the printer 2 Wi Fi Wi Fi 1 Use t...

Page 184: ...uo 2 5 GHz or more Available memory space 1 GB or more Hard disk Available volume to install 10 GB or more Display resolution 1024x768 or better Connection method with the printer SuperSpeed USB Ethernet 1000Base T Browser Windows Internet Explorer Microsoft Edge Use the latest version Internet Explorer 11 or later Mac Operating system macOS v10 7 or later CPU Intel Core2Duo 2 0GHz or more Availab...

Page 185: ...cking Ink charged 10 to 40 C within a month at 40 C Ink discharged 1 20 to 25 C within a month at 25 C Humidity Printer Specifications Printing 20 to 80 40 to 60 is recommended Without condensation In storage 5 to 85 without condensation Temperature and humidity range for operating the range shown by diagonal lines is recommended Dimensions Width Depth Height Printing 2 A 1385 966 1060 mm B 1080 9...

Page 186: ...ve with security settings cannot be used Warning To prevent radio interference to the licensed service this device is intended to be operated indoors and away from windows to provide maximum shielding Equipment or its transmit antenna that is installed outdoors is subject to licensing Ink Specifications Type Dedicated ink cartridges Pigment ink Black Cyan Magenta Yellow Use by date See the expirat...

Page 187: ... the following Internet address http www epson eu conformity Radio Equipment Information This product intentionally emit radio wave described as follows a frequency band in which the radio equipment operates 2 4 to 2 4835 GHz b maximum radio frequency power transmitted in the frequency band in which the radio equipment operates 20dBm eirp power SC T5400 Series SC T3400 Series SC T3400N Series User...

Page 188: ...ot solve the problem using the troubleshooting information in your product documentation contact Epson support services for assistance If Epson support for your area is not listed below contact the dealer where you purchased your product Epson support will be able to help you much more quickly if you give them the following information Product serial number The serial number label is usually on th...

Page 189: ...sales or http www epson ca Canadian sales Help for Users in Europe Check your Pan European Warranty Document for information on how to contact Epson support Help for Users in Australia Epson Australia wishes to provide you with a high level of customer service In addition to your product documentation we provide the following sources for obtaining information Your Dealer Don t forget that your dea...

Page 190: ...ld Wide Web http www epson co th Information on product specifications drivers for download Frequently Asked Questions FAQ and e mail are available Epson Hotline Phone 66 2685 9899 Our Hotline team can help you with the following over the phone Sales enquiries and product information Product usage questions or problems Enquiries on repair service and warranty Help for Users in Vietnam Contacts for...

Page 191: ...tion Answers to Frequently Asked Questions FAQs Latest versions of Epson product drivers Users can access our World Wide Web home page at http www epson com hk Technical Support Hotline You can also contact our technical staff at the following telephone and fax numbers Phone 852 2827 8911 Fax 852 2827 4383 Help for Users in Malaysia Contacts for information support and services are World Wide Web ...

Page 192: ...oll free number For Service CDMA Mobile Users 3900 1600 9AM 6PM Prefix local STD code Help for Users in the Philippines To obtain technical support as well as other after sales services users are welcome to contact the Epson Philippines Corporation at the telephone and fax numbers and e mail address below Trunk Line 63 2 706 2609 Fax 63 2 706 2665 Helpdesk Direct Line 63 2 706 2625 E mail epchelpd...

Reviews:

Related manuals for SC-T3400 SERIES