E
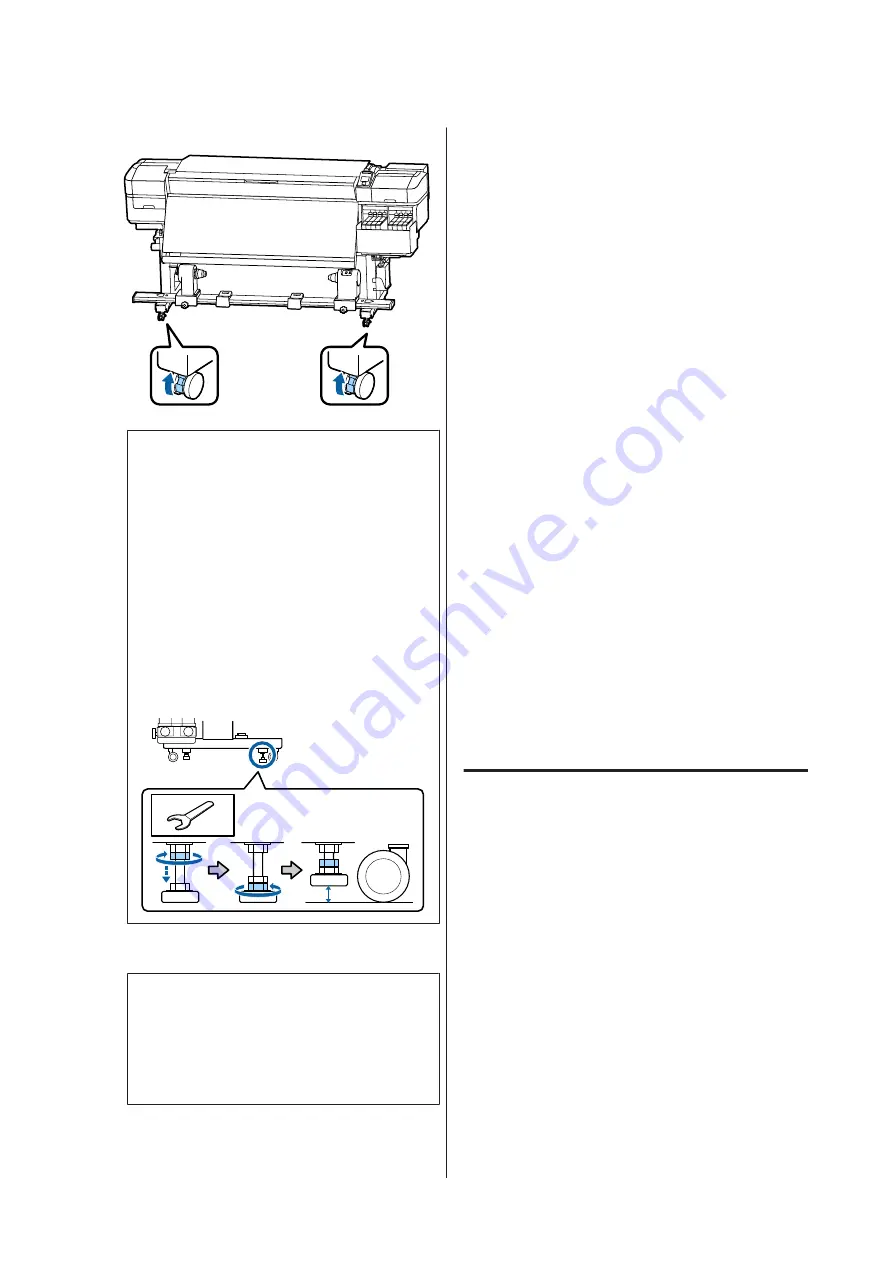
Unlock the two casters at the front.
c
Important:
When performing level adjustment using the
adjusters, make sure you raise the adjusters
above the casters before trying to move the
printer. Moving the printer without raising
the adjusters could cause malfunction. You
need the spanner supplied to adjust the
adjusters.
1. Loosen the nut on the top of the adjuster.
2. Turn the nut on the bottom
counter-clockwise.
3. Check that it is above the caster.
F
Move the printer.
c
Important:
Use the casters on the dedicated printer
stand to move the printer indoors a short
distance over a level floor. They can not be
used for transport.
Post-Move Setup
After moving the printer, follow the steps below to
ready it for use.
A
Check that the location is appropriate for
installation, and set up the printer.
U
Setup Guide
(booklet)
If you do not have the
Setup Guide
, contact
your dealer or Epson Support.
U
“Where To Get Help” on page 134
B
Do parallel adjustments to the Auto Take-up
Reel Unit.
U
“Parallel Adjustments for the Auto Take-
C
Plug in the power cables and turn the printer on.
U
Setup Guide
(booklet)
D
Perform a nozzle check to check for clogged
nozzles.
U
“Printing nozzle check patterns” on
E
Perform
Media Adjust
in the setup menu, and
check the print quality.
U
Transport
Before transporting the printer, contact your dealer or
Epson Support.
U
“Where To Get Help” on page 134
SC-F9300 Series User's Guide
Appendix
120


