55
Introduction
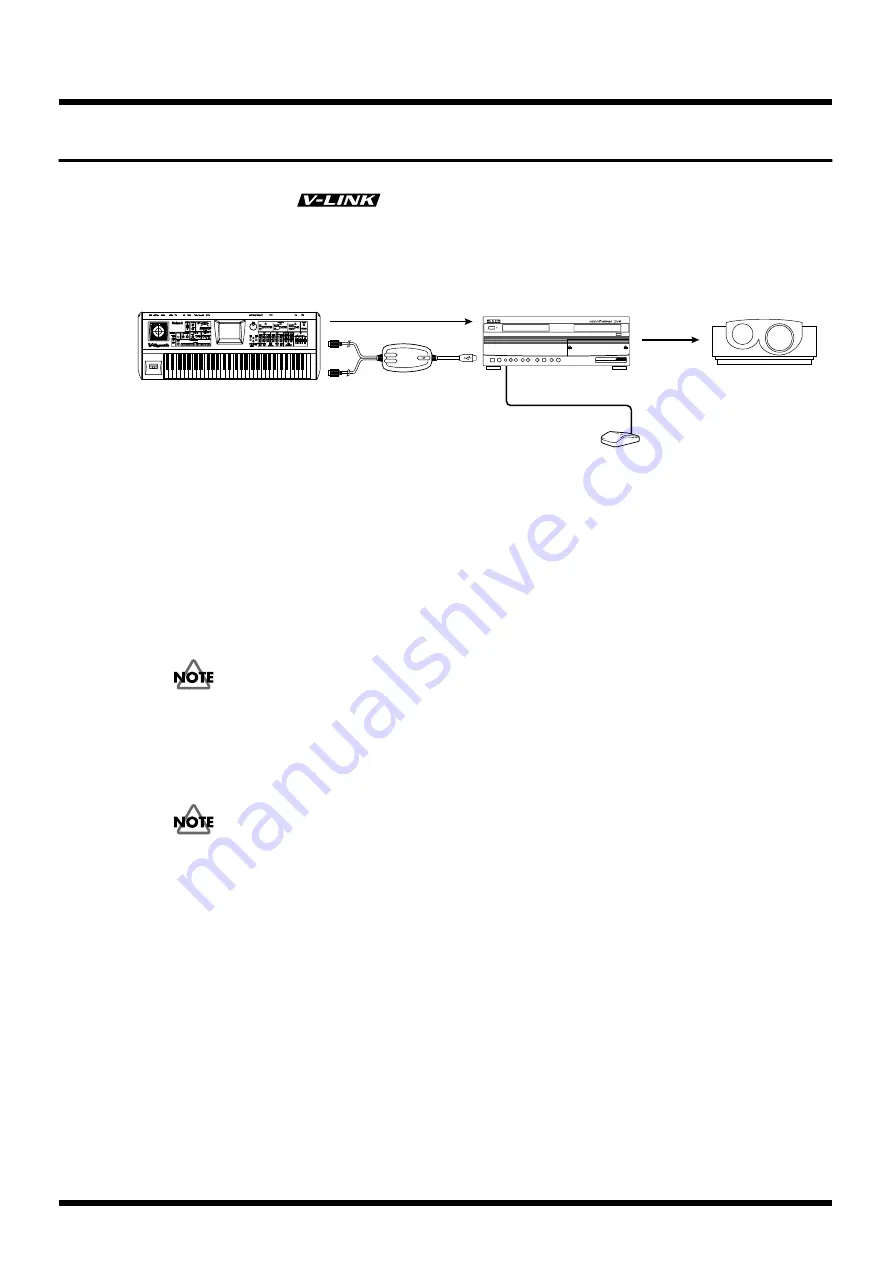
Using the V-LINK
Using the V-LINK (
) function, you can easily synchronize your image production
with musical performance. Use the MIDI interface to connect a MIDI compatible device with your
DV-7PR and press the V-LINK button on the MIDI device. You can now control the Presenter easily.
fig.stage
Use a USB compatible MIDI interface such as the UM-1 (sold separately)
Connect the USB compatible MIDI interface cable to the [REMOTE] jack on the rear panel of the DV-
7PR.
You can use the following MIDI interfaces.
UM-1, UM-1S, UM-2, UM-2E, UM-2C, UM-4, UM-550, UM-880, PCR-30, PCR-50, PC-300
The driver software supplied with the above are not needed. Also, when multiple interfaces are
connected, or the interface has more than one port, all input signals are merged, and output signals
are parallel (the same signals are output).
Be sure to turn off the power to all devices before connecting.
The Presenter needs to be launched before you press the V-LINK button on the MIDI device.
By switching ON the V-LINK, you need only to set up the MIDI environment of the external device,
and perform the necessary operation assignments according to the MIDI device without using the
MIDI environment of this unit.
Any MIDI configuration performed to this unit while V-LINK is ON will not be saved.
You can MIDI control the following Presenter functions.
• Select palettes
• Start/stop video clip playback
• Change the retrigger point
• Change the playback speed
• Change the dissolve time
• Change the audio level
• Turn on/off the Dual Stream mode
• Operate the T Bar when the Dual Stream mode is on
• Time trip control
• Control the Cr/Cb colors, brightness
• Control effects
• Control the output fadeout
DV-7PR
Projector
Remote control (V-LINK)
Image output
V-Synth
Connection example
Mouse
UM-1
Summary of Contents for DV-7PR
Page 120: ...02902189 02 6 B2 11KS ...


