38
Introduction
System Preferences
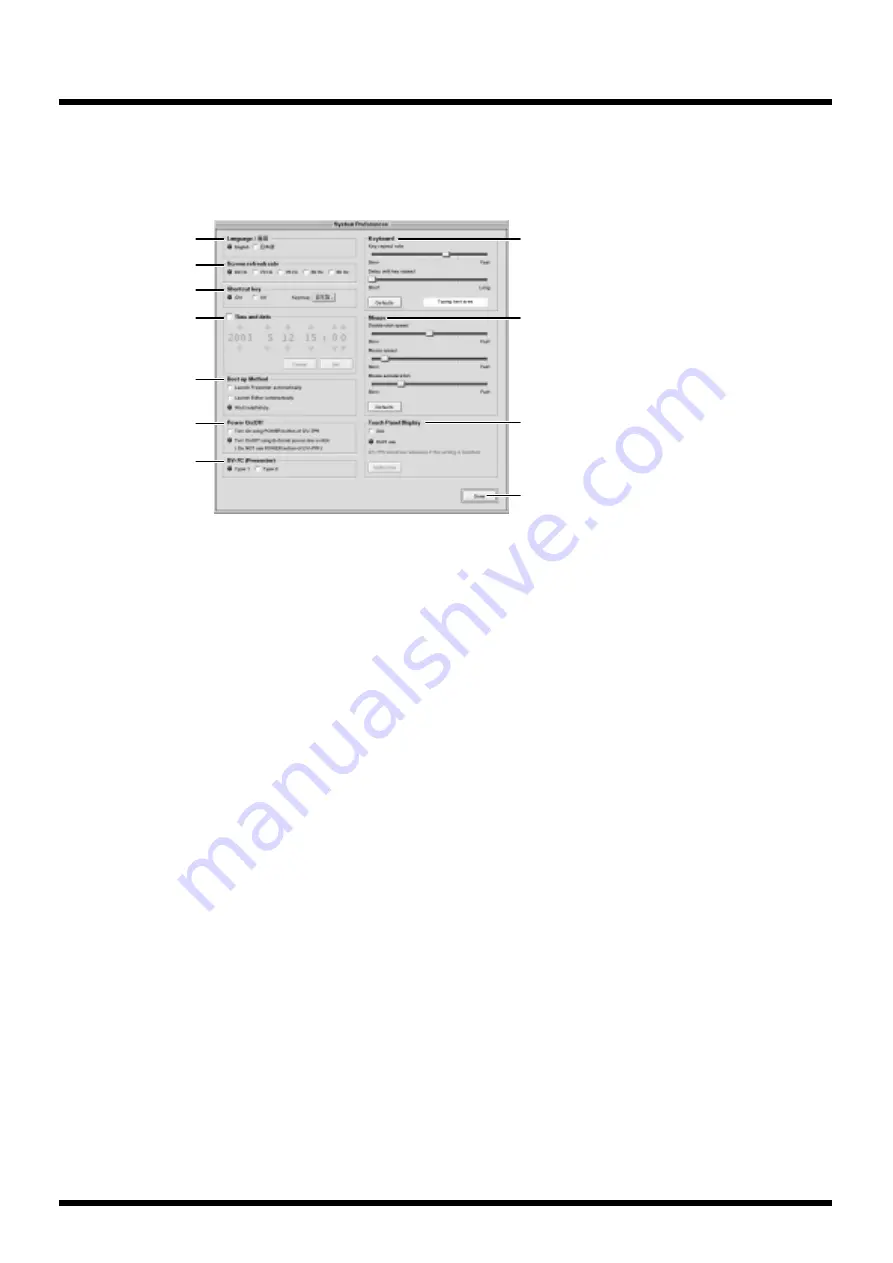
This window appears when you select “System Preferences” at the Selector window (p.29).
You can set up the overall system of your DV-7PR.
fig.sys.prefs
a. Language/Gengo
Set the display language to either English or Japanese.
b. Screen refresh rate
Set the screen refresh rate. For more information, refer to
“Clearing a jittery monitor” (p. 97).
c. Shortcut key
Set the key to use when performing
operations using the shortcut key patterns.
For more information regarding keyboard shortcut
operations, refer to “Keyboard shortcut keys” (p. 100).
d. Time and date
Set the time and date of the internal clock. To change the
current setting, select the checkbox and then adjust the
values as desired by clicking on the up and down arrows.
When completed, click the [Set] button.
e. Boot up Method
Set how you would like the DV-7PR to boot up when
turned on. With this setting, you can have the DV-7PR
automatically launch the application you desire after a
set amount of time elapses at the Selector window. For
more information, refer to “Launching Presenter or
Editor automatically at power on” (p. 98).
f. Power On/Off
Set how you would like to turn on and off the
DV-7PR.
For more information regarding the
operation, refer to “Turning on/off the power
using an external switch” (p. 98).
* When “Turn On/Off using External power-line switch” is
selected, do not use the POWER button on the DV-7PR to turn
on and off the DV-7PR. If you do use the POWER button to
turn off the DV-7PR, then to turn the DV-7PR back on, you
will need to use the POWER button again.
g. DV-7C (Presenter)
Set the control assignment when you wish to
use the DV-7C to control this unit. For more
information regarding the operation, refer to
“Using the DV-7C as a deck controller” (p. 95).
h. Keyboard
Set the various keyboard settings as you
desire. Click the [Defaults] to return the
settings to as they were when the DV-7PR was
shipped.
i. Mouse
Set the various mouse settings as you desire.
Click the [Defaults] to return the settings to as
they were when the DV-7PR was shipped.
j. Touch panel display
Set the touch panel display control.
For more information regarding the
operation, refer to “Setting the touch panel
display” (p. 99).
k. [Done] button
Click to return to the Selector window after
you have completed the system preference
settings.
h
a
b
c
d
e
f
g
i
j
k
Summary of Contents for DV-7PR
Page 120: ...02902189 02 6 B2 11KS ...


