26
Instruction Manual IM02602008E - Rev. D
Transformer Temperature Controllers
IM02602008E - Rev. D May 2019 www.eaton.com
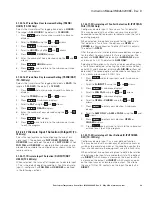
4.1.2.2.13 Alarm Parameters (ALARM)
This is the top level menu for setting the various alarm
parameters. Pressing
Select
at this menu item provides a
set of sub-menus to navigate through the individual param-
eters.
4.1.2.2.13.1 Alarm Setpoint (ALARM)
Selects the setpoint where the Alarm activates due to an
over-temperature condition, or disables the Alarm for over-
temperature. Range is from
0-250° C
or
OFF
. The default is
200° C
.
1. Press
Prog
and enter your password. A sub-menu
displays.
2. Scroll to
ALARM
using the
and
arrows.
3. Press
Select
. A sub-menu displays.
4. Scroll to
A--SETPNT
using the
and
arrows.
5. Press
Select
. A sub-menu displays.
6. Scroll to
INTERVAL
using the
and
arrows.
7. Press
Select
. A sub-menu displays.
8. Enter the setpoint temperature setting desired using
the
and
arrows.
9. Press
Select
to enter your choice.
A--SETPNT
dis-
plays.
10. Press
Back
once to return to the sub-menu or twice
to exit the program.
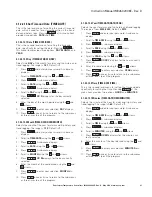
4.1.2.2.13.2 Alarm Dead Band (ALARM/A-BAND)
Sets hysteresis for Alarm deactivation on return from an
over-temperature condition, from
5-20° C
. The default is
5° C.
1. Press
Prog
and enter your password. A sub-menu
displays.
2. Scroll to
ALARM
using the
and
arrows.
3. Press
Select
. A sub-menu displays.
4. Scroll to
D--BAND
using the
and
arrows.
5. Press
Select
. A sub-menu displays.
6. Enter the dead band temperature setting desired using
the
and
arrows.
7. Press
Select
to enter your choice.
A--D BAND
dis-
plays.
8. Press
Back
once to return to the sub-menu or twice
to exit the program.
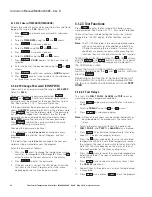
4.1.2.2.13.3 Alarm Fail Safe (ALARM/A-FSAFE)
Selects the Alarm Relay Fail Safe mode, between
ON
and
OFF
. On means Alarm Relay is powered when no alarms
are active. Off means Alarm Relay is not active. The default
is
OFF
.
1. Press
Prog
and enter your password. A sub-menu
displays.
2. Scroll to
ALARM
using the
and
arrows.
3. Press
Select
. A sub-menu displays.
4. Scroll to
A--F SAFE
using the
and
arrows.
5. Press
Select
. A sub-menu displays.
6. Scroll to
OFF
or
ON
using the
and
arrows.
7. Press
Select
to enter your choice.
A--F SAFE
dis-
plays.
8. Press
Back
once to return to the sub-menu or twice
to exit the program.
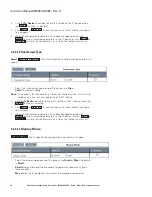
4.1.2.2.13.4 Alarm Latch (ALARM/A-LATCH)
Selects the alarm latch mode, between
ON
or
OFF
. Default
is
ON
. On means the Alarm state remains active even after
the condition(s) that caused the alarm are cleared. The
Alarm state must be manually cleared using the front panel
button.
otee:
N
The
ON
condition requires an Alarm Reset after the
alarm condition is corrected in order to cancel the
alarm.
1. Press
Prog
and enter your password. A sub-menu
displays.
2. Scroll to
ALARM
using the
and
arrows.
3. Press
Select
. A sub-menu displays.
4. Scroll to
A--LATCH
using the
and
arrows.
5. Press
Select
. A sub-menu displays.
6. Scroll to
OFF
or
ON
using the
and
arrows.
7. Press
Select
to enter your choice.
A--LATCH
displays.
8. Press
Back
once to return to the sub-menu or twice
to exit the program.
4.1.2.2.13.5 Alarm Display (ALARM/A-DISP)
Selects the alarm display mode, between
ON
or
OFF
. The
default is
ON
. ON allows a brief description of all alarm con-
ditions to be displayed on the front panel LED display.
otee:
N
The red LED beside the Alarm button illuminates
when an alarm condition is present/latched, regard-
less of this configuration.
1. Press
Prog
and enter your password. A sub-menu
displays.
2. Scroll to
ALARM
using the
and
arrows.
3. Press
Select
. A sub-menu displays.
4. Scroll to
A--DISP
using the
and
arrows.
5. Press
Select
. A sub-menu displays.


