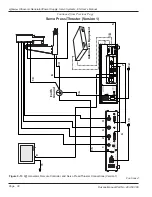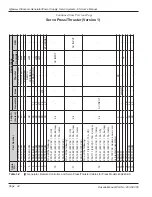
AC Power Inlet Panel
The standard AC power inlet panel is described in this sec-
tion.
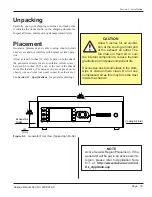
IEC AC Power Inlet Connector
The IEC AC power inlet connector mounted on the system
AC power inlet panel requires a properly configured IEC
compliant power cord, which enables worldwide system
operation by simply changing the power cord.
Low profile systems are equipped with a 10 amp rated IEC
inlet connector. The high profile systems include a 16/20
amp rated IEC inlet connector. 120VAC and 3600/4800W
systems include a non-detachable power cord.
An appropriately rated power cord must be securely at-
tached to the welding system’s IEC inlet connector. If the
correct power cord configuration is not included with the
system for the local AC power outlet at your location, an
appropriate IEC power cord should be available from a
local electrical parts supplier. Note that the system under-
voltage lockout will inhibit system operation if a North
American power cord configured for 120V is connected to
the system. A minimum of 180V is required for the system
to operate.
Fixed AC Power Cords
For some models an appropriately rated AC power cord is
permanently mounted to the power inlet panel.
Power Switch/Circuit Breaker
The power switch/circuit breaker has a rocker type actua-
tor switch that will activate or deactivate the AC power
to the system. The power ON position is marked with the
internationally recognized I symbol, the power OFF posi-
tion is marked with the 0 symbol. This power switch also
integrates an appropriately sized over-current protection
circuit breaker function in the generator.
If an over-current condition trips the circuit breaker, it will
automatically switch to the OFF position. If the overload
current that caused the circuit breaker to trip is due to a
transient condition, the circuit breaker can be reset by
switching the actuator back to the ON position. If when
resetting the circuit breaker after it has tripped, it imme-
diately trips again, there is likely an internal system mal-
function, and the generator will require service.
Do not repeatedly try to reset the circuit breaker. If it trips,
this will only cause more damage to the generator.
System I/O Panel
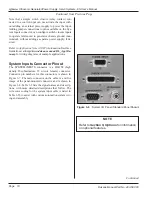
The standard system I/O panel is described in this sec-
tion. See Figure 3-6 on the next page.
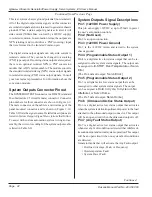
System Inputs Connector
The
SYSTEM INPUTS
connector mounted on the sys-
tem I/O panel includes connections for all of the basic
system control input signals, that will typically come
from an automated control system. The cable attached to
this connector includes all of the available system con-
trol signals, which will be controlled by an output card
or output port on the automation controller.
The user can determine which signals to use for each
particular welding application, but there must be at least
one connection to this connector in order to activate the
ultrasound output. All of the input signals on this connec-
tor are electrically isolated (signals are NOT referenced
to chassis ground) and activated when a 24VDC voltage
source is connected to the signal input pin, referenced
to the isolated common pin. The electrically isolated in-
put signals can be driven from an automation controller
output that is either sinking (NPN) or sourcing (PNP),
depending upon how the isolated common connection
is terminated. All inputs sink or source 10mA of current
from a 24VDC power supply.
Chassis Grounding Stud
The chassis grounding stud is used to attach a protec-
tive earth ground to the generator. This will aid in the
suppression of electrical interference or radio frequency
interference (RFI) that is common in a industrial envi-
ronment. The chassis ground stud is
C
in Figure 3-5.
Proper system grounding is discussed on Page 9.
Figure 3-5
IEC AC Power Inlet Connector
LINE VOLTAGE:
200-240 Vac
50/60Hz, 10A
PE
I
0
-WARNING-
DUKANE CORP.
POWER LINE OUTLET
MUST BE GROUNDED
DISCONNECT LINE POWER
BEFORE REMOVING COVER
ST. CHARLES IL. 60174
MADE IN U.S.A.
UL: 1012:2010
CSA: C22.2 61010-1-12
IEC: 61010-2012
C
US
U.S. PATENTS 7,475,801
7,819,158 AND 7,225,965
C
Continued
Page 17
Dukane Manual Part No. 403-587-00
Section 3 - Installation


