15
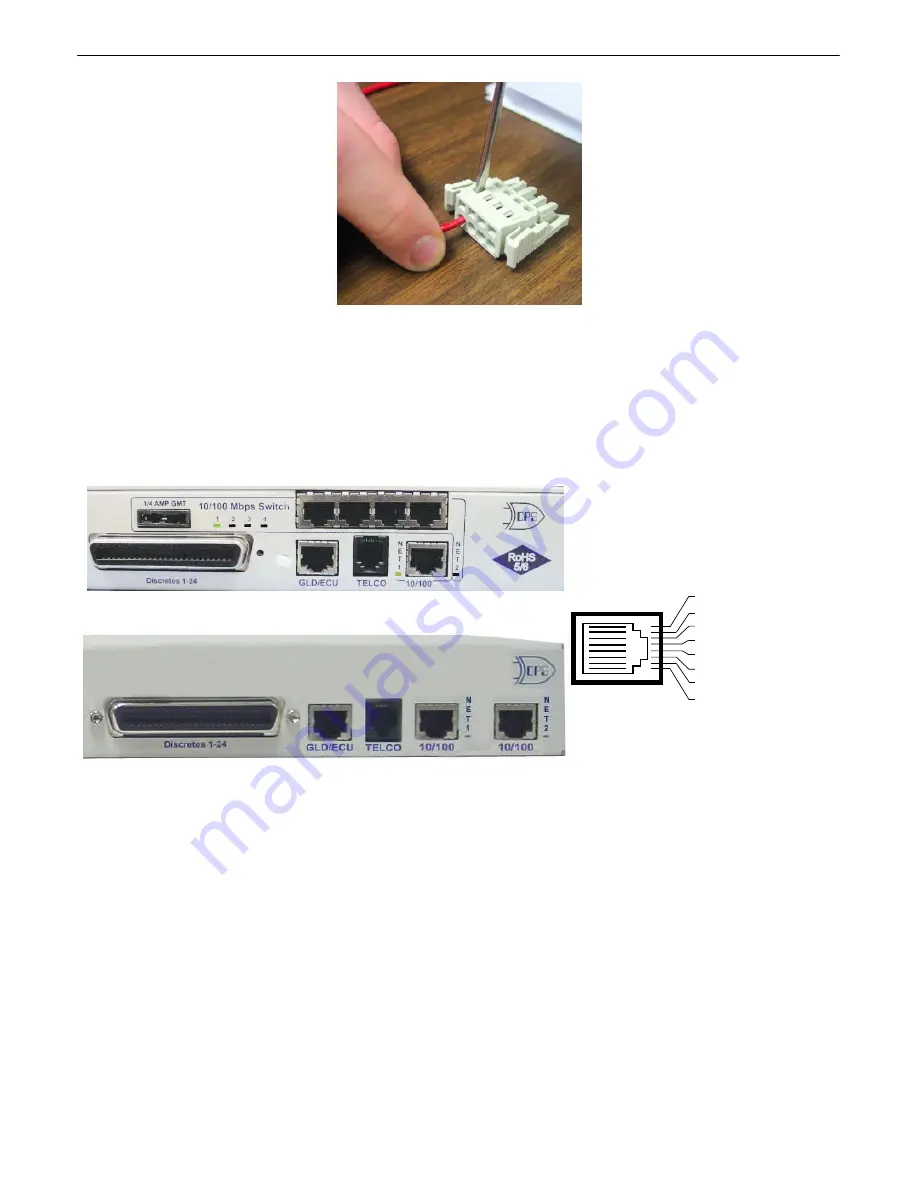
Inserting a -48 VDC Line into Slot
1 of WAGO Connector
5. Push the power connector plug firmly back into the power connector. If the power feed is connected
correctly, the LED by the connector will light
GREEN
. If the polarity of the power feed is reversed, the
LED will not illuminate.
6. Reinsert the fuses to power the NetGuardian. The front panel LEDs will flash
RED
and
GREEN
.
LAN Connection
6.4
Fig. 6.4.1.
Two 10/100 Ethernet ports (With Switch)
Fig. 6.4.2.
Two 10/100 Ethernet ports (Without Switch)
RJ45 Ethernet Connection
8
7
5
6 Receive In – (RI–)
4
3 Receive In + (RI+)
2 Transmit Out – (TO–)
1 Transmit Out + (TO+)
Fig. 6.4.3
Ethernet port pinout
For enhanced security, the NetGuardian G5 has two 10/100 Ethernet ports. Each port has its own
separate IP address and subnet, so you can safely connect one port to your private company LAN and
the other to the public Internet.
There is no routing between Net 1 and Net 2, this ensures that both connections are independent of
each other. By default, outbound data traffic from the NetGuardian 832A will be sent over Net 2. Only
outbound data that is specifically directed to Net 1, usually the Company's LAN, will be sent to Net 1. To
use both network interfaces, be sure Net1 and Net2 are on separate Subnet Masks.
To use only one of the network interfaces, set either Net1 or Net2 to IP address being used and set the
unused network IP subnet and gateway to 255.255.255.0. If your NetGuardian has the 4-port hub build
option, use Net2, which is connected to the Hub. Both ports are standard RJ45 ports that take standard
RJ45 Ethernet cables. If the IP connection is OK, the LNK LED will light
SOLID GREEN
when the cable
is connected.
Summary of Contents for NetGuardian 832A
Page 9: ...4 Hardware kit containing a WAGO connector ...
Page 34: ...29 right ...
Page 39: ...34 Fig 6 9 1 Optional 66 block pinout for Discretes 1 24 ...
Page 40: ...35 Fig 6 9 2 Optional 66 block pinout for Analogs 1 8 Discretes 25 32 Relays 1 8 ...
Page 50: ...45 ...
Page 73: ...68 13 2 8 DSCP Configuration Configure your Serial Data Ports through the Edit Ports screen ...
Page 104: ...99 ...
Page 105: ...100 ...
Page 106: ...101 ...


