206
Adding and Replacing Parts
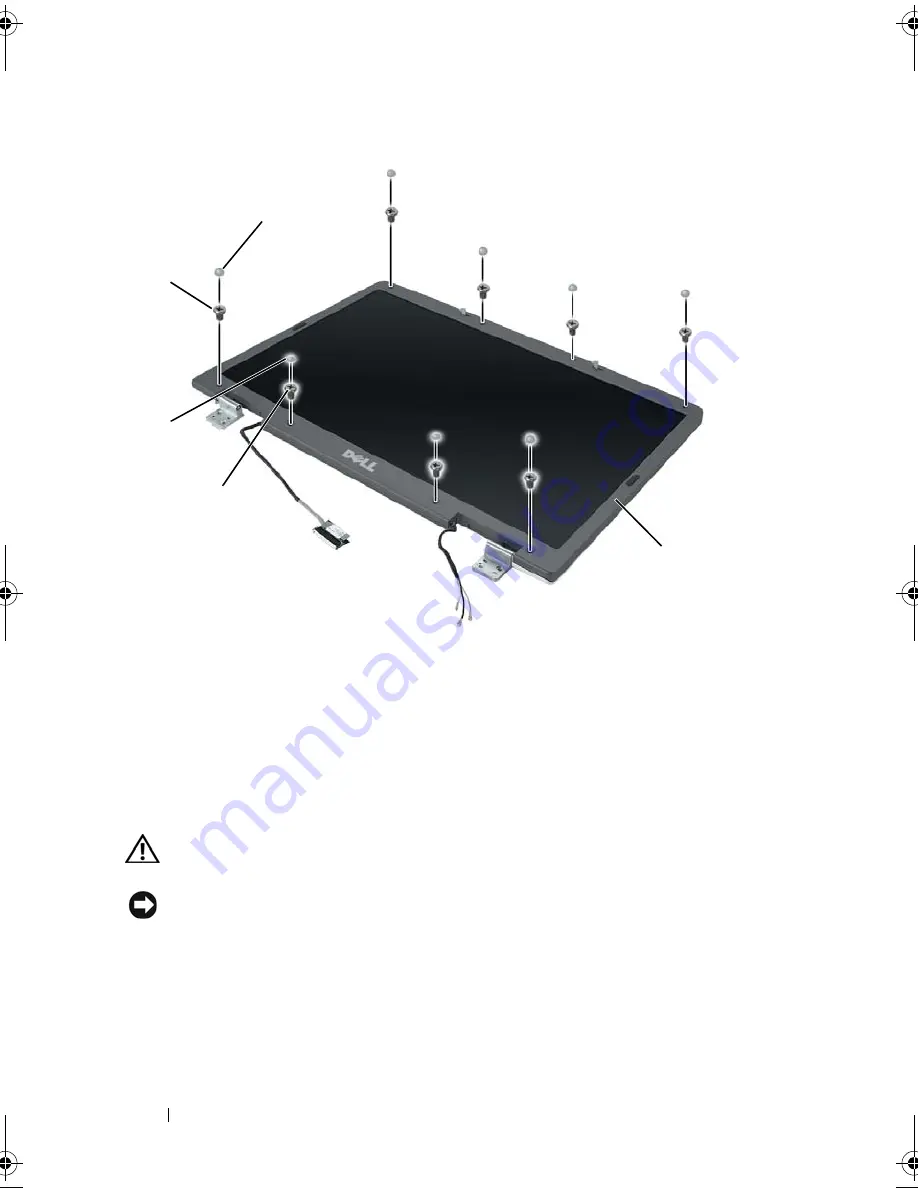
Removing the Display Bezel
CAUTION:
Before you begin the following procedure, follow the safety
instructions in the
Product Information Guide
.
NOTICE:
To avoid electrostatic discharge, ground yourself by using a wrist
grounding strap or by periodically touching an unpainted metal surface (such as the
back panel) on the computer.
1
Follow the instructions in "Before Working Inside Your Computer" on
page 180.
2
Remove the display assembly (see "Removing the Display Assembly" on
page 200).
1
shoulder screws (4), two at the top
and two at the bottom)
2
screw covers (2)
3
M2.5 x 5-mm screws
(4), one on
each corner)
4
rubber screw-covers/display
bumpers (6)
5
display bezel
3
5
4
1
2
book.book Page 206 Tuesday, August 28, 2007 10:20 AM
Summary of Contents for Precision M6300
Page 1: ...Dell Precision Mobile Workstation M6300 User s Guide ...
Page 14: ...14 Contents ...
Page 22: ...22 Finding Information ...
Page 23: ...Finding Information 23 ...
Page 24: ...24 Finding Information ...
Page 25: ...Finding Information 25 ...
Page 26: ...26 Finding Information ...
Page 27: ...Finding Information 27 ...
Page 28: ...28 Finding Information ...
Page 29: ...Finding Information 29 ...
Page 30: ...30 Finding Information ...
Page 31: ...Finding Information 31 ...
Page 32: ...32 Finding Information ...
Page 51: ...Setting Up Your Computer 51 ...
Page 52: ...52 Setting Up Your Computer ...
Page 62: ...62 Using a Battery ...
Page 63: ...Using a Battery 63 ...
Page 64: ...64 Using a Battery ...
Page 65: ...Using a Battery 65 ...
Page 66: ...66 Using a Battery ...
Page 67: ...Using a Battery 67 ...
Page 68: ...68 Using a Battery ...
Page 69: ...Using a Battery 69 ...
Page 70: ...70 Using a Battery ...
Page 71: ...Using a Battery 71 ...
Page 72: ...72 Using a Battery ...
Page 73: ...Using a Battery 73 ...
Page 74: ...74 Using a Battery ...
Page 84: ...84 Using the Display ...
Page 109: ...Using Multimedia 109 ...
Page 110: ...110 Using Multimedia ...
Page 122: ...122 Setting Up and Using Networks ...
Page 128: ...128 Using Cards 1 smart card slot 2 smart card 3 ExpressCard slot 1 2 3 ...
Page 160: ...160 Troubleshooting ...
Page 193: ...Adding and Replacing Parts 193 1 securing clips 2 2 mini card 2 1 ...
Page 250: ...250 Adding and Replacing Parts ...
Page 252: ...252 Dell QuickSet ...
Page 256: ...256 Traveling With Your Computer ...
Page 264: ...264 Getting Help ...
Page 291: ...Glossary 291 ...
Page 292: ...292 Glossary ...


