(3)
Press the
FAX
button.
The fax standby screen will appear.
2.
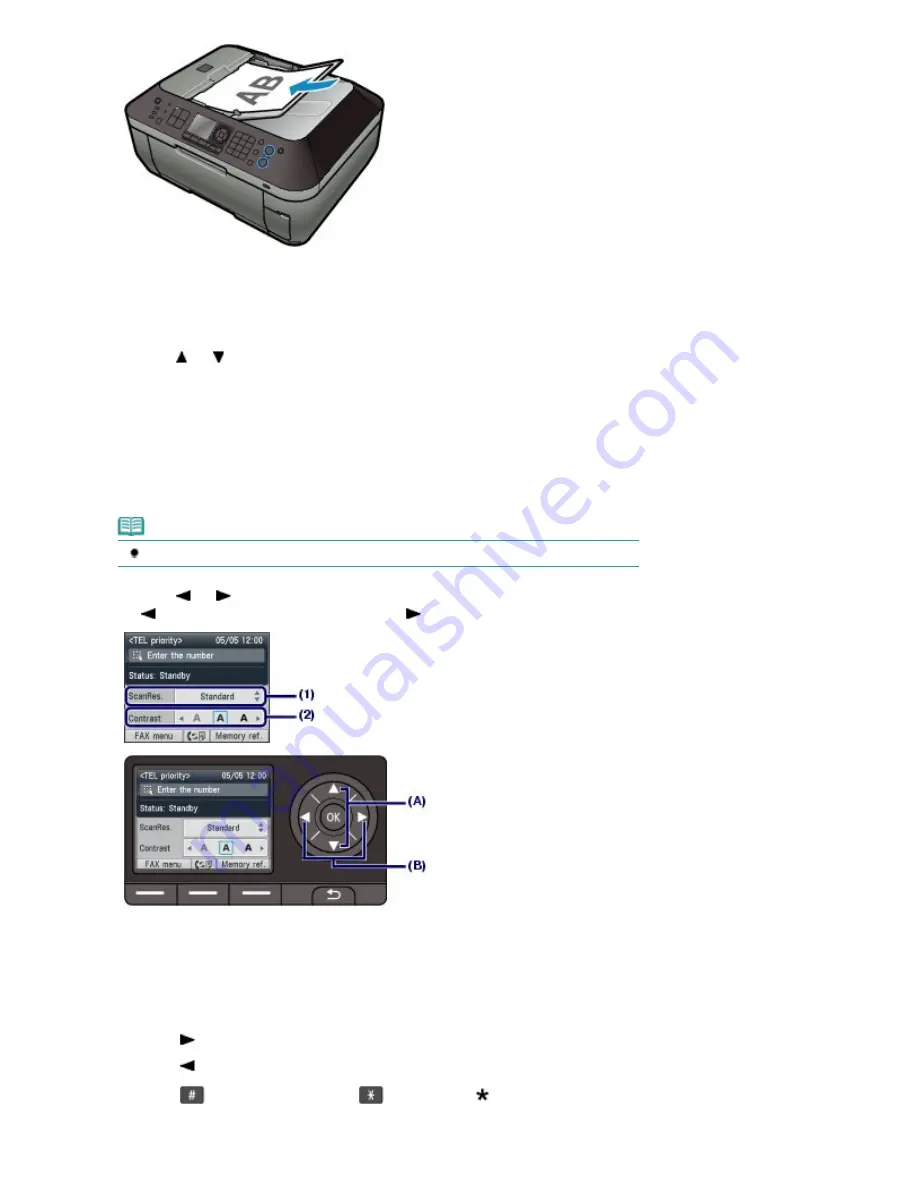
Adjust the scan resolution and contrast as necessary.
(1)
Use the or button (A) to select the scan resolution.
Standard: Suitable for text-only documents.
Fine: Suitable for fine-print documents.
Extra fine: Suitable for detailed illustration or fine-print quality documents.
If the recipient's fax machine is not compatible with Extra fine (300x300dpi), the fax will be sent in the
Standard or Fine resolution.
Photo: Suitable for photographs.
Note
The color fax is sent with the resolution for Photo.
(2)
Use the or button (B) to select the scan contrast.
The
button decreases the scan contrast, and the
button increases the scan contrast.
3.
Send the fax.
(1)
Use the Numeric buttons to dial the recipient's fax/telephone number.
In the fax/telephone number entry field, the following operations are available.
- Press a Numeric button to enter that number.
- Press the
button to enter a space.
- Press the
button to delete the last number you entered.
- Press the
button to enter "#", and the
button to enter "
".
- Press the
Redial /Pause
button to enter a pause "P".
Page 35 of 1127 pages
Sending Faxes
Summary of Contents for PIXMA MX870 Series
Page 27: ...Page top Page 27 of 1127 pages Entering Numbers Letters and Symbols...
Page 32: ...Page top Page 32 of 1127 pages Setting the Receive Mode...
Page 55: ...Page top Page 55 of 1127 pages Using Useful Fax Functions...
Page 71: ...Page top Page 71 of 1127 pages Inserting the USB Flash Drive...
Page 80: ...Page top Page 80 of 1127 pages Using Various Copy Functions...
Page 109: ...Page top Page 109 of 1127 pages Loading Paper...
Page 112: ...Page top Page 112 of 1127 pages Loading Paper in the Cassette...
Page 126: ...Page top Page 126 of 1127 pages Loading Originals on the Platen Glass...
Page 129: ...Page top Page 129 of 1127 pages How to Load Originals for Each Function...
Page 133: ...Page top Page 133 of 1127 pages Originals You Can Load...
Page 148: ...Page top Page 148 of 1127 pages Cleaning the Print Head...
Page 193: ...Page top Page 193 of 1127 pages Printing Photos...
Page 218: ...See Help for details on the Edit screen Page top Page 218 of 1127 pages Editing...
Page 227: ...Page top Page 227 of 1127 pages Printing...
Page 236: ...Adjusting Images Page top Page 236 of 1127 pages Correcting and Enhancing Photos...
Page 244: ...Page top Page 244 of 1127 pages Using the Face Brightener Function...
Page 260: ...Page top Page 260 of 1127 pages Correct Enhance Images Window...
Page 270: ...Page top Page 270 of 1127 pages Cropping Photos Photo Print...
Page 274: ...Page top Page 274 of 1127 pages Printing an Index...
Page 315: ...Page top Page 315 of 1127 pages Borderless Printing...
Page 374: ...Page top Page 374 of 1127 pages Smoothing Jagged Outlines...
Page 406: ...Page top Page 406 of 1127 pages Copying Four Pages to Fit onto a Single Page 4 on 1 Copy...
Page 531: ...View Use Window Page top Page 531 of 1127 pages Classifying Images into Categories...
Page 600: ...Page top Page 600 of 1127 pages Send via E mail Dialog Box...
Page 622: ...Page top Page 622 of 1127 pages Save Dialog Box...
Page 670: ...Advanced Mode Tab Page top Page 670 of 1127 pages Scanning in Advanced Mode...
Page 703: ...Page top Page 703 of 1127 pages Basic Mode Tab...
Page 759: ...Page top Page 759 of 1127 pages Registering Coded Speed Dial Numbers...
Page 823: ...Page top Page 823 of 1127 pages Sending a FAX...
Page 984: ...Page top Page 984 of 1127 pages Jammed Paper Is Not Removed out When Automatic Duplex Printing...
Page 1033: ...Page top Page 1033 of 1127 pages Problems Sending Faxes...
Page 1057: ...Page top Page 1057 of 1127 pages Installing the MP Drivers...
Page 1064: ...Page top Page 1064 of 1127 pages Using Easy PhotoPrint EX...
Page 1093: ...Page top Page 1093 of 1127 pages How to Set a Network Key Network Password Passphrase...
Page 1105: ...Page top Page 1105 of 1127 pages Checking Information about the Network...


